Graphic 45 French Country Matchbox & Tags

Many of you know that I love Graphic 45 paper and staples. At Scrapbook Parade, where I teach classes, we are starting a Graphic 45 Club in September, with classes every month. For the first club class, this is our project.


Mainly the Graphic 45 French Country 6 x 6 pad was used with a little leftovers chipboard pieces, some of the cardstock die cut punch outs, and two images cut out and leftover from the 8 x 8 pad. The flowers are made using My Favorite Things Mini Hybrid Heirloom Rose Die-namics, and the tiny butterflies made with a tiny punch, and the leaves punched out with Martha Stewart's branch punch.

You may be asking what is inside this matchbox? Well there are 6 tags in there! But first a couple more detail photos.


A few details - There is no opening for the box. The clasp is just decorative. I died the kraft box using a sponge foam brush and a few drops of my Memento Tuxedo Black ink refill. It was so easy to cover the box this way and the black is beautiful.


Now for the tags!


Now do I show you each tag separately, or as a collage. Showing them individually would make this a very long post, so I'll use the collage of the tags. Change that - the tags aren't large enough for those that don't finish the class and need to see them close up to complete them. So Individual it is. Oh, and there is a video at the end!


So if you'd like to hear me say a few things about this project, you can view the video.


So after all that, I thank you for stopping by for a longer visit than usual. Hope you enjoyed the project and it's details.

Happy papercrafting!


File Folder Scrapping

Some of you may be familiar with Heidi Swapp's Memory system she created. From the first time I saw her idea, I was intrigued and have wanted to see if I could make my own twist on her concept using regular office file folders, and have a class on making them. So here is one I came up with. It was quite fun to make, too.


When you open it, you see this-


Whenever I make a layout or a mini I usually like to crop my photos, but this time I left the space for them at 4 x 6. You can also see the two attached booklets inside. In the video below, you can see more about them.

When you flip the top booklet to the left, you can see the back of it and the front of the other one under it.


I used washi tape throughout the folder along with some scrap strips from cutting up the pieces for the folder. When you flip over the bottom booklet, you see this -


So that's it fr the photos, but you can see more in the video as well as further ideas for this project. The class is at the end of August, so I will have the instructions for this folder on "Paper Architecture with Sabrina" after that.

Oh, do you see the spine from the inside of the folder? Notice that it is cream? I forgot to place the strip I had cut in there! Can you believe that. I couldn't help but laugh when I was nearly finish and came upon the strip.

Any way, here is the walk through video.


Thank you for stopping by to have a look. Have fun papercrafting!


Background Stamping - DT Christmas Card Challenge #35

I was so looking forward to this challenge at Christmas Card Challenge #35, because I so seldom get the chance to play with backgorund stamping!

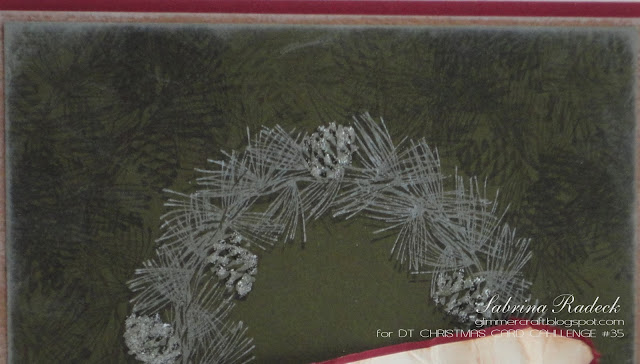
I used Hero Arts Pinceone Wreath and stamped it in the center with VersaMark. Then with the same stamp I repeatedly stamped around the outside of the wreath. When I completed that, I then used white ink and restamped the same stamp just slightly off to give it more dimension. Hopefully you can see the background stamping better in the next photo.


To give the wreath even more dimension, I used Frosted Lace Stickles dotted on the pinecones.

Here is a side view to show the layers and banner.


I really like making those crinkled banners to look old.

So that's it for this card! I hope that you will have fun making a Christmas card using background stamping. Have a peek at the other DT submissions at Christmas Card Challenge #35 or click on their links below.

 Alanna -  DT coordinator 
Sabrina - That's me!
Sparkle-- Owner

Happy Papercrafting!


Now Available

Remember this?  The Secret Garden Roll Top Card Box?


Instructions are now available on "Paper Architecture with Sabrina"!

Happy Papercrafting!


Something New!

It's Sabrina here, and I have an exciting announcement to make!

Due to increasing requests for my project measurements and tutorials, I have created a new space where some of my project instructions can be purchased:  Paper Architecture with Sabrina!

My first project instructions available for purchase is my Travel Log Flip Folio. Please visit Paper Architecture for more information. I will continue to add more project instructions as I can. If you subscribe by email there, you will be notified any time a new project is posted.

Thank you for your interest in creating some of my project designs!

Happy papercrafting!


Ooh-La-La!

I feel like I've been working on this project forever! Not that it necessarily took a long time to create, but I kept getting distracted and then coming back to it.


I made this as a birthday gift to a coworker. She dreams of going to Paris and that made her gift an easy one!

I started by die-cutting 3 layers of True Black cardstock and 1 smaller layer of Scarlet Jewel with Grand Labels 23. The Scarlet Jewel layer was inked with Black Soot ink and spattered with Black Velvet Color Shine and Shimmer Goosebumps Texture Spray. I LOVE the Heidi Swapp Color Shine products!

I embossed the Eiffel Tower photochip with Li'l Inkers Stitched Mats (fit perfectly!) and then inked it with Palette Noir ink. I layered it over a True Black Postage Stamp die cut.

I die-cut and embossed a Spellbinders banner with vellum cardstock. I heat embossed the Waltzingmouse Stamps sentiment with Versamark+black ink and clear powder on the wrong side of the die-cut. I actually did this on purpose because I liked the look better on this side of the vellum.

After considering placement of all my elements, including the gorgeous Prima flower, I stamped the ticket from PTI's Destination set with Fresh Snow ink. Everything was assembled, the banner popped up with clear dimensional adhesive (these are quite visible but I don't mind the effect).

I wanted this whole thing to sit up like a picture frame, hence the 3 layers of True Black. I cut out and scored part of the back layer to achieve this, using ribbon to keep it from going too far. I didn't like how it looked and so added one last die-cut, using Labels 23.


Thanks for peeking!


{Supplies--all Papertrey Ink unless noted}
  • Cardstock: True Black, Scarlet Jewel, Vellum
  • Stamps: Destination, Compact Sentiments (Waltzingmouse Stamps)
  • Ink: Versamark and Memento Tuxedo Black (Tsukineko), Black Soot Tim Holtz Distress Ink (Ranger), Palette Noir
  • Dies: Stitched Mats--Squares (Li'l Inkers), Labels and Grand Labels 23 (Spellbinders), Ribbon Banners (Spellbinders)
  • Accessories: Paris Photochips (Darkroom Door), True Black twill ribbon, pearl ribbon flower (Prima)
  • Other Tools: Black Velvet Color Shine (Heidi Swapp), Shimmer Goosebumps Texture Spray (Tsukineko)

Snowflakes! Christmas Card Challenge #34 DT

It seems Christmas cards are a big part of my life right now. Thursday I had two back to back Christmas card classes! That was 24 kits I had to make with four very detailed cards requiring die cutting galore, and more. And now it is time again for the weekly Christmas Card Challenge design team to post. Luckily that requires only one card.

Christmas Card Challenge #34 is about Snowflakes, if you haven't already guessed. Of course you can still enter the challenge even if you don't use snowflakes, as long as it is a Christmas card.

Here is my DT design using snowflakes.


For this card I used Spellbinder's Snowflake Medallion from 2010 and embossed the die from the back of the cardstock using both the large and small snowflake. I then went over the embossed lines of the snowflakes with Star Dust Stickles. I then die cut two of the smaller snowflakes covering them with Star Dust Stickles as well. Punching out some Martha Stewart Alpine snowflakes, I placed them in the center of the large embossed snowflake, the two small die cuts, and one out on it's own.


You can see in this close up that I scored a double frame in the Bazzill Jawbreaker Card Shoppe cardstock. Yes, I deliberately stamped the sentiment very low on the bottom edge of the white because I knew that I wanted to place snowflakes that would be closer to the bottom than usual. When cutting the organza ribbon, it fell over the stamped area and that made me wonder about placing the ribbon over the text of the sentiment, rather than above it as I had planned. I liked the look of the shear glittery organza muting the text a little and creating an interesting look, so I went ahead and did it.

This next photo shows the card from the side so that you can better see the layers.


Thank you for checking out my Christmas Card Challenge #34 DT inspirational submission. Be sure to check out the other DT members card for this challenge.

Alanna -  DT coordinator 


Sabrina - That's me!


Sparkle-- Owner 
Have fun making your Christmas cards! See you next week for challenge #35.

Aug Christmas Card Club - More Vintage

-I'm real happy with how these turned out

Soon I'll be teaching July's Christmas Card Club class and need to have the August ones ready to show the class. These have just a touch of vintage to them.


The first one you see is fairly easy, except for all the ink distressing of every piece on this card. But then all three of the cards have every piece ink distressed!


 I die-cut the letters using My Favorite Things High-Rise Alphabet Uppercase. There are two of each with dimensionals between them. Here is a close up of the word 'Joy'.


I used my Spectrum Noir Maker DR7 to colour the white pearls to match the red in the paper better. And a side view to see the layers.


I can't decide if this next one is my favorite, or the last one! I like how they both turned out.


I used Cuttlebug's Holly Ribbons folder for the embossing, and was proud of the fact that my eye-balling was so good when I lined up the smaller fame piece and it fit perfectly into the pattern in the required position! For stamps I used Flourishes 'Forest of Trees' with VersaMark and white embossing powder onto Bazzill's Moody Blue Card Shoppe cardstock. Next came the VersaColor White ink pad as I distressed the edges wanting a frosted glass pane look.


I used my Cricut to cut the house with the 'Heritage' cartridge (House #2 @ 1") and cut off the extension on the left and popping it up on the front right. The snow is created with Studio Gesso and I cut a piece of red cardstock to 1/4" x 3/8" for the little tiny door.This I backed with Bazzill Gold Metallic cardstock to like like glowing windows at night.

The white trees are covered with Frosted Lace Stickles, and a few dots of it in the sky to make it look like it's snowing.

Here is a side view showing the layering of the card.


Hmmm...that white pearl seems to have moved a little too high. I may have to use a tiny dot of glue to keep it from moving around!

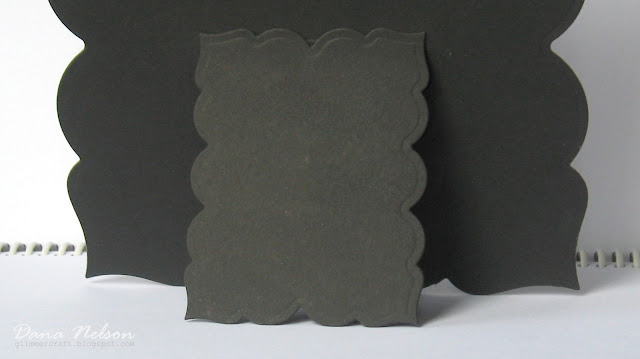
The last card has a mini little chalkboard piece that looks great on the card.


A lot of Spellbinder's are used on this card. Poinsettia, Labels Twenty-Eight, and 2010 Snowflake. I also used two Martha Stewart Punches; Floral Vine and Alpine Snowflake. Again, a lot of ink distressing using Tim Holtz Vintage Photo. Let's have a close-up look.


The chalkboard piece is heat embossed in white and edged in VersaColor White and has some white coloring pencil details given in the little snowflakes drawn on, and adding diagonal line between the two lines in the sentiment.

Here is a close up  of the little Poinsettias.


Since the leaves in this die set are much too large for the smaller Poinsettias, I die cut a larger poinsettia in green, and then cut it up separating the petals into leaves. All these are also edged in Vintage Photo ink. I shaped them with my fingers and after building them added Lemon Yellow Liquid Pearls in the center.
And here are three other views showing how I placed the snowflake backed chalkboard at an angle on the card. One layer of dimensionals at the lower left corner to two layers on the lower right and upper left, to three and four layers of dimensionals in the upper right. I hope the photos clarify my description.


Well, that's it for these three Christmas Club cards. Hope you're getting inspired to start planning and creating your own Christmas cards if you haven't already done so.

Happy Papercrafting!


DT Sample for Christmas Card Challenge #33

-the challenge for this week is to use the embossing technique - wet or dry

Hello everyone! I have something to share with you today as a DT member for Christmas Card Challenge #33. I always try to challenge myself to come up with something just a little different than the norm with each challenge. With this challenge I decided to go with the dry  embossing technique and thought it might be fun to emboss the same folder three times using different coloured papers, cut out parts, and pop it up over the exact same spot on the background embossed surface.


I used the Sellbinder's M-Bossabilities "Holiday Magic" folder and cut out the ornaments within it's design in the red, green and white. I next used a gold metallic ink pad to gently rub over the embossed surface. It looked great with the exception that it looked more green on the white than gold, and on all three ornaments some parts refused to be covered in ink! So, starting with the green I took my Gold Stickles to cover up the raised surfaces.

Guess what? I ran out. I could have sworn that I had another bottle of gold, but found I did not. So I had to resort to using my Gold Liquid Pearl. I did find that having inked it in gold first actually helped me to put the Stickles and Liquid Pearls exactly where it needed to be. It acted as a great guide. All in all, this 5 x 7 card turned out.

Here are a couple of side views.


Be sure to check out the other DT members blogs to see what creations they came up for in your Challenge #33 inspirations.

Alanna -  DT coordinator 
Sabrina - That's me!
Sparkle-- Owner 

And remember, you don't have to use embossing to enter the challenge, just as long as you make a Christmas card. Have fun!