Graphic 45 "LOST IN PARADISE" Layout Kits Update


Hello everyone!

Hope  that you all had a wonderful Christmas! Mine was very busy trying to finish crocheted gifts and quickly make something for some unexpected company. But I'm sure you would rather know more about the Graphic 45 "Lost in Paradise" kits. I just mailed off the samples to Carol (Scrapbook Parade) so she should be able to put them up for you to view soon. If you live in the Victoria, BC area they will be on display at the Langford Legion crop on Sat. January, 18th.

Graphic 45 - Lost in Paradise
Layout Kit # 1 with Sabrina
I absolutely LOVE what Sabrina created for Layout # 1
The photos in the layout were donated by Joyce
She will get the layout to keep when the kits are sold out

The kit will come with full colour step-by-step instructions. It also comes with full sheets for you to cut to size, as well as sheets to fussy cut so you can re-create this 2 page layout. Cardstock and stickers are included too.
They should be available at the January 18th Langford Legion Crop
Everyone on the Pre-Order list gets first choice if they want a kit. A separate e-mail will be sent to the group as well as arrangements for delivery and/or pick-up.

Cost $21.95 (limited quantities)


Graphic 45 - Lost in Paradise
Layout Kit # 2 with Sabrina
Another beautiful layout with lots of fussy cutting.
The kit will come with full colour step-by-step instructions. It also comes with full sheets for you to cut to size, as well as sheets to fussy cut so you can re-create this 2 page layout. Cardstock and stickers are included too.
More details are in Layout Kit # 1's notes above.

Cost $21.95 (limited quantities)


Graphic 45 - Lost in Paradise
Layout Kit # 3 with Sabrina
Wow one more amazing layout to round out the 3 Layout Kits
See all the details above in Layout #1's description...

Cost $21.95 (limited quantities)


If you wish to order one of these kits, or all three, just get in touch with Carol, here, and she will send you your kit/s if you do not live in the Victoria, BC area.

Happy scrapbooking!


Graphic 45 "Lost in Paradise" Layout Kits


Hello Everyone!

With Christmas just around the corner, I have had little time to post about my first lay out kits for Scrapbook Parade. Even though I have completed my lay outs and taken photos, I still have to tweak the instructions a bit here and there. But I can share the photos with you. At the end of the post, there will be links to where you can contact Carol to order your kit. There are only a limited number of kits available.

LAY OUT # 1


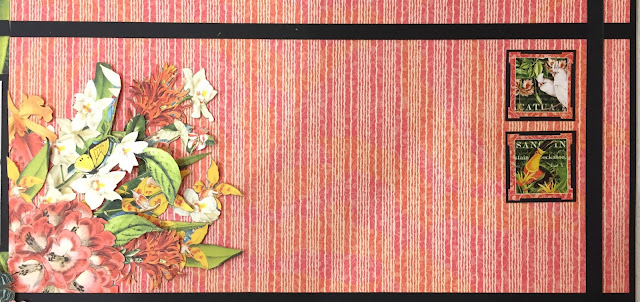
I love the black strips! I think it really helps the papers to pop more. And, of course fussy cutting really uses this lovely paper to its fullest extent.


LAY OUT #2

This is the only photo I have of this layout, at the moment. I will take a few more before sending it to Carol in Victoria, BC, and add them in.


LAY OUT #3

For this lay out, by leaving the strip paper nearly empty, the fussy cut flower arrangement stands out more than if put on the floral papers. One could always add another photo or two on the striped paper if needed.


More detailed photos...


Thank you for stopping by to have a peak.

Happy Scrapbooking!


If you are interested in ordering a kit through Carol at Scrapbook Parade, you can contact her on the Scrapbook Parade Facebook page


Exciting Announcement!


Some of the people that follow my blog are from Victoria, BC, where I taught classes for seven years. I would like to thank those lovely ladies for taking those classes, and for the comradery we shared. I left the Island in February of this year and am enjoying living with my daughter and her family. Since leaving the Island and teaching classes, I have not done very much in the line of papercrafting, as evident in the great drop in my posts.

One of the places I taught classes at in Victoria, was Scrapbook Parade, from around 2012 to 2014 or so. After that I taught at home for a couple of years as a Stampin' Up Demonstrator, and then was asked to teach at Scrapbook Essentials, BC for a couple of years from 2017 through 2018.

For the past nine months I have enjoyed being a grandma and doing other things. I have kept in touch off and on with some of the ladies in Victoria, and have been asked if I would continuing designing for the purpose of making kits to sell in Victoria. After some thought, I realized it was time to accept the invitation.

So to those that have taken classes from me in the past and are still following my blog, I will be a part of your papercrafting once again, though not in person.

To read the announcement Scrapbook Parade made and see some of the other kits that are available in their latest newsletter, here is the link.


I look forward to posting my designs again and share ideas with you all. The first kits available will be in January 2020, so you will start to see a few more posts again.

Happy Papercrafting everyone!


Grandson's Birthday Card - G45 Sun Kissed


Hello Everyone!

Surprise! I have something to share with you today. I do have other posts planned for you, but they are not ready to post yet, but I do have my eldest grandson's birthday card to share with you today.

To make this card, I do not have all my stamping stuff organized yet, so I turned to my paper collections. It turns out that most of my paper is feminine, but I did come across the turtle sheet from the Graphic 45 'Sun Kissed' collection and found out that my soon to be 14 year-old grandson (end of August) likes turtles. So that is what I used to make his card with.

The fussy cut turtle on the bottom right corner is of course fussy cut out and popped up.


The inside of this card, is based on a card I made a few years ago when I was a Stampin' Up Demonstrator. You can see it here. So let's have a look at it.


My grandson was surprised when he opened the card, and loved it. I did my writing on the right panel. Let's have a closer look at the details, shall we.


On this left panel, you see a large die cut '14'. In case you are wanting a Number die set, these are an older Stampin' Up die set, and as far as I can see, it is no longer available. But I am sure there will be other companies that have a numerical die set, or an AcuCut number set.

I cut three layers of the orange cardstock and then the patterned paper, gluing all the layers together to make the number stand out more. Then of course, I added some more of the fussy cut pieces.

Know let's have a closer look at the folded card center.


You see the large heart die cut and in the behind the fussy cut sand dollars, and star fish. Then there is the large turtle attached behind the heart die cut, peeking out. On the front, cream part, are more fussy cut images - the little turtle, and the flowers.

To create this inside piece with die cut, here is some help.

Measurements

Card Base
Your Choice of Colour - 4 1/4" x 11" - score @ 5 1/2"

Inside Card Piece
Your Choice of Colour - 4 1/4" x 11" - score @ 5 1/2" then turn cardstock to other side & score at 2 3/4" & 7 3/4" (OR 3" & 8" if you wish to have a smaller folded inside section for your die cut and larger side pannels.

First center your choice of shape and die cut your shape from the center before folding any score lines. Once your shape is cut out, use your bone folder to fold the score lines, and attach the left & right panels to the inside of your card base, leaving the center sections free to fold as you open and close the card.


Hope this helps. then you can decorate as you wish. IF YOU ARE STAMPING behind the die cut shape, you must do that before attaching the die cut piece inside the card.

WARNING: Before attaching any of your fussy cut or die cut pieces to the die cut shape/hole, be sure they do not stick out passed the card edges when the card is closed, or you will not be able to put the card into an envelope.

Hope you have fun make some cards like this!

Happy creating!


Graphic 45 "Love Notes" Cards

Hello Everyone,

When the focus of you life is no longer teaching paper crafting classes and is filled with other things, like cooking 1/2 the meals for your daughter's family, or driving grandchildren around, or participating more in volunteer work, the time just flies by. I do have a couple of other posts in the works, but with Scrapbook Essentials BC has this class coming up soon, so I had better post these cards for you.

WHEN: Thursday, May 16th
TIME: 6:00 - 9:00

COST: $35 + GST

In today's post I am also sharing with you three tips. You will find them by the word "tip" in bold.


These four cards designed with Graphic 45's "Love Notes" used most of the cut-a-parts sheet along with some of the other sheets form the collection and some black and red cardstock. There is not as much fussy cutting as there is with some of my other designs.

So let's have a look at each of the cards. There will be a series of detail photos with each card so that you see some of them more closely for any of them you wish to make.

The Mandolin Card


This is how I do the mitering of corners with striped paper pattern strips.


1. Start by laying out the piano key strips as in the photos below
2. Holding corners flush, cut with scissors by overlapping inside corner to outside corner, on all four corners
3. Attach the pieces to 5 X 7 red cardstock leaving about a 1/16 inch border around the edge


Here are the close ups from different angles to give you help in the layering and assembly of the card.


The Trumpet Card

For this card I created a little tag using a die. Here is a tip for you. If you have a favorite smaller tag die, you will need to die cut one out of your choice of pattern paper and then trace an outline of that tag die onto the coordinating cardstock you chose to go with the paper. Then cut it out with your scissors. This will create a slightly larger version of the tag to attach the pattern paper onto leaving a narrow border all around it. You will see this tag in some of the following photos.


More details to view in these close ups.


One thing I need to mention is that on all the roses I used a Spectrum Noir Glimmer Brush. You do not see it much at all in the photos, except on this photo where there is a hint of it when you look closely.

The "Music Speaks" Card

This is a great Anniversary card, Valentines card, or just an I love You card.


A closer look from different angles will help you see more of the details.


Another tip for you. This is the second card that uses thread for embellishment, but ordinary or regular sewing thread is fine and the thread you see on these two cards is coat thread. A thread that is thicker used for sewing heavier fabrics for coats. As you can see it adds more texture by using the thicker thread. 

"How Do I Love Thee" Card

This card uses more of the larger roses fussy cut out of the paper. You will see that the background paper has one of the larger roses, and the others are popped up fussy cut roses, leaves & buds. 

Another tip when working with a background that has similar images to your fussy cutting. On the back ground piece, before you assemble your card, take an ink blending tool and an ink colour similar to the Distress Ink pad (not Oxide) to Gathered Twigs and lightly darken the background area where you will be adding similar fussy cut items. This will help to have the pieces you add stand out a bit more instead of blending into the background.


And here are the close up details for the last card of this set.


I hope you enjoyed seeing the beautiful paper turn in a few of the card ideas I had, and that you are inspired ins some way.

Happy Papercrafting everyone!


Authentique 'Stitches' & Spellbinders Border Dies


Hi!

I'm back with another showing for something that has not yet been posted on the Scrapbook Essentials BC Facebook page.

Before I begin I must tell you that the Bracket Spellbinders die set I used for these cards were available when I created these cards back in October/November sometime, but are no longer available. I am so sorry about that, but there are similar bracket dies available at Spellbinders, just not with the stitching.

Another thing I will say, is that I do not know if this will be a class, or a card kit. This info is for those friends in the Victoria, BC area. For the rest of my online friends, these are here for inspiration.

These 6 cards are mailable, so are not think with layered pop ups; just one layer or two at the very most. LOL! These are easy cards to whip together.


This first card, you can see that the narrow die cut top piece has been popped up, as has the ampersand square. The die cut 'hugs' has been die cut twice (I prefer 3 to 4 times) and layered together with glue. This helps the die cut word to stand out more from the card.


OK, this card has two layers popped up, but it still easily fits into an envelope. I love the sentiment and image on this card. It brings back memories of my own childhood as I watched my Mom do many of the things that she taught me to do, and for which I am very grateful to have learned.


This next card is another great example of cutting apart some of those cut-a-parts you get in paper collections. I cut up the sentiment piece into smaller sections for this card. And as you all know I love fussy cut flowers, which adds a little something special to the card. So this card too, has two layers popped up.


To make the die look a bit different, I die cut on the angle, and I love how it looks. (I'm saying love a lot aren't I?) Again I die cut 2 (prefer 3 -4 ) sentiments and glued the layers together. The old fashioned dress form is cut out of one of the cut-a-parts.


For this card the die cuts on the top and the bottom are both popped up, and once more the sentiment is layered so that it stands out better on the card. The fussy cut image is also popped up onto the other half of the cut-a-part I got it from from.


Do you see the frame in the middle of the card? I do not have dies for this kind of thing, but you can create them on most paper trimmers. I cut two of them and layered them together with glue. The cut-a-parts are trimmed down and are popped up. The scissors and thread are single layered pop ups, while the sentiment is double layered where needed and single layered over the ones already popped up.


Thank you for stopping by and having a look. When the card class or kit (not sure which it will be yet) is available at Scrapbook Essentials BC, I will let you know.

In the meantime, Happy Creating!


THIS IS THE BORDER DIE SET I USED FOR THESE CARDS. HOWEVER, I DO NOT THINK THESE ARE STILL AVAILABLE.


THESE ARE SOME SPELLBINDER BORDER DIES THAT WOULD WORK FOR THESE KINDS OF CARDS


Altenew Script Words 2 die set