Showing posts with label theme - anniversary. Show all posts

A Step By Step Tutorial "Thank You"

I'm going to share with you a "Thank you" gift! "Thank you" for your sweet comments; "Thank you" for following this blog; "Thank you" for sharing this blog with your friends; and "Thank you" for your support and encouragement!

Recently I made a layout, and having intended a different posting for it, needed to take step by step photos on how to put the layout together. However, things changed and I posted it for a challenge instead. Since I had all the photos I decided to give them to you. So if you are interested in making a similar layout to the one you've recently seen, here it is. Oh, and it's the one that won the prize at Craft Hoarders Challenge Blog for their 4th challenge! You can see it two different ways, too.


I used Graphic 45 Sweet Sentiments, and of course you can use whatever paper you'd like.

Start with a 12 x 12 and ink the edges if you wish.


With the next layer cut to 9 7/8 x 9 7/8, round the corners and ink the edges.


Then you need a piece 8 1/2 x 8 1/2 and a Martha Stewart Around the page set of punches. Ink around the edges.


Then with a 6 x 6 piece Punch around it using one of the We R Memory Keepers Mini 8 Punches and ink the edges.


Cut a strip to 1 1/2 x 10, fish-tail or notch one end and ink the edges. The second strip (the top one) I ended up not using.


Next you'll need a piece 6 3/4 x 10 1/2. If you wish to stitch as I did, you'll need the Martha Stewart "Cherished" Around the Page Punch set, an embroidery needle and embroidery floss to stitch using the holes this punch set makes.


I used metal filigree embellishments from Monique's Zibbet Store "ButterBee Scraps" and painted them white with acrylic paint. I ended up using only the square on you see at the bottom of this next photo.


In this next photo you see the embellishments I used from the paper; fussy cut flowers, a cut-a-part from the 12 x 12 paper pad, 4 smaller cut-a-parts from the 8 x 8 paper pad, and three chipboard pieces from the Sweet Sentiments package. And again, the edges are inked.


The net photos show how I layered it all together.


The next you tuck in, glue and pop up your fussy cut flowers, add your bling flourishes, metal filigree, chipboard pieces, and the rest of your cut-a-parts. Then you end up with your completed layout.


I decided to also make a video slide presentation using these photos.


Again, thank you, and Happy Papercrafting!


CHA Challenge #4 Winner!

I have something exciting to share with you today! I haven't entered a blog challenge in a very long time and recently decided to enter Gloria Stengel's Craft Hoarders Anonymous Challenge #4. We were to use some sparkle, glitz, or glam in our project. Something I don't do very often.

Guess what? I won! With both projects I entered! Check out the CHA Announcement here.


These are the two projects I entered. If you click on the link below each photo, it will take you to the original post.


 I love following Gloria's CHA Challenge Blog because any genre of papercrafting is encouraged with each challenge! Gloria was on the Graphic 45 design team and is frequently a Guest Designer there. She is very talented and I love her work. Her design team is quite talented too, all having their own style.

This is what I've won! I can hardly wait to use all these wonderful things! 


Thank You Gloria! And to Graphic 45 the sponsor of the prize.

Happy papercrafting everyone!


58th Anniversary - My Mom & Dad

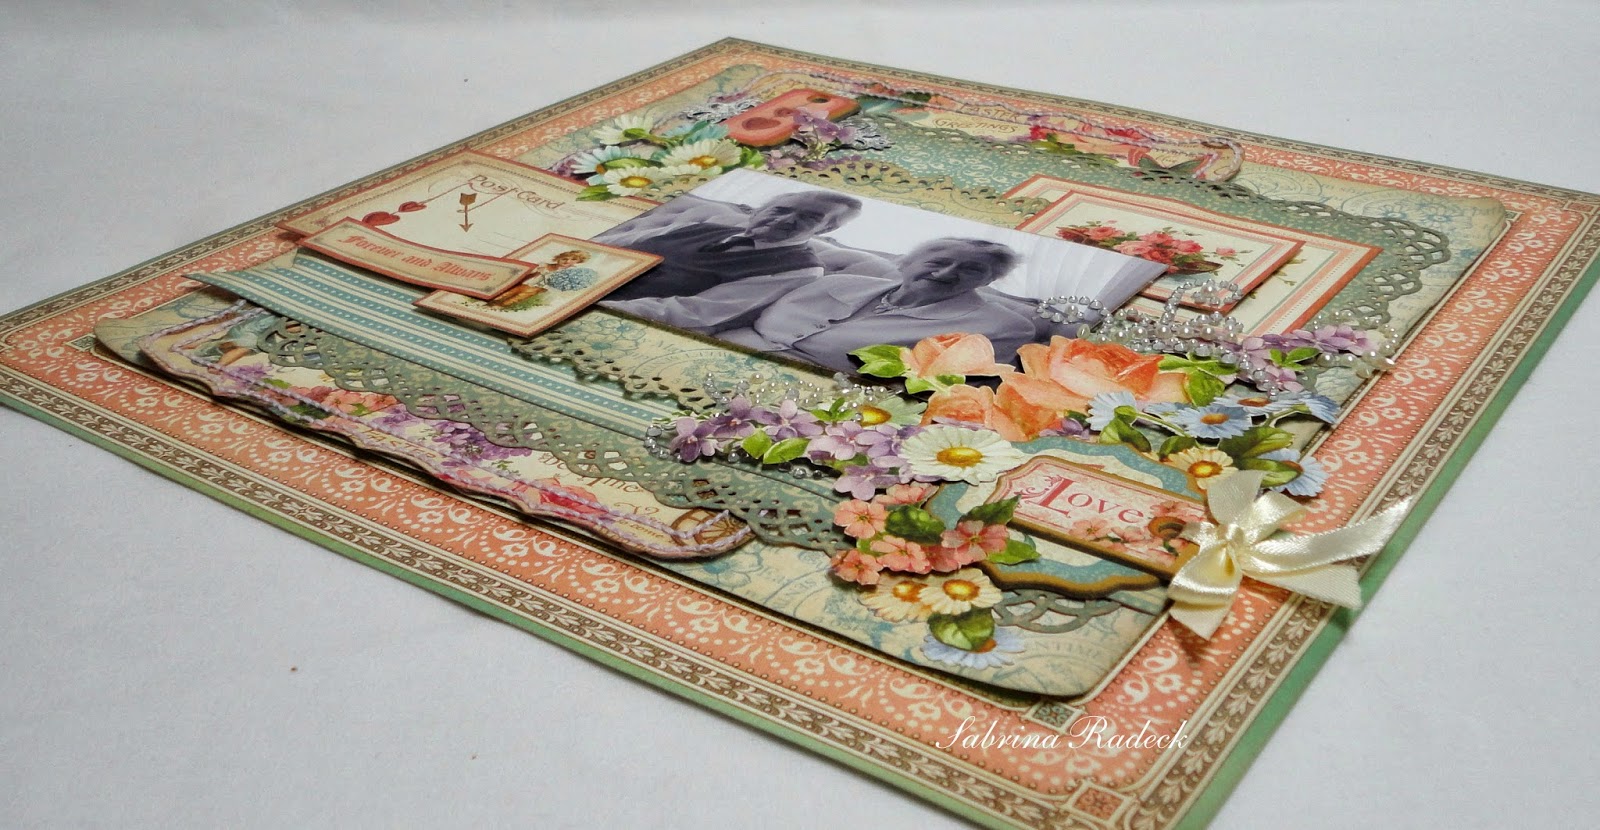
My Mom and Dad just recently celebrated their 58th wedding anniversary! My Mom knows how I often wonder if she will be here for the next one with her not having been well for years now. This last year her health issues have greatly affected her, but she is an amazing woman and an incredible trooper. I'm glad my parents had another year together and hope more for them. I love them both very much. I've wanted to make a scrapbook page of them for quite a while and this seemed like a perfect time and occasion to create a layout about my parents.


I'm also entering this in a challenge! Yeah for me! I haven't done that for a while. I'm entering this layout in Gloria Stengel's Craft Hoarders Anonymous Challenge #4 - Show Some Sparkle, Glitz or Glam!  To the left is the inspiration collage and to the right is the Challenge Blog Badge.

 So here we go!


I've converted the photo I'm using to B&W and using some of Graphic 45's Sweet Sentiments papers, and chipboard pieces. I seldom use bling so with this challenge, this is one of those times. I used an older pearl & bling flourish from Prima and cut it up a little.

Just FYI, there are three items on this layout from the 8 x 8 pad - the small cut-a-part over my Mom with the roses in the boat, the little boy with the blue bunch of flowers under my Dad, as well as the sentiment strip. Everything else is from the 12 x 12 pad or chipboard tags.

You know I always like to show my work from all angles for you; then I'll show you some close-ups.


Detail close-ups -


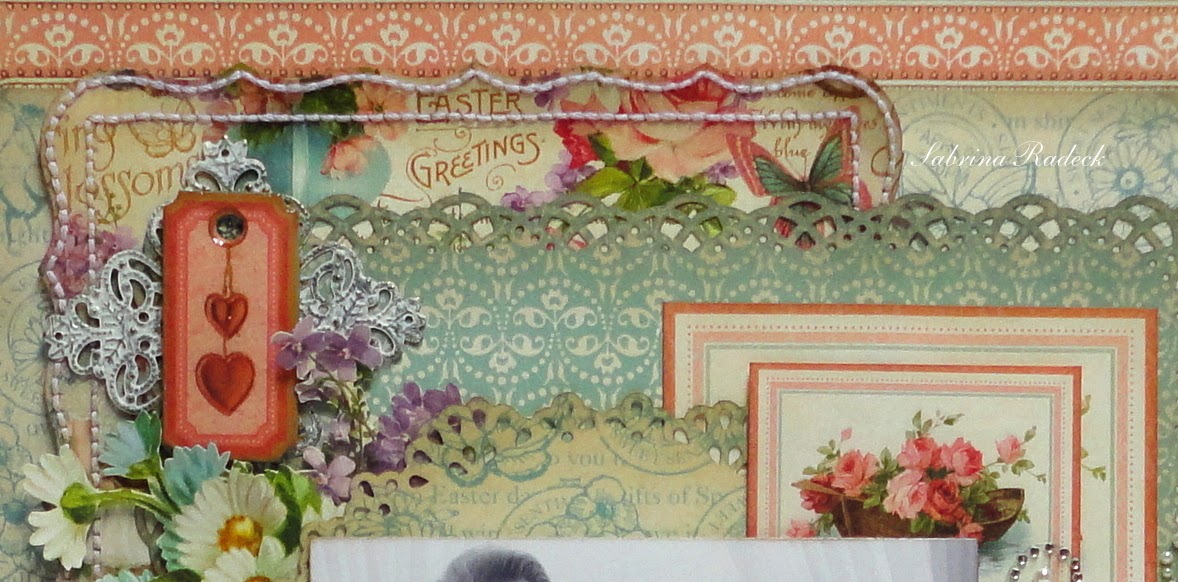
In the photo above, you can see that I painted the filigree metal from ButterBee Scraps and placed it behind the chipboard tag with the hearts on it. The heart chipboard tag is covered with Glossy Accents. I thought this would help add to the "bling" factor.


With the photo above, you see the "glitz" in form of bling and pearl flourishes with the arrangement of fussy cut flowers. And in the photo below, the detail of the stitching around the Martha Stewart "Cherished" border punch.


Let me know if you'd like to make this layout for yourself, because I took photos in the step by step making of this layout because I had something in mind for them, but things have changed.

Thank you so much for stopping by to check out my challenge entry!

Happy papercrafting everyone! 


Added April 2, 2014

With so many wonderful projects entered for this challenge, I was pleasantly surprised to find that I had won challenge #4 with both this LO entry and my card entry "Easter Card #3". Wow! Thank you Gloria and CHA DT!

Tutorial - Couture Anniversary Card & Box

Added Notation: The instruction pages are hard to read, so it may be best to email me at glimmercraft.sabrina@gmail.com to request a copy of these instructions as a pdf version. Thanks.

I've had a few people request the instructions for the Anniversary card I designed for a class using Graphic 45's Couture paper.
This is the first time I'm trying this; including the pages of instructions that is. So I think if you click on each page, then right click & save, you should be able to print out or view the instructions.If it doesn't work let me know and I'll change it.

You will need:
2 Black cardstock - Bazzill Card Shoppe 100# Licorice Twist - 12" x 12"
1  Bazzill Red Rock cardstock - 12" x 12"
1"Couture" sheet from 8 x 8 pad Graphic 45 Couture
1 "Style" sheet from 8 x 8 pad Graphic 45 Couture
2 "Gorgeous" sheets from 8 x 8 pad Graphic 45 Couture
Glossy Accents
Black embroidery floss 
Optional (Shape of card)


Look for the Couture Birthday Card & Box set of instructions tomorrow! I will also post a link to this onto the "Freebies" tab at "Paper Architecture with Sabrina".
If you have any further questions regarding this project's instructions, email me at glimmercraft.sabrina@gmail.com.

Happy papercrafting!

Happy Anniversary

This card came from the center of the card in my previous post.


I brushed each flower with some Rock Candy Stickles (jar). I also used the regular Stickles dispenser to add some glitter to the banner. The tiny sentiment was heat embossed with Kaleidoscope and is a bit more legible IRL. :)


{Supplies--all Papertrey Ink unless noted}
  • Cardstock: Royal Velvet, Plum Pudding, Winter Wisteria
  • Stamps: Door to Door
  • Ink: Royal Velvet, Versamark (Tsukineko)
  • Dies: Fleur de Lis Squares (Spellbinders), Door to Door banner
  • Other Tools: Kaleidoscope embossing powder (Stampendous), flowers (unknown), Rock Candy--jar and dispenser (Ranger)

For The Men In Our Lives

...so fun to make masculine cards

I'm back! I've had a pretty busy few days with a two day class, some very detailed project classes and a couple of others that I had to make kits for, etc. So, today I'm back with a new class for the end of May. A masculine card class. We should do that more often, because I forgot how fun they can be to make.

The cards for this class all measure 3 3/4" x 8 1/4". They are black exterior with a white interior and come with charcoal envelopes. Each package has five in it, so each person gets to make 5 cards in class. I based these cards on some of the elements that men like or associate with in their life. Leather, wood, stone/brick, metal, and the sea. These are they.


I have two favorites, and will start and end in showing them to you. The first is one that make you think leather, and maybe jungle.


I used the old Cuttlebug embossing folder "Mosaic Tiles" and since the paper was considerably longer than the folder I had to turn it and emboss it again. By not going over the edge of the folder, I was able to keep the inevitable 'edge bump' from appearing, and even matched the rows. The pattern will not match, but I covered that with the twill ribbon.

To get the leather look after using the embossing folder, I completely covered the paper with VersaMark ink and covered it all with clear embossing powder and heated it up until all melted.

Here is a closer look at that part of the card.

 
The leaves are actually from MFT Die-Namics Poinsettia which I cut up. The tag I cut out of chipboard using the store's Accucut. I then heat embossed it twice (2 layers) with copper embossing powder, and while still hot from heating, immediately placed my choice of clear stamp into the very hot embossed tag to give it that engraved look. The hemp cord I wrapped around one of my small brush handles and heated the cord with my heat gun to hold the 'ringlete' shape better.

On to the next card.

  
You guessed it. This is the 'wood' card. Again I had to trick the paper using a small embossing folder "Woodgrain" from Sizix.  The using Tim Holtz's Distress ink pad in Vintage Photo and passed it gently over the embossed wood grain to darken it. The maple leaves are from an old die from Cuttlebug that came with a little mini embossing folder to emboss the leaf edges and veins which I darkened with Tim Holtz Distress inks Shabby Shutters for the lighter leaf and Peeled Paint for the darker leaves.

Now let's check out the Stone/Brick card.


Here, too, I used a folder and had to trick the paper. But this time I inked the folder with a white ink before embossing it to help define the bricks and make it look more like mortar between the bricks. I punched out some tiny little hearts and used the white ink pad around the edges of the hearts.

OK. Let's have a peek at the 'metal' card. Another tall and skinny one.


I thought that I'd use the sophisticated black, gold and touch of cream for this one. I didn't have to fudge around with the paper on this one as the size fit into the folder nicely. Actually, it wasn't paper but Spellbinder's Precious Metals foils sheets and Cuttlebug's Script Texture embossing folder. I then sanded the gold off of the script to expose the silver underneath. I added a lot of tiny little gold brads along the side of this.

The MFT's DC Giftcard Greetings was gold heat embossed and then line framed using a ruler and gold Gelly Roll pen. I did the same with the banners.


And, now, for my other favorite, and last card of this set. The Sea inspired card.


I took some designer graph paper, second stamped the left corner, and inked the edges with Tim Holtz Stormy Sky. Using Spellbinders Standard Circles I created the lifesaver ring and attached the hemp cord while wrapping the blue ribbon around.


The waves I drew onto three different blues and cut them out. Then with some Studio Gesso I squeezed lightly out and spread around in a circular motion with the tip of the nozzle on the bottle. It didn't take long to dry, and that's when I used my Glossy Accents to quickly draw wave and added in a circular motion again, over the white caps I created with the gesso.

Each blue layer I popped up with some dimensional foam squares, and then added the lifesaver. Do they still call those ring "livesavers"? I always wonder beacuse of the candies. lol

So there you have the five masculine cards. Hope you are inspired to make your own masculine cards. Happy papercrafting everyone.