Showing posts with label organization. Show all posts

Stacked Organiztion Tower

I'm sharing with you today, a project that I made for Paper Architecture but can't use due to instructional video problems. If you follow my Paper Architecture with Sabrina FaceBook page, you'll know what happened there. Anyway, I have the project so I may as well show it to you. I plan to remake this project in the future again.

So What I came up with is a project that has several layers and can be put together with just one layer, two, three, or four layers! You stack them in the order you want, and glue them together building your organizational tower. It can be used s a sewing box, jewelry box, craft organization, office organizer, and more!

Made, as I did, with the base and two layers, the project measures 12" wide x 12" deep x 10" high. So if you add more sections, the tower would of course be higher. Here are the photos.


That's it for the photos. Next is a video to show you more details and explain how it works and can be configured.


Not sure when I will get to it again since I have the next few months planned out, but I will get this project done again for you with a video that works.

Thank you for joining me today, and Happy Papercrafting everyone!


My Christmas Gift to Mom - Multi-Purpose Tray Organizer

Merry Christmas, Mom!

As I mentioned in yesterday's post, I grew up having our Christmas on Christmas Eve, so that means my Mom now has her gift, and I can post it...actually I scheduled it.

My Mom is writing her life story along with a little family history. I look forward to reading it even though I have heard some of these stories throughout my life. I wanted to make her something for Christmas that might help her with this project. I don't know how many chapters she will end up with, but this would be a start. I came up with a tray-organizer, and using the beautiful spring papers of Graphic 45's Sweet Sentiments, this is the result.


I used all but five sheets from the 12 x 12 paper pad, with some scraps enough to make a few cards as well. The project measures 12 3/8" w x 5 3/4" d x 9 1/4" h.

It starts with a chipboard base tray, and all of the parts that go into it are individual pieces that you can configure it in different ways. Here is the tray alone.


Here are all the parts!


You see 15 mini-magazine-like holders, a pen & pencil holder, and a compartment to hold notebooks and more. Here's a shot with the notebook.


Here is an individual little mini-magazine-like holder.


So when all the parts are assembled in the tray in the configuration you like, you have a useful organizational tool. In the YouTube video, I demonstrate some different uses for this project. But, first let's look at the loaded tray from all angles.


So that's it for the photos, but you can view a walk through video where I also share a few multi-purpose uses for this project.


What other functions for this project can you come up with?

Thank you for stopping by to share in my gift to my Mom. (Added late Christmas Eve: My Mom loved it!)


My Christmas Gift to Dad - Desk Set

Merry Christmas Dad!

I grew up having Christmas on Christmas Eve, and since we will be busy on the 24th, I'm scheduling this for that day... my Dad won't see it before Christmas Eve.

A person always wants to make something as a gift for a loved one that will be something they will like and use. My Dad likes to read and make notes using a lot of stickies or post-it notes. I came up with something I could make him and went through my stash of dollar store repurposing/project stuff. I found a frame, and a box that would work beautifully for what I had in mind. But, what paper could I use? What paper could I use for a man? I decided to check out the many scraps I have from all those classes I've taught. Guess what I found? A bin full of Graphic 45's Bird Song scraps! I love those papers.

So here is the end result.


I've included a frame so that my Dad (& Mom) can place in it a more current photo of me. I' happy that I had all these strips to work with! Let's look at the frame first, shall we.

You can see that I added some red on the side edges of the frame.


In this photo you can see the little knob that I added to the top of the frame, hanging a tassel I made with a wooden bead. I also created a charm using black chipboard and a couple of the stamps I had left from an 8 x 8 pad.


Looking at the box you can see a Kaisercraft Metal Label Pull for a place to hold and open the box with.


Here is the box open.


On the lid you can see that I repeated the image inside using the smaller version from the 8 x 8 pad, while the outside has the same image from the 12 x 12 cropped   bit at the top and bottom. this way I was able to hide the adhesive for both image panels while creating red side borders for the one on the inside!


You will also note that I line the box bottom with cork! I created divers with black chipboard and glued them into the box. I added an entire package of mechanical pencils from the dollar store, for my Dad. He's always needing a pencil sharpener, so I hope this helps him. Then I have, also from the dollar store, a variety of post-it note sizes and colours for his reading notes, and more. I created a little section to act as a mini bulletin board where he can post notes to himself or reminders, and the note can be seen even when the box is closed. With that little mini-bulletin section I then had include some tacks too.

I hope that my Dad will like this set. So back to both the frame and box together again.


So that's it for my Dad's Christmas gift. I found that I have enough Bird Song scraps to make a few more things. I wonder when I can get to that?

Hope you all have a Merry Christmas! A wonderful time of the year!


Busy, Busy, Busy - Another set of instructions available


Great start to a new week! Everyone is busy getting ready for Christmas, and I have something for you, that you might be able to squeeze in, because it makes a great gift.

Remember this?

It's now available at Paper Architecture with Sabrina! And here is the link to view all the photos posted for that class project. You can use any paper you like, and you don't have to do all the fancy embellishing either. Up to you!

I have new ideas flowing into my head while preparing instructions for these older projects people wanted to know how to put together. So soon you will be seeing new things!

Thank you for checking in. Maybe I can participate in a challenge or two as well. See you soon!

Happy papercrafting!


Storage Tower...Jewlery Box...etc

- versatile and a good size for almost any use you can dream up


This "storage tower" as Kaisercraft calls it, has so many possible uses, with or without the drawers. And, after white washing the edges, then inking on top of that with Tim Holtz Distress Ink in Tumbled Glass, and using some of the papers from My Minds Eye Collectible lines, I ended up with a happy and cheerful unit.

The entire unit measures 13 1/2" high, by 7" by 7 1/4".


 You can see in this photo what I came up with for the knobs. I used wood beads and heat embossed them with silver. Then I used embroidery floss to create six little tassels that I pulled through the bead and the hole punched in the front of the drawer using my Big Bite. I pulled tightly on the tassel till it would no longer come through the hole of the bead and glued it under the paper lining the inside of the drawer. There may be some photos that you can see them a bit better.

I have several photos to show so that the unit can be seen from many angles.


Here you can see the Tim Holtz Sizzix die "Hardware Findings" used with chipboard and designer paper to create the 6 hinges used for this project. I didn't have enough brads for the four holes in each hinge, so I filled them with silver Liquid Pearl, and looks just fine.


See a bit more of the top.


A closer look at the inside of the drawers. Once the class is completed I plan to make little dividers for some of the drawers and use this as my jewelry box.


If a person wanted to, they could leave out the drawers and use this as a little shelf unit, or a combination of shelves and drawers. In this next photo I have taken all the drawers out and stacked them next to the unit. This shows that it can stand as shelves alone, and that the paper was cut so that the pattern was matched from drawer to drawer. Without the drawers it could easily act as storage for 6 x 6 pads of designer papers!


Well that's it for this project. Thanks for stopping by today.


Card Keeper - Graphic 45's Place in Time

-something a little different for this collection from Graphic45

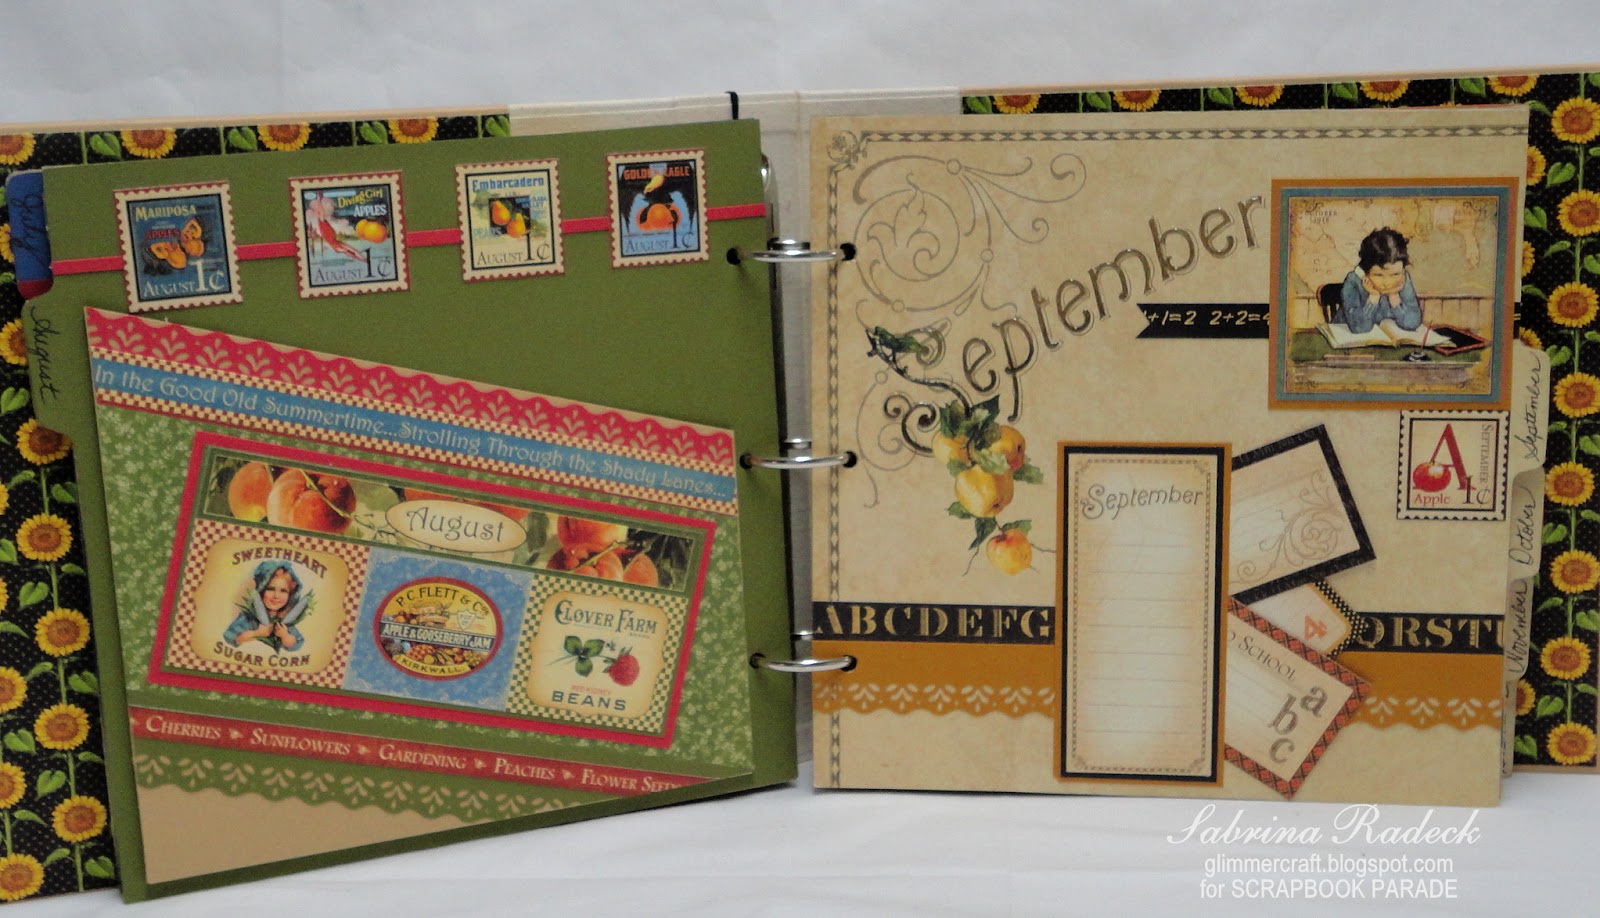
We can never have enough things to help us organize our card giving. The Graphic 45 "Place In Time" (12 x 12) is perfect for just this kind of a project. So using 2 BoBunny 9" x 9" canvas bound binder albums along with these beautiful papers, I came up with this. Just FYI, I only had one binder to work with until the order for everything comes in, so I had to hold up the cover for Volume Two - July through December.

On the outside of Volume One - January through June.


I needed to darken the light canvas binding a bit so I inked it with Tim Holtz Antique Linen and my ink blending tool. 

 After cutting out the 9 x 9 pages from the 12 x 12 sheets, I used what was left from them to piece together the background piece for the two front covers. You may be able to see a seem here and there.


I did the same for the little frame on the front of the sunflower paper.
 
Volume Two - July through December


Before I show you the pages inside, I just want to let you know that because this is something that will be frequently used and handled, I opted to keep embellishments minimal. This also would save time in class, as it will be a two day class as is. The participants will have the option to embellish as much as their hearts desire. I may add a few things myself, once the class has been completed.

I also kept the layouts basically the same with just minor changes here and there. This will keep our cutting measurements less varied and more easily put together.

So here are the pages in monthly order.


Here you will see a little pocket that has the month as a header followed by lines. This would be where you would record the birthdays for that month. then there are tags tucked in behind. These could be for additional birthdays, anniversaries, or for non-family birthdays keeping just the family birthdays on the front...something like that.


On the left, is the other side of January. This, again, is basically the same for each month page, and holds two pockets. The larger pocket holds the cards and envelopes, while the smaller pocket, behind the images and month label, is  for photos you may want to include in the cards for that month, or for gift cards to include in your cards, or just for your stamps.

So now you cans just scroll down and see all the other pages.


End of Volume One, on to Volume Two.


So that's it for all the pages. 

If you'd like to see the video about this project...


Thank you for stopping by to have a look at all the photos on this post. Hope I didn't bore you with them all.

Hugs & Happy crafting everyone!