Photo Details For Slimline "Vintage Autumn Basics" Instructions

Welcome Ladies!

So you bought the big 9 slimline card kit! Lots of work, but it can be done over time and this post is always here for you. The challenge is making 9" tall cards when your paper is only 6" in both directions. There are several ways of doing this, but it all boils down to piecing. There are no sentiments, so that you can use whatever one you wish for the cards.

So here we go!

Card #1 - A nice masculine card.


A couple of closer looks.
 

Card #2 - just a teaser photo (not a good one)

In this next photo you can see the hole punching I did on the square. I recommend a smaller hole punch if you have.


Card #3 - this one definitely will not fit into an envelope! But I love the style of this one!

To get the rolled 'V' you will need to do this as per your instructions. This is the view from the back so that you could see where I inked, and where I placed my double sided tape.

This next photo will help with placement of things.


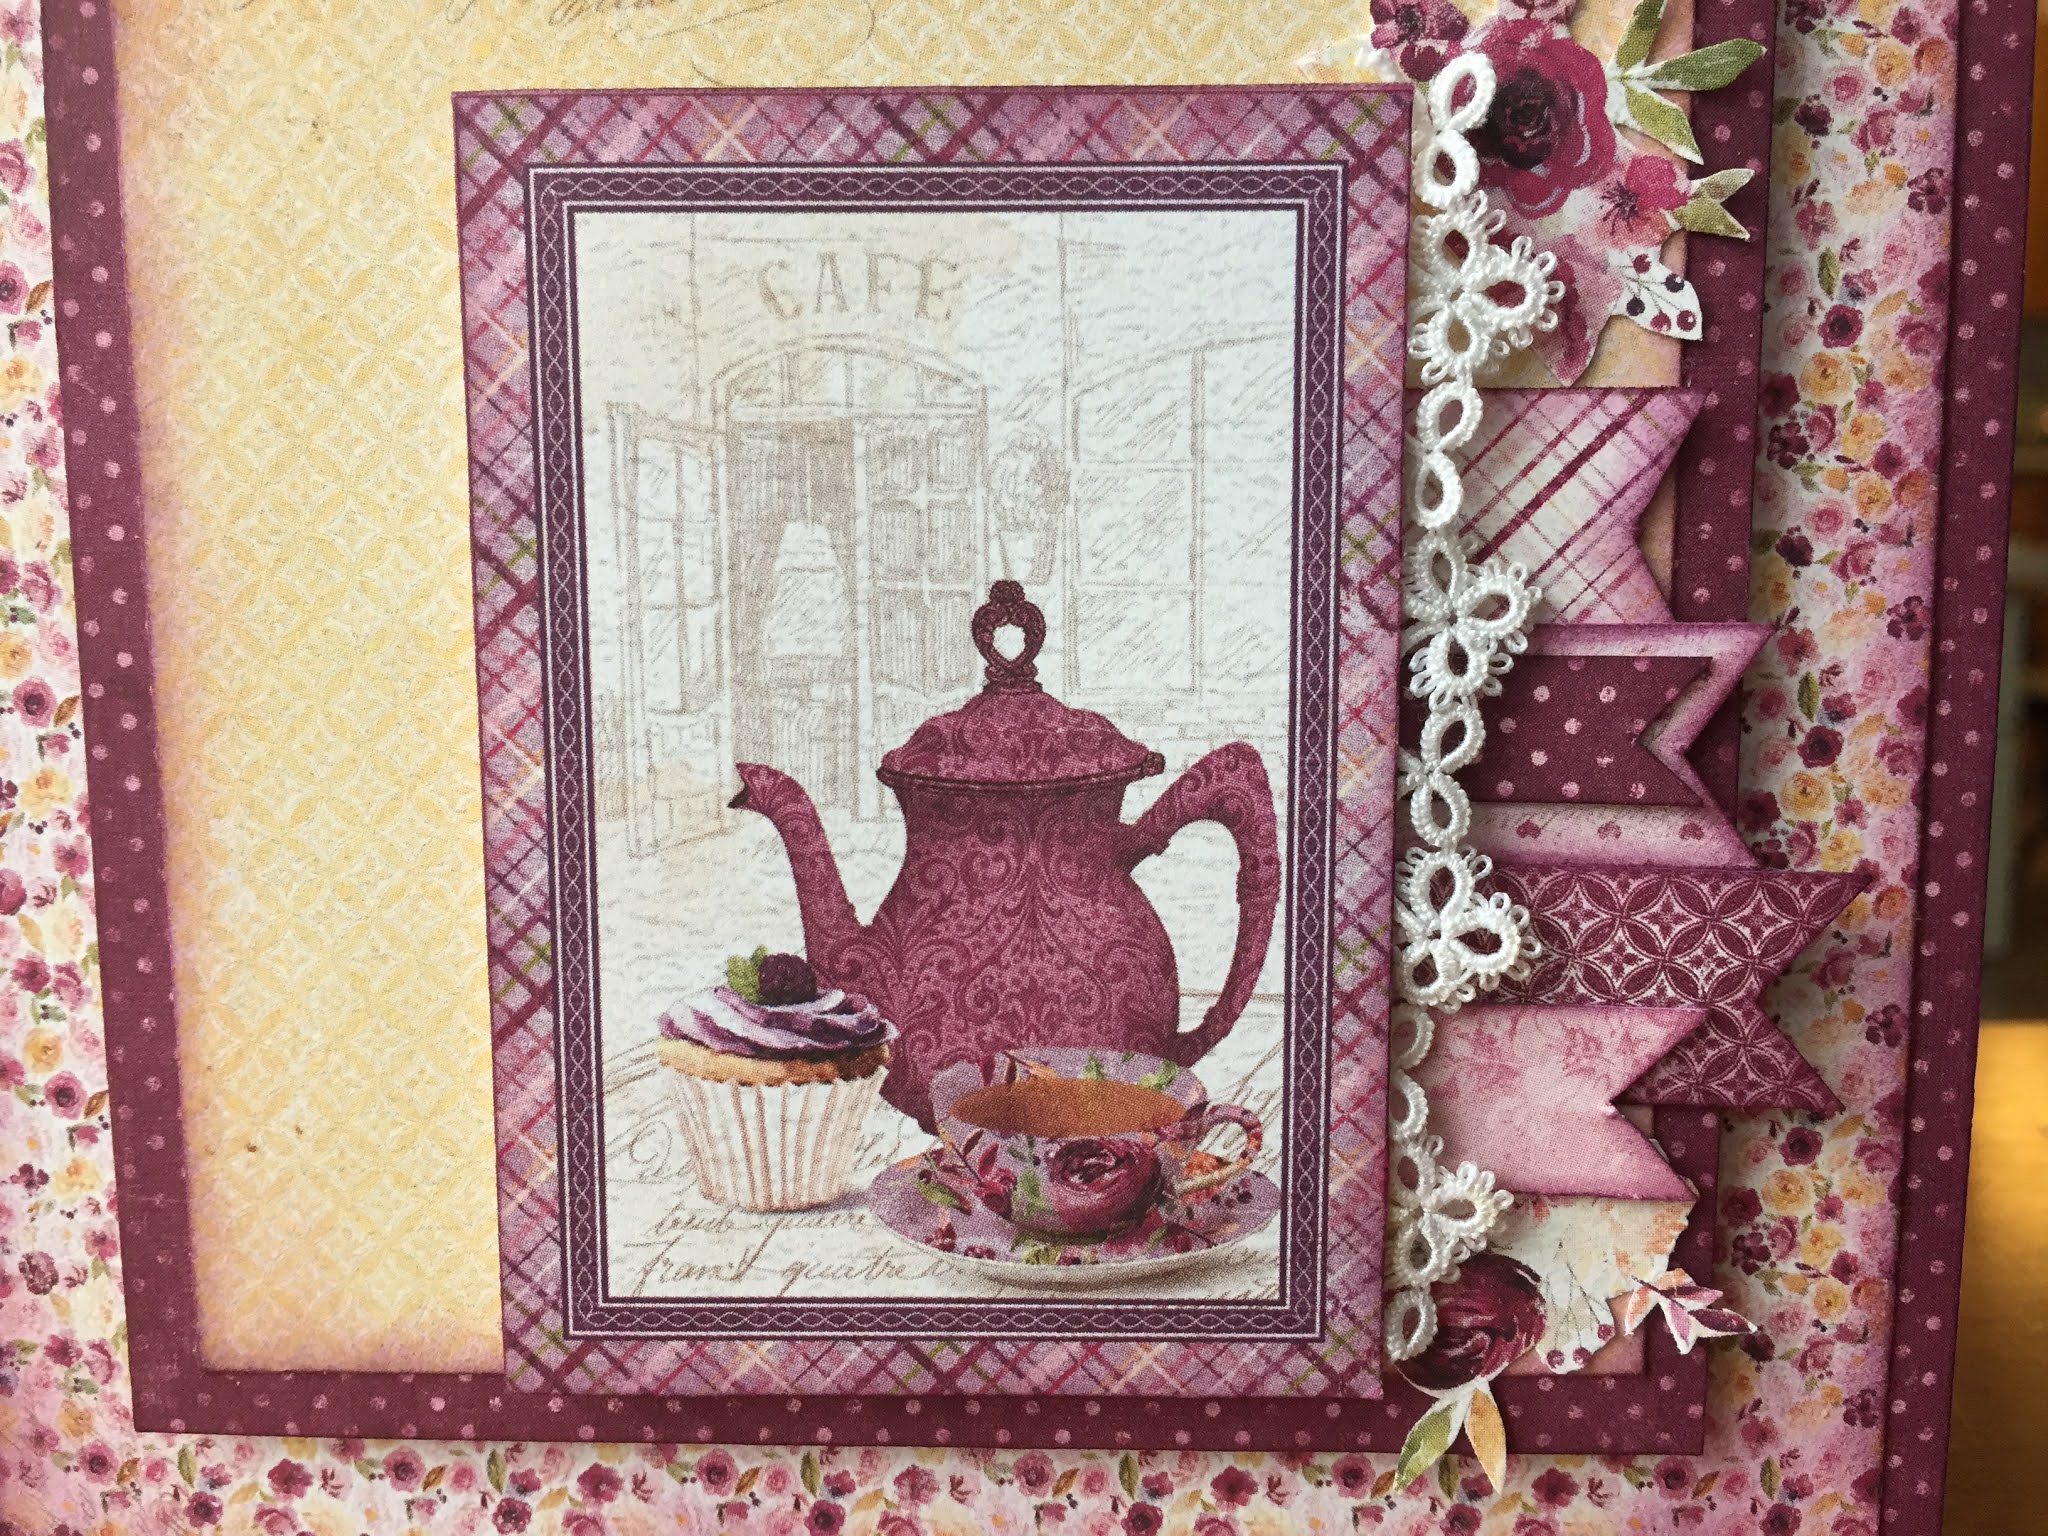
Card #4 - definitely a ladies card, and this one won't fit into an envelope either. I love dimension and sometimes when creating away, I forget that most people want to mail their cards.

 
I love how the fraying of the crochet lace, and especially the ribbon, added some aged shabby to the look.

Arranging the flowers, leaves & hat pin Laser Cut


Card #5 - For both women & men...


 My drops were not at all dry when I took the photo right away.

 Card #6 - I love the design of this card. Hope you are all OK if use this one again on a different sized card.


Card #7 - Again, one for either men or women.


Card #8 -  MADE FROM SCRAPS - This photo was taken on a bright sunny day by my window, as did all of the others (except card #2). So it is brighter than it should be even after editing it as best as I could.


Card #9


It's always so fun to use the drops on cards and layouts. Hope you like the results too.

Thank you Ladies, for purchasing this kit. I hope that you had a good time putting them all together.


Next kit??? I'll be using Maja Design "Miles Apart" As I said on the Scrapbook Parade video, I love the soft rose, blues, greens, & kraft/taupe colours of this collection. I can't were pastels, but I have them everywhere in my home!

Happy Creating!


Slimline Card Kit With Maja Design's Vintage Autumn Basics


Nice to see you back!

I have always loved slimline cards since I first learned about making them about 10 years ago. It is wonderful to see that they are all the rage in card design now. So I was thrilled to design an entire card kit with all slimline cards.
 
This post is just showing you the cards that will be in the kit. I believe that they are all spoken for ecept for one kit! And Carol just received them on Friday (3 days ago)! 

One thing though, I forgot to take my photos of all the cards like I usually do. I do, however, have the teaser photos I took, and have done the best I could with editing them. 
 
SOLD within a day after posting
This is a large Kit! It has 9 Slimeline cards!
Kit cost is $45. If you wish to grab the last remaining kit, contact Scrapbook Parade here.

These are the nine cards in order as they will appear on the printed instructions.


So these are the cards for the Maja Design "Vintage Autumn Basics" Slimline card kit.

See you next time for a post with more detailed photos to accompany the instructions for this kit. Remember, there is only one left!

Happy creating!


Photo Details - Square Card Kit Using Maja Design's Little Street Cafe

Hello Ladies!

A big thank you to all those that purchased this kit from me & Scrapbook Parade! This post will share additional photos in helping you put your cards together. I am going to go through them in the same order as what you have on your written instructions.

Card #1 - The only Shabby Chic card in this set.

Video Demo on how to TEAR YOUR SQUARE into 2 pieces.


So those are all the views of the completed card. Now for a little video on how to tear the mauve floral square.


Card #2


Card #3

 
TO START MAKING THE CARD, YOU WILL NEED TO MAKE 'THE WAVE' AS I CALL IT. HERE IS THE VIDEO SHOWING YOU HOW TO DO THAT.


The banner you see here (above) is for stamping you sentiment on. In the instructions I mention that you should stamp it before attaching it to the card.

In the photo below you can better see the layering on the bottom right corner of the card.

Card #4

This card involves colouring with three colours of pencil crayons; whilte, olive green & yellow. The first images are of the steps I took in colouring. When colouring on dark cardstock you want to always use white first, and then add the colours on top.

(Sorry about the lighting, I did this in the evening)

Now for the completed card photos.

...and other views.

Card #5 (Last one)

This one you will need a bunch of scraps, so be sure to keep some.


I hope these photos are a help to you as you put your cards together. If not let me know in the comment section below.

The next KIT is again using Maja Design paper - Autumn Basics - to make a set of the popular slimline cards. You might ask, "How can you make a 4"w x 9"h card using 6" x 6" paper?" It can be done!


Till next time, HAPPY CREATING!