Hello Everyone!
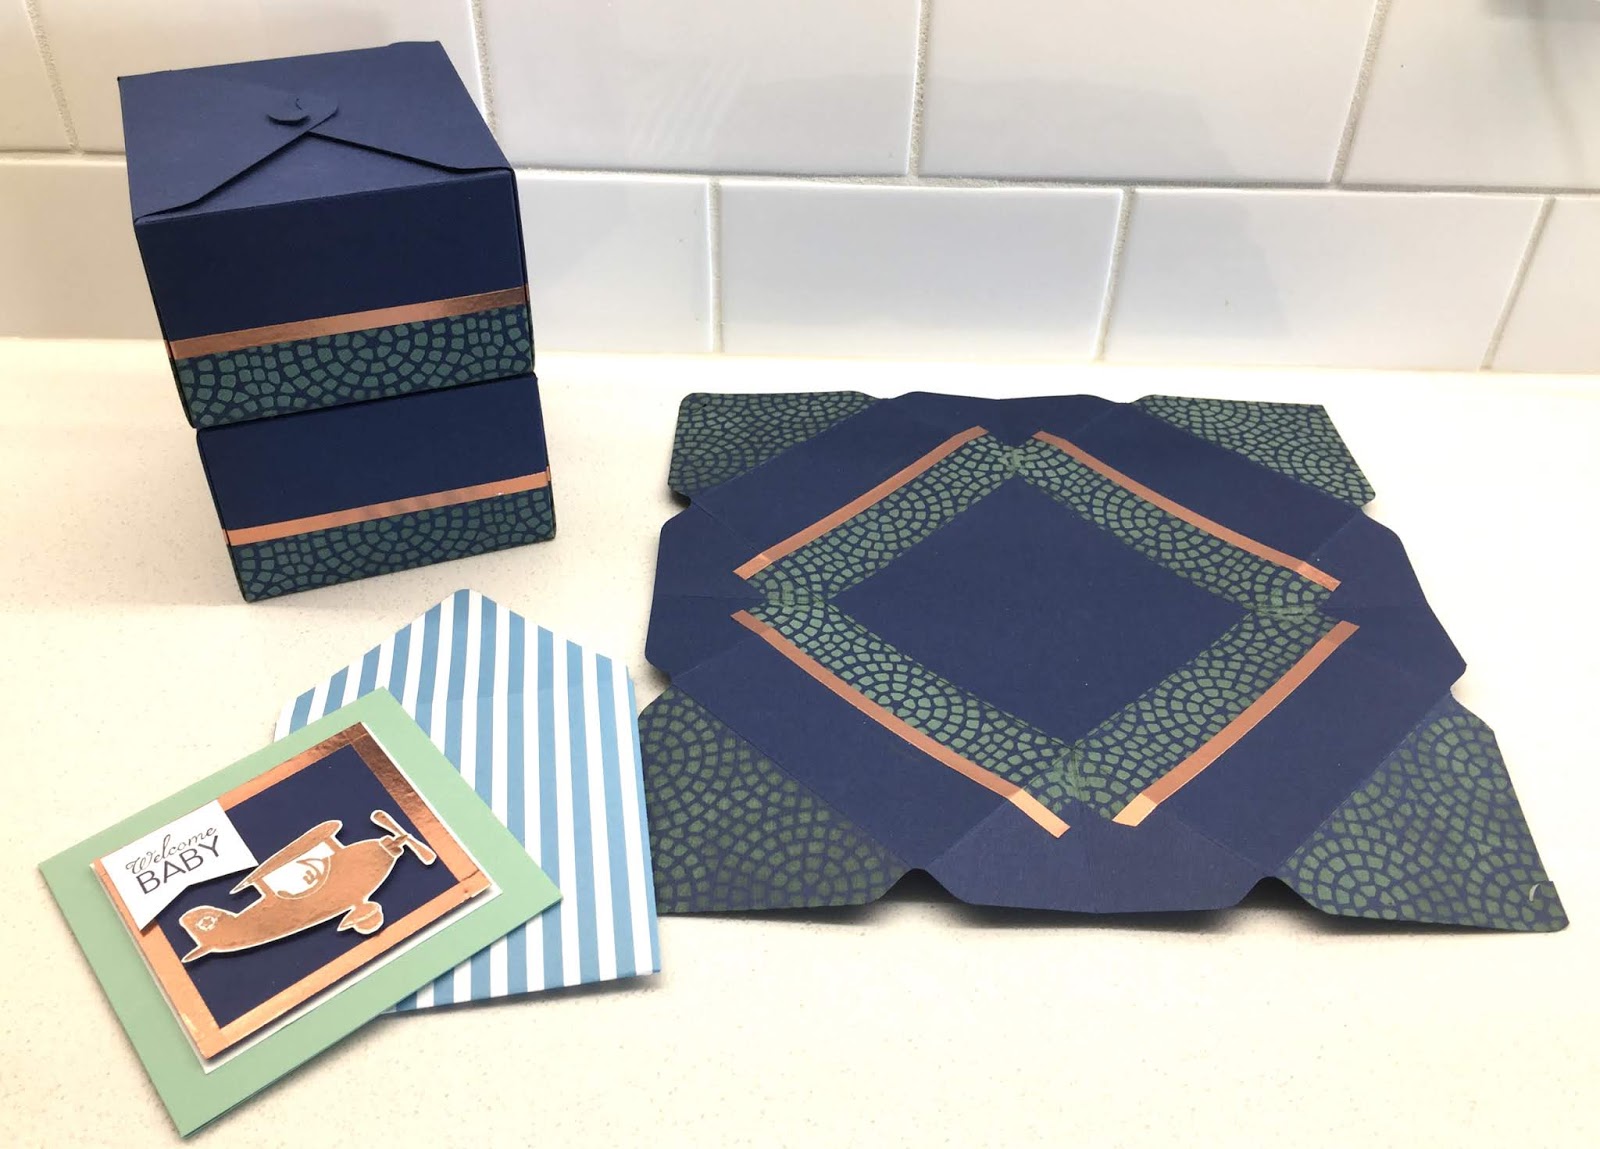
Today I am sharing with something that I made for a Baby Shower. I had crocheted 3 pairs of little booties, and could not find a gift box around the house that was the right size. So a thought came to mind saying, "Come on Sabrina, you can make boxes, so what's stopping you?". I guess I was thinking I needed my score board to make a box big enough for 3 pairs of booties, which is stored away still in one of my many boxes in my daughter's garage. But I remembered that I had my box punch board. I could make one box for each pair of booties and stack them together and tie a ribbon around all three boxes!

How did I get that pattern on the bottom of the boxes? Well I used Peeled Paint Oxide ink and a stencil with a blending tool. Then I used copper washi tape as a border along the top edge of the pattern.

The above photo shows the top box open and flat to give you an idea of how I did it. I did the same stenciling on the top portions of the box that go on top of the other 2 boxes. It was real easy to do, and did not take much time at all.
You also see the little 4 x 4 card that I made to coordinate with the boxes. The envelope is not quite a matching piece, but that was the best I could do with what I had, and it is still blue for a little baby boy.

I cut the blue piece and attached the same copper washi tape around the edges to create the border. Then I stamped and heat embossed a little copper plane fussy cutting it out. I then popped up the blue piece over the white I had already attached to the card front. Next I popped up the little banner and the copper plane.

I used my Mini Envelope Punch Board to make the envelope.
Because all those layers make the card a little front heavy, I like to add a couple of cardstock layers on the inside of the card so that it can better stand and not topple over.

Plus it nicely frames the inside sentiment and what you write on the card.
I wanted to have one more photo to show you here, but guess what? After tying the boxes together with a beautiful dark green ribbon, I forgot to take the photo before going the the shower.
I hope that you have been inspired to try some stenciling on any boxes you might next make. I think I like it better than adding cut pieces of patterned paper. At least for now anyway.
Happing creating!

Today I am sharing with something that I made for a Baby Shower. I had crocheted 3 pairs of little booties, and could not find a gift box around the house that was the right size. So a thought came to mind saying, "Come on Sabrina, you can make boxes, so what's stopping you?". I guess I was thinking I needed my score board to make a box big enough for 3 pairs of booties, which is stored away still in one of my many boxes in my daughter's garage. But I remembered that I had my box punch board. I could make one box for each pair of booties and stack them together and tie a ribbon around all three boxes!

How did I get that pattern on the bottom of the boxes? Well I used Peeled Paint Oxide ink and a stencil with a blending tool. Then I used copper washi tape as a border along the top edge of the pattern.
The above photo shows the top box open and flat to give you an idea of how I did it. I did the same stenciling on the top portions of the box that go on top of the other 2 boxes. It was real easy to do, and did not take much time at all.
You also see the little 4 x 4 card that I made to coordinate with the boxes. The envelope is not quite a matching piece, but that was the best I could do with what I had, and it is still blue for a little baby boy.

I cut the blue piece and attached the same copper washi tape around the edges to create the border. Then I stamped and heat embossed a little copper plane fussy cutting it out. I then popped up the blue piece over the white I had already attached to the card front. Next I popped up the little banner and the copper plane.

I used my Mini Envelope Punch Board to make the envelope.
Because all those layers make the card a little front heavy, I like to add a couple of cardstock layers on the inside of the card so that it can better stand and not topple over.

Plus it nicely frames the inside sentiment and what you write on the card.
I wanted to have one more photo to show you here, but guess what? After tying the boxes together with a beautiful dark green ribbon, I forgot to take the photo before going the the shower.
I hope that you have been inspired to try some stenciling on any boxes you might next make. I think I like it better than adding cut pieces of patterned paper. At least for now anyway.
Happing creating!