Spectrum Noir Class #4 - Reds, Browns and Warm Grays


Hard to believe that the beginner Spectrum Noir class at Scrapbook Essentials BC has only one more class left after this one!  Since we are introducing three basic colour sets into our marker collections, we are making three cards. These are they!


When: Saturday, May 27th
Time: 10:00 - 12:30
Cost: $25 + GST for each class IF YOU HAVE THE MARKERS

Where: Scrapbook Essentials BC, Victoria BC
Reds, Browns and Warm Grays are the colours for our fourth Spectrum Noir class. We will discuss working with colours that bleed more than others, and colouring skin and hair, along with colouring paper piecing will be a part of this class, as well as texturing your colouring with tactile fabrics.
Please bring to class: All of your Spectrum Noir Markers, your Spectrum Noir binder,  double sided adhesive tape, glue dots, 3D Foam Squares or foam tape, and scissors, and your previous class projects.  Also bring a 2" square of jean material, a 2" square of terry cloth (from a towel or face cloth), a 2" strip of 1" wide lace and  a 2" strip of 1" wide piece of grosgrain ribbon.

Warm Grays & Reds focus


Browns & Reds focus


All three colour collections, plus focus on beginner hair & skin. Also colouring when paper piecing.


Here is my practice sheet. I am not including Copic colours this time, since everyone in class seems to have Spectrum Noir markers.


The next and final beginner class will introduce Purples and Pale Hues. We can work on a a few more skin tones when we have the Pale Tones.

See you in class!


Spellbinders Educator Class #3 - Kaleidoscope "Optical Illusion"


Spellbinders Canada chose the Kaleidoscope "Optical Illusion" die for this next class. I see that a person could create many pattern ideas with this die.


For this month's Spellbinders class we will be working with a geometric die that has a number of uses that we will only be able to skim the surface with. The Spellbinders die for June is from the Kaleidoscope collection "Optical Illusion" (S4-696) Because our die cutting will allow use to make more than one card with the pieces, we will be able to create a couple more cards this time.

Please bring to class: Die cutting machine (you... can order the Platinum 6 (PE-100) for a nice portable machine from Stacey), scissors, VersaMark Watermark in pad, gold embossing powder, heat tool, double sided adhesive tape, mini-glue dots, & white 3D Foam Squares (white and black for this class).
.
Wednesday, June 28th
3:30 - 5:30
OR
6:30 - 8:30
Cost: $40 + GST (includes $28 die)


CONTACT Stacey to register at sbebc2011@gmail.com for this Victoria class.

For this card I wanted to hint towards a quilt. We have a lot of quilters here in Victoria, so this card is a great all occasion card, or you may add a sentiment strip.


This next card is bold and could be a masculine card. I would love to see it in browns, blues, & greens as a masculine card with some of the paper piecing popped up here and there.


This next card is not part of the class, but after creating the second card above, I thought it might be nice to create a contemporary snowflake and wanted to see what it would look like. I kept is CAS and was pleased with the look. It may be hard to see in this photo, but I added Stardust Stickles to the created snowflake.


Well, I hope to see you in this class at the end of June. Happy die cutting and card making!


#NeverStopMaking, #Spellbinders


Shabby Chic Class #4


I am so excited to share this Shabby Chic card class with you, because we are using for the first time paper from the new company "49th and Market". You have to be a vendor to purchase from them, but you can still browse all the incredible and gorgeous products available from them. Browse and pick what you would like, and then place your order with Stacey at Scrapbook Essentials BC. She can get everything you would like from them!

OK, on to the class. These are the two A7 cards we will be making in class. I am introducing some new techniques to our Shabby Chic card classes that you will love! So be sure to read the class blurb, or description, to get a hint of what we will be doing.


For this class we are going to be using the gorgeous 49th & Market papers for the first time. And let me tell you that you are going to love these papers for more than just their good looks. There will be some fussy cutting for this class so I will be giving you just a little bit of homework. We will also be using some new products for some techniques in this class that you will love! I know Stacey has these two items in the store if you would like to get your own for class - Liquitex Ceramic Stucco & Liquitex Glass Beads.

Please bring to class: Paper distresser, scissors, paint brush, Gesso, double sided adhesive tape, liquid glue, Distress Ink "Hickory Smoke" and an ink blending tool, non-stick craft mat, water mister, heat tool, an old credit card or gift card, and if you have Tim Holtz Mini-Stencil Set #25, & 49th & Market "Gabi's Crackle Texture Stamp Set". I will have one set of each there, but if you have something similar, it will work just fine. You can also order these from Stacey (though I doubt you will get it in time for the class but you will be able to use them at home and future classes, as I plan to use these sets again).

WHEN: Thursday, June 22nd
TIME: 6:00 - 8:30
COST: $30.00

COTACT Stacey at sbebc2011@gmail.com to register for this class here in Victoria.

This first card is from the "Scents of Nature" collection. (Fly Away)


This paper is from the Heirloom Botanicals collection. (The Patch)


As I said earlier, I am so excited about this class, and hope that you will be too.

Happy cardmaking and see you in class!


G45 Portrait of a Lady Layouts Class #3


This is the final of three classes in this series creating vintage layouts using the gorgeous G45 Portrait of a Lady collection of papers. If you wish to view the layouts from the previous two classes - Class 1, and Class 2, just click on the links.


For the last two layouts of the G45 Portrait of a Lady Layout series class, I will be introducing a couple of Shabby Chic elements into them. We will work with inking stencils, painting some laser-cut chipboard, and doing a little block free stamping. And as promised, some more paper manipulation with water misting and the heat tool, as well as how to add a long curl to the beginning and end of your hand writing. We are going... to have a lot of fun in this last of the series. Be prepared to get dirty fingers for this one.

Please bring to class the following: Paper trimmer, scissors, paper distresser, Gathered Twigs & Tattered Rose ink pads (or similar colours), ink blending tool, Gesso, a flat or stipple brush, a watercolour, or liner, or Aqua Brush, double sided adhesive tape, liquid glue, a brown coloured gel pen or journaling type pen/marker (not too fine), water mister, heat tool, non-stick craft mat, and a 5 x 7 & a 4 x 6 photo if you wish. If you have the following, or something similar, please bring to class - Tim Holtz Mini-Stencil Set #25, & 49th & Market "Gabi's Crackle Texture Stamp Set". I will have one set of each there, but if you have something similar, it will work just fine. You can also order these from Stacey (though I doubt you will get it in time for the class but you will be able to use them at home and future classes, as I plan to use these sets again)

Dates:
Thursday, May 4th - Class 1 - completed
Thursday, May 11th - Class 2
Thursday, June 1st - Class 3
Time: 6:00 - 9:00
Cost: $35.00 + GST each class
Take ALL three classes and SAVE $5 each class

Contact Stacey at sbebc2011@gmail.com to register for these classes at Scrapbook Essentials BC here in Victoria.

I am again using photos of my Mom's life. I think I shall have to get more of this paper to make an entire album of her photos with gorgeous G45 "Portrait of a Lady" collection.


If you would like different Portrait of a Lady layouts (not so vintage) or projects like an album, or keepsake boxes, let me or Stacey know! (Before this paper is gone too!)

Happy scrapbooking!


Class Photos - Portrait of a Lady Layout #1


I am busy preparing a few samples for future classes today, so will not take the time to write a whole lot on today's post. After a great class Thursday night, and photos taken during class, I decided to share some of the with you. The class was the first of three series of single page Layouts using the gorgeous Graphic 45 Portrait of a Lady. Here is the link to the blog post showing the layout samples .


As always, we had some good laughs and shared some fun layout techniques. Thank you ladies for taking the class with me.

Happy scrapbooking!


G45 Portrait of a Lady Layout Class #2


I am having so much fun creating the samples for these three classes! In part, because I am using photos of my Mom, who passed away June 2016. It is wonderful to go through the memories of the her photos, and to use the gorgeous paper collection from Graphic 45's Portrait of a Lady to showcase them and who my Mom was.

These are the two layouts of the second class in this series.


The roses go so well with this photo of my Mom as a child in the garden. Lots of layers for this layout!


I always looked at my Mom as an 'elegant lady', as did everyone who met her. This monochromatic layout, I feel, goes so very well with this particular photo of my Mom. She used to create the most gorgeous Faberge-like eggs as you see here in the photo.

Monochromatic layouts can be quite fun to create. This one does not have so many layers as the one above, but has the fun of tearing a corner of paper right off!


Looking forward, as always, to teaching this class. Here is the class info posted on the Scrapbook Essentials BC Facebook page -

NEW VINTAGE LAYOUT SERIES WITH SABRINA - Class # 2
Sabrina is back with vintage Graphic 45 layout classes. Do you have special single photos of loved ones or friends, or heritage photos where there usually are only one or two for a layout? Do you love vintage layouts and want to learn some new techniques for yourself? Then this is the class for you! We have been requested to use the gorgeous G45 "Portrait of a Lady" collection for some layouts. We heard, and now have a series... of 3 classes with Sabrina, each with two single page layouts. Each class will have a little homework, and some portions of the homework given for each class may not be used until another class, but it will help to have it done when needed.

BRING TO CLASS: paper trimmer, scissors, paper distresser, ink sponges and your favorite vintage ink colour (Gathered Twigs is best for this class, but if you can't get it, Pumice Stone, & Vintage Photo all will work), non-stick craft mat, mini-glue dots, double sided adhesive tape, glue, 3D Foam Squares or tape, and if you have the Spectrum Noir marker GB8, bring it to colour the pearls with.

Dates:
Thursday, May 4th - Class 1
Thursday, May 11th - Class 2
Thursday, June 1st - Class 3
Time: 6:00 - 9:00
Cost: $35.00 + GST each class
Take ALL three classes and SAVE $5 each class


If you are interested in taking this class contact Stacey at sbebc2011@gmail.com


Thank you for stopping by to have a look. Hope you have had some inspiration. Happy creating!


Shabby Chic Class 2


I can't believe that I missed posting this card class a month ago!! This class is actually happening this evening, so I will not include all the class information. I am just sharing these cards as inspiration at this point. If you wish to refresh your memory as the cards of the first Shabby Chic class, click here.

In this second class, we continue using the Blue Fern 'Attic Charm' paper collection.


For this card, we die cut circles, distressed the paper edges and stitch them. Tucking in some small paper pieces in behind the rips that are curled, adds the look of another layer of paper without the waste of another paper layer. Painted laser cut chipboard and some Spellbinders die cuts tucked in some cheese cloth with some sheer ruffled pink ribbon add to the wonderful look of this card. I think I used something like 16 to 18 pearls on this card.


For this next card, I cut out a heart that is curved as it points, but when everything is added over it, you can't even see the unique shape of the heart. Again we have some painted laser cut chipboard and cheese cloth around the heart. Added a little strip of  taupe lace, some fussy cut little flowers from the paper, layers of paper, a large pink bow, and then randomly touched up the card with gesso.


Either of these cards would make a lovely Mothers Day card, or feminine birthday, or all occasion card.

I will have to make sure to get my posts out for you. I might have add them onto my schedule instead of relying on my memory with all the classes I need to prepare for.

Thank you for stopping by to have a look. Hope you are inspired to create your own Shabby Chic cards. Happy creating!


The First Spellbinders Educator Class Photos


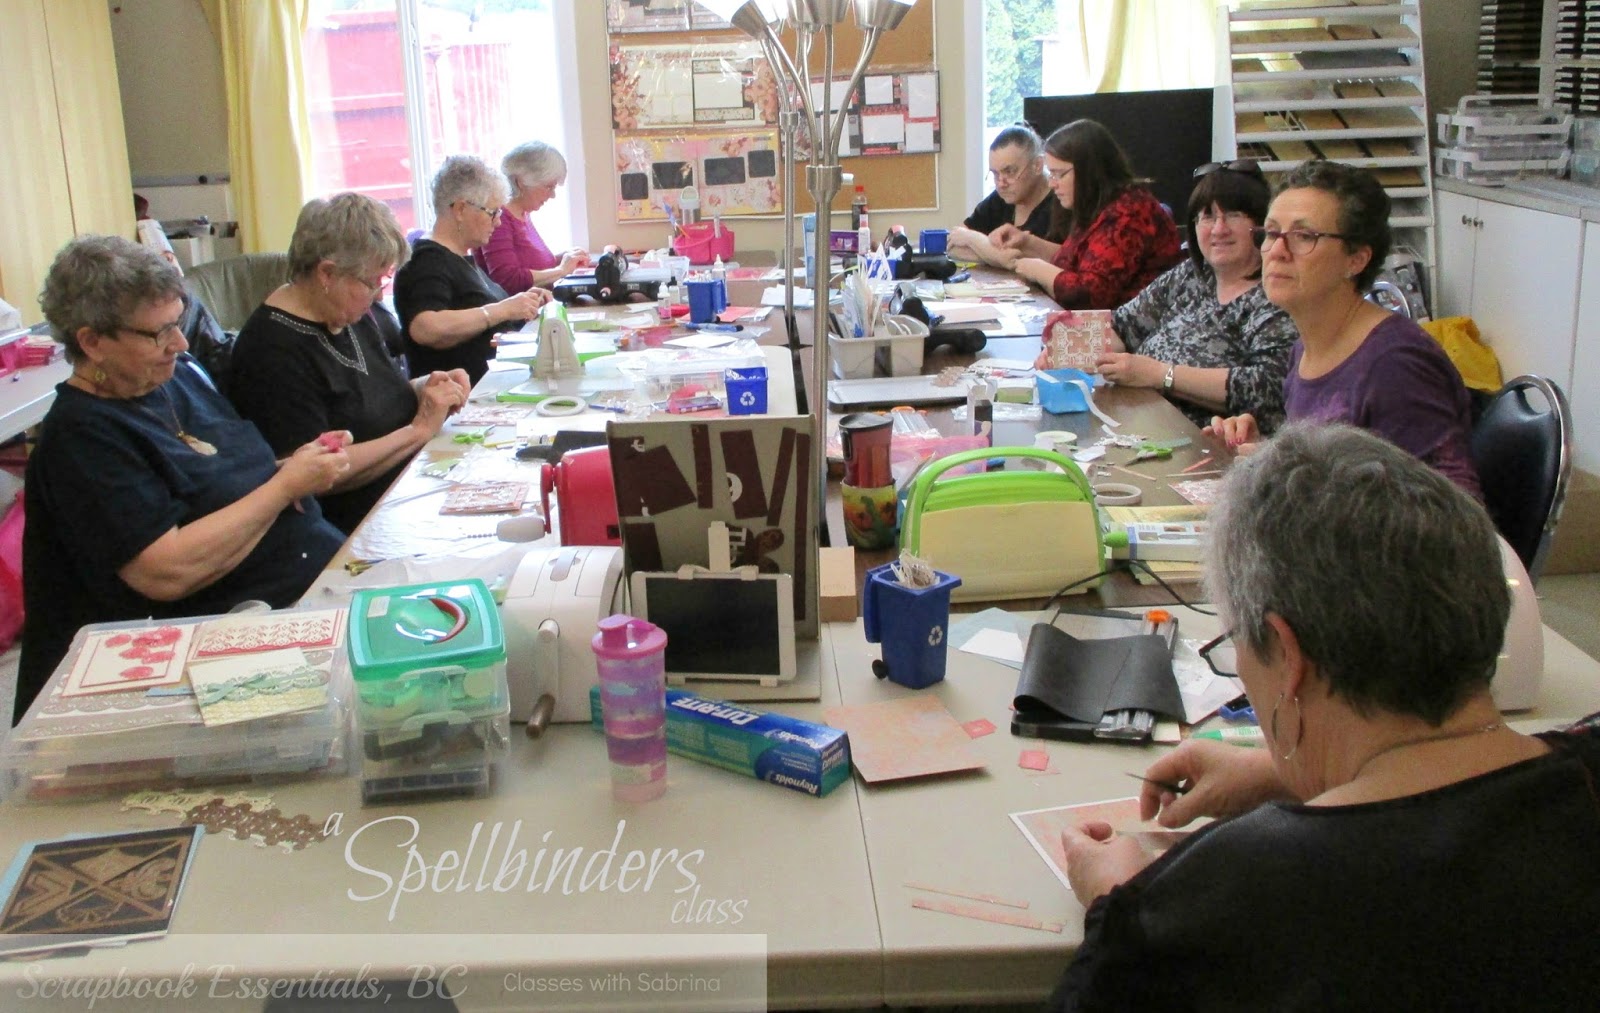
Sharing with you some photos, today, of our first Spellbinders Educator classes held Wednesday. We had so much fun! This was not a class with spurts of complete silence that happens when everyone is fussy cutting, but instead moments of loud noises as people cranked their die cutting machines.

I shared all the great things about Spellbinders' new Platnum6 and Prizm, the Tool-in-One, discussed using and care of Spellbinders dies, and of course made two cards with the beautiful Tuscany Strip die.

In this first photo you can see everyone that is in this first class of the day. (We had a second class in the evening, but I forgot to take photos. Sorry to those that took the evening class)


Here are some photos of busy hands and their end results.


We are all really looking forward to the next Spellbinders Educator class!

Thank you for stopping by to have a peek at our class.