Simon Says Stamp, PTI MIM, CR84FN and Young Crafter's Unite

Using CR84FN's color combo (graphic below) and Papertrey Ink's Make It Monday pocket card challenge, I whipped together something with the lovely Happy Hydrangea stamp set.


After measuring the dimensions to fit an A2 envelope,  I cut and scored some Spring Moss cardstock. Though I was this close to sewing it together at this point, I remembered to do my stamping first so the ink would not show up on the stitching. I considered several purples before deciding on PTI's new Winter Wisteria.


After sewing the edges, I recalled that I had wanted to cut out a small portion of the front to allow for some dimension. Thankfully, my 1 3/4" circle punch was able to slip in and do the deed.


I went back and forth about adding ribbon, as Heather did for her project. I decided to keep bulk down.

I am also entering this into this week's Simon Says Stamp challenge: Anything Goes and Young Crafter's Unite: Flowers.


{Supplies--all Papertrey Ink unless noted}
  • Cardstock: Spring Moss, Soft Stone
  • Stamps: Happy Hydrangea
  • Ink: Winter Wisteria, Spring Moss, Smokey Shadow, Versamark (Tsukineko)
  • Dies: Happy Hydrangea
  • Other Tools: sewing machine/thread, Corner Chomper (We R Memory Keepers)

CASE Study

I remember when I first saw this week's CASE Study card in a recent PaperCrafts magazine... LOVE Aga's work [graphic below]! That's when I first decided that I needed at least one tub of FlowerSoft. I now have 5 but hope to get more!

Instead of using FlowerSoft for my creation, however, I decided to use the lovely, CAS sketch (inverted). I love both PTI's tie stamp set and WPlus9's tie stamp set... I haven't had a chance to get the WPlus9 set though and so here is my PTI creation:


With Father's Day fast approaching, I got my masculine-card-mindset on.  I've learned not to expend too much effort on cards for men as they prefer a simple look.

So I kept this simple and won over my husband's approval. (Or perhaps he's finally learned to just say it's great!)


{Supplies--all Papertrey Ink unless noted}
  • Cardstock: Stamper's Select White; Kraft
  • Stamps: World's Greatest; My Hero, My Dad
  • Ink: Enchanted Evening, Fired Brick and Antique Linen Tim Holtz Distress Ink (Ranger), Memento Dandelion (Tsukineko)
  • Dies: Tie
  • Other Tools: edge distresser (Tonic)

PTI Blog Hop (2)

In need of a wedding card, I used the wedding invitation, as well as PTI's blog hop inspiration photo (graphic below), as my muse.


The wedding invitation inspiration is on the left (a little worse for wear due to children) and the PTI blog hop inspiration photo on the right. What a happy coincidence that the same greens are used!  ;)

Thanks for stopping by!


{Supplies--all Papertrey Ink unless noted}
  • Cardstock: Stamper's Select White, Simply Chartreuse
  • Stamps: Half & Half, Fillable Frames 10
  • Ink: Memento Tuxedo Black and Versamark (Tsukineko)
  • Dies: Turning a New Leaf
  • Other Tools: white embossing powder (Filigree)

PTI Blog Hop (1)

I absolutely loved this month's inspiration photo for Papertrey Ink's blog hop (graphic below)! So many patterns and such fabulous colors! Lots of texture and shape, as well.

I was able to get this picture of my creation during a rare moment of sunshine!


I was so excited to finally use my Opaque White Studio Calico mist! I will be entering this into Moxie Fab's Spatter challenge.

Thanks for stopping by!


{Supplies--all Papertrey Ink unless noted}
  • Cardstock: Stamper's Select White, True Black, Simply Chartreuse
  • Stamps: Gracious Vases, Tags for Spring, Debonair (Paper Smooches)
  • Ink: Memento Tuxedo Black (Tsukineko), Simply Chartreuse
  • Dies: Detail Doilies, Victorian Lace (negative)
  • Other Tools: Opaque White mist (Studio Calico), velvet ribbon (_____), pearls (dollar store), black Spica

Stationary or Desktop Gift Set - Scrapbook Parade Class

Bright, cheerful, 'Summery', and fun, with a hint of shabby chic! This gift set is made of modular drawers that can be attached together in a variety of ways. One drawer holds A2 card & envelopes, and another holds A7 cards and envelopes. The two smaller ones can hold stamps, pens, card embellishments, treats, whatever. But this unit doesn't have to be used for cards and stationary, it can be used to hold hair clips, barrettes, elastics, small combs, etc. Or perhaps a little girls jewelry. It can brighten the desk of a daughter going to college as a reminder to send cards home.Or perhaps a teacher "Thank You/Appreciation" gift. And what idea can you come up for it's use?

Here is the entire set.


From another angle.


Here is the journal, notebook, or whatever kind of book you can come up with.


And the cards.


You'll note that there are several folded flowers strewn about. These are made for the cards to be added if desired. (I forgot to put the pearls in then centers before taking the photos) I seldom make cards that are flat. I love using pop-dots or dimensionals, so this is different. But I thought I should make these cards as mailable as possible, and allowing the option of adding the folded flowers that can be tucked away inn one of the little drawers.

There you have it. May 30th and 31st will be the dates for completing this project.

Thank you for checking inand having a look at this project!  Happy Crafting everyone!


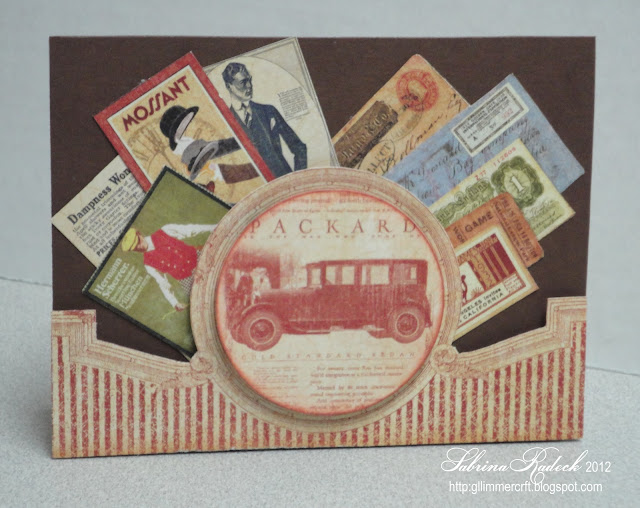
A Proper Gentleman - Masculine Cards - Scrapbook Parade Class

Even though I don't often make them, I do enjoy making masculine cards. Most men can't be bothered with cards, but if done right they can appreciate them more than they might admit. The key I find, is to keep them looking simple even if they really aren't.

After preparing for the Father's Day gift class, there is enough of the paper left over to have two masculine card classes. I've prepared cards for one class, and we'll see about a second. The focus of these cards is the paper, so mainly there is paper cutting and not much stamping and techniques.

Here they are.


And here they are individually for a better look.


You'll have noticed that a couple of the cards have a sentiment banner or tab that is blank. I left it that way as in class they will be left up to the customer to decide what they wish to stamp. The rest are sentiment free like an all-occasion card. Though, there is room to add a sentiment if they wish to.

Thank you for stopping by to see what some of my future classes will be. I have tons more to work on as come September we wish to have the last four months of the year ready for signing up. So I hope you'll keep checking in to see what fun things we'll be doing for the rest of the year, and to inspire your own creative versions.

Happy crafting everyone!


TOOLS & SUPPLIES

PAPER: Graphic 45 "A Proper Gentleman"
Ranger Liquid Pearls: Gold & Copper
SPELLBINDERS: Standard Circles, Standard Ovals, Petite Ovals 
EMBELLISHMENTS: Graphic 45 Brads, Bulk Metal embellishments from the store
INK: Versa Magic Red Brick

Butterfly Spring Layout - Scrapbook Parade Class

I've left my scrapbooks at the store (Scrapbook Parade) for a couple of months so that customers can have a look at them for inspiration and was told how often people commented on this page. So Carol asked if I could adapt something like it for a double page layout. We found the beautiful My Minds Eye 'Follow Your Heart' paper that inspires such a layout.

Here is what I came up with, and will be teaching a class on, for Tuesday, July 10th.


Close ups and details.


I had a blast cutting out all those butterflies! I think it was the anticipation of how it would look/turn out that made the task seem worthwhile. The customers taking the class will get their printed sheet of digi butterflies to cut out before class.

I just love these papers! Thanks for stopping by today, and happy crafting!


TOOLS & SUPPLIES
PAPER - My Minds Eye 'Follow Your Heart', vellum (computer printed)
Ink - Tim Holtz Distress Tattered Rose 
Martha Stewart - Vintage Floral & Swirling Lace border punches
Adironack Acrylic Paint Dabber - snow Cap
Ranger - Liquid Pearl - White Opal
EKS - Small Flower punch
Kaisercraft - Blooms (roses)
Recollections - Floral Embellishments
clear button
Laser Cut chipboard

Very Aged Look - Scrapbook Parade Class

This layout will be a bit messy, but a lot of fun to create. A variety of Tim Holtz Disress inkpads are used with an ink blending tool and a large foil doily to create colour and a bit of a backdrop for this MME Lifestories paper (a printed kraft paper). This is one of the messy parts. Then there's the sanding of the embossed Core'dinations paper creating paper dust everywhere! The other is misting die cut flowers of the same cardstock, crinkling them up, opening them, shaping them, and drying them to look liked old crinkled paper flowers. Works great!


Close ups.


Made a couple of lace flowers with the leftover bit of lace. I also had a lot of fun winding and looping that beautiful ribbon. I had to, of course, work with the meeting of the two pages so that it looks like it flows over both pages as one.


You can see how I put the Kaisercraft roses into the center of the crinkled paper flowers I made. I also love the laser cut quill and flourish. I ink distressed it with Tim Holtz Walnut Stain ink and a blending tool.

Thank you for coming by to have a peek.  This class is taking place on Saturday, June 16th. Look forward to it!


TOOLS & SUPPLIES

PAPER - My Minds Eye - Lifestories
INKS - Tim Holtz Distress Inkpads - Fired Brick, Crushed Olive, Tea Dye, Walnut Stain, Tattered Rose, Mulled Lavender
SPELLBINDERS - Foliage
MARTHA STEWART - Decao Fan Corner Punch
CUTTLEBUG - Kassie's Brocade embossing folder
EKS - Flower punches large & medium size
KAISERCRAFT - Blooms (roses)
CORE'DINATIONS - 
Laser Cut chipboard
Ribbon
Lace
Pearls

Color Q & Freshly Made Sketches

So fun for me, because I've been able to squeeze in a couple of challenges. This is the 2nd one today - ColorQ #137 & Freshly Made Sketches #35.  I love this colour combination and will probably use it again. I would have loves to have something a little different, but because of time constraints I have to do something quick, which is a good thing to do on occasion, because I'm a person that thinks every avenue before proceeding.

Here is my card.


The green patterned paper I stamped using a stamp I picked up from a garage sale. I don't know the name of it, but I do know it is from Stampin' Up. I used white embossing powder thinking it might be fun to try to heat emboss on a patterned paper. I also heat embossed on the lavender cardstock.

Thank you for stopping by again. Have a great weekend and happy crafting!


Retro Sketches 12, Moxie Fab World & Papercraft Star - Happy Birthday Sister!

Graphics Fairy2 has wonderful free digi prints that I subscribe to. Some are vintage, others are retro, and some I find are a little weird. I only save the ones that I really love, and recently I added a retro folder. As I was thinking about the fact that June is fast approaching, with the 13th being the birthday for three people I love dearly - my Dad and my twin sisters! What could I make for one of my sisters. This sister loves to garden, and has a huge vegetable garden, loves to can, juice, dehydrate, freeze, and so forth. That reminded me of a retro digi print I saved not long ago that would be ideal for her. Then I thought of Retro Sketches, finding challenge #12, and then searched for another colour inspiration challenge. Instead, I found the Papercraft Star challenge #97,  and Moxie Fab World gingham challenge, where we are to use gingham/checks. This in turn reminded me that I had black gingham ribbon which would go well with the retro silhouette. My first thought was to use red as the splash of colour, but then I found a peach coloured gingham and hoped it wouldn't be too much with the ribbon. I think the peach gingham would be a little more unique than using red.

So, this was the trail of thought as I searched to enter a challenge. Here is the birthday card for one of my twin sisters.


 I hope I didn't get carried away with the little blossoms....Thank you so much for stopping by to have a peek at my challenge entries. Happy crafting everyone!


A Proper Gentleman Father`s Day Project - Scrapbook Parade Class


Father`s day is soon upon us, and I have this fun project for a class. Using a mini printer`s tray and the last of the Graphic 45 A Proper Gentleman paper collection I will be having class to make this wonderful Father`s Day gift.
 
We will take this tray/shadowbox...


...and make this!


And here are a few close ups. First, the top.


Did you see the two little jars? Second the upper compartment...


Then the hidden photos.


Next, the lower compartments with mini-shadow-box scenes.


And lastly, the back with a hidden tab/tag card. I find most men are not card people, so I thought a hidden tag at the back of the project would be more their style.


This will be a fun project to put together on Saturday, June 9th. This will be following my Monochromatic card class on the same day. 

Thank you for stopping by to peek. I`d love to hear what you are making for Father`s day, and if this project inspires you in any way. ;) Happy Crafting!