Showing posts with label Layered Dies. Show all posts

Rescheduling Sailboat Die Class


Welcome

I have been busy of late and I have come down with the flu just before I leave on the 24th to visit my daughter, grandchildren and my sister! Can you believe that? I am doing everything I can to fight this so I can go!

We have decided to reschedule this class class for you. It is a class using a scene die cut called 'Sailboat Frame' by Impression Obsession. Sometimes a person can run out of or not even think of what can all be done with this type of die. So in this class we will be learning a few different techniques that help to step up the look of the obvious basic use for this die and other like it.


IMPRESSION OBSESSION SAILBOAT FRAME TECHNIQUE CARDS

WHEN: Monday, January 14th
TIME: 6:00pm - 8:30pm (If you would be interested in a daytime class, please let us know)
COST: $25 + tax

RSVP: 778-533-4290 OR sbebc2011@gmail.com

These lovely sailboat cards are so Victoria, and can be made very masculine and even feminine. Working with a large die cut or scene die can sometimes stump your ideas beyond the obvious. In this class we will experiment with some techniques that can be applied to these kinds of dies. We will use paint brushes and washi tape to paint ink onto the die cut to add details, and we will create an ink blended scene background to create a faux stained glass look. We will also discuss layering intricate die cuts, and share other ideas that can be done using the Impression Obsession Sailboat Frame die. These techniques can be used on other die cuts too.

PLEASE BRING TO CLASS: scissors, pencil & white eraser, old washi tape which might not be your favourite, Glossy Accents, a pin or safety pin, a couple of toothpicks, paper towel, wipes for your hands and work surface, double-sided adhesive tape (could also use a very narrow at 1/8" or use liquid glue), liquid glue, white pop-ups, non-stick craft mat, 1/4" flat brushes (2 to 4), ink blending tools & extra sponges, heat tool, and as many of the following ink pads as you have -


  • Oxide Inks - Tumbled Glass OR Broken China, Cracked Pistachio, Evergreen Bough, Stormy Sky, Fired Brick, Peeled Paint OR Crushed Olive, Squeezed Lemonade OR Scattered Straw, Worn Lipstick (you can used regular Distress ink pads in these colours, just remember that it will look different than the samples) we will have ink here to borrow if need be....but you will still need your own blending sponges.

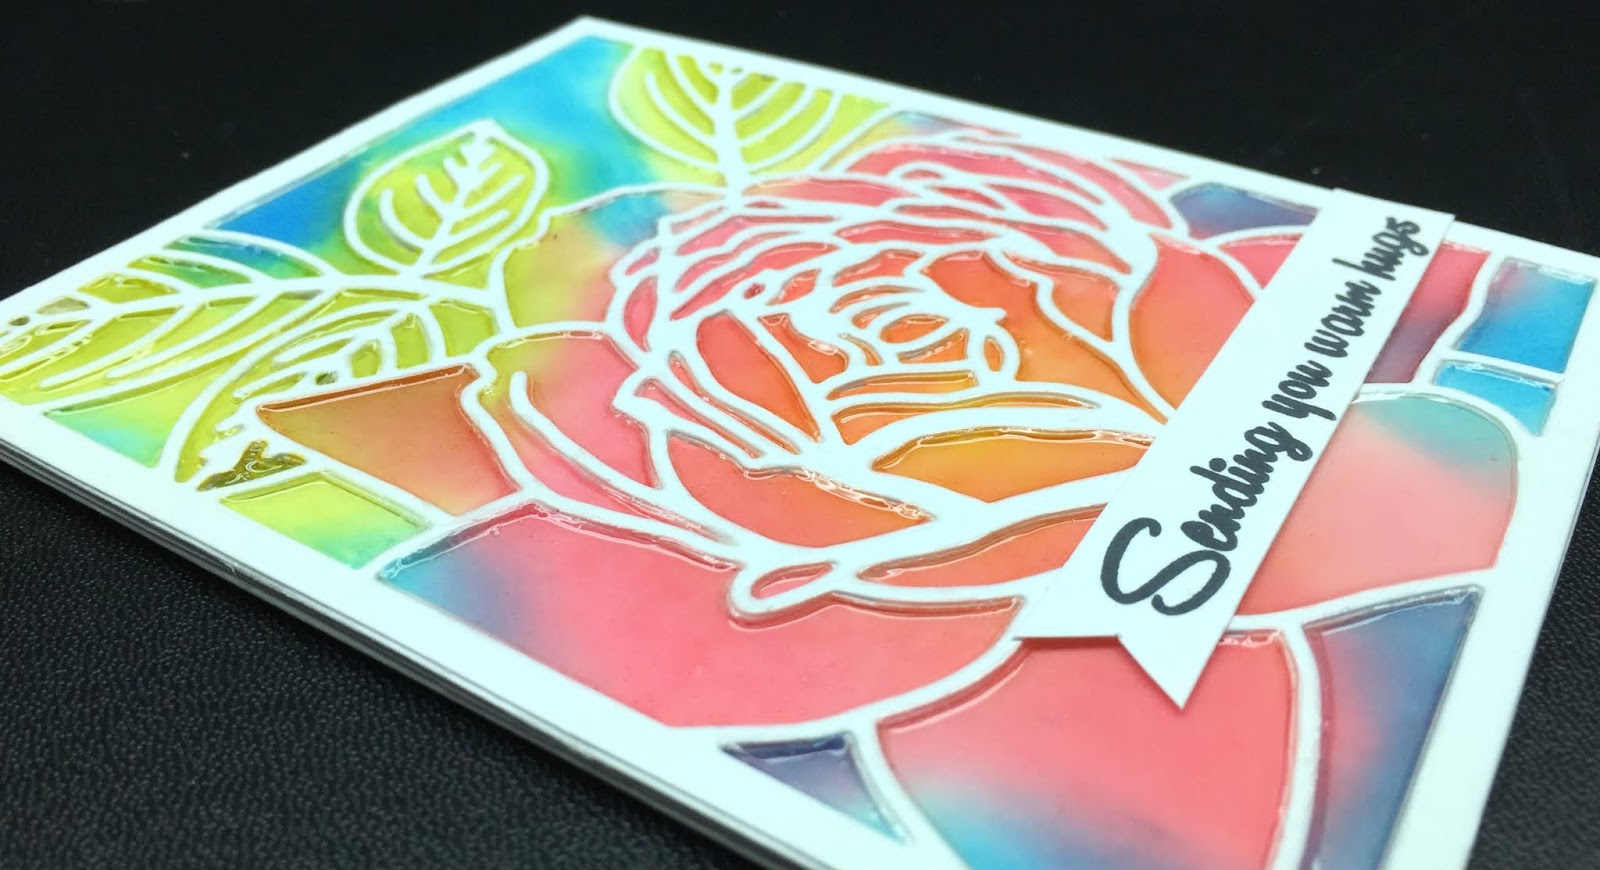
2 Cards Out Of 1 Coloured Die Cut - Altenew Layered Blossom 1


Thank you for stopping by today. Today I am sharing with you two cards that I made from one coloured die cut. These are the two cards.


What I did was cut a 4 1/4" x 5 1/2" piece of white cardstock. At this point I had two ideas to choose from in proceeding. The idea behind this card came from Jennifer Mcquire's tutorial on 'Faux Stained Glass'.  I wanted to create this card using sponged ink colours, rather than the alcohol markers that Jennifer used. I thought I could achieve this in two different ways. 1) just ink blend the colours in the approximate areas, or 2) take out all the pieces and ink blend the pieces individually.

As I pondered this, I thought that I could get two coloured parts I could use to make two cards out of it if I did the first choice. So I went to blend ink colours in the approximate areas. I knew that this would mean the colouring would not be between the lines, but would be loose and interesting.

Once the colouring was done, I then die cut the piece. I kept the individual pieces separate from the frame and lines image.


So, beginning with this card (above), the next thing I did was die cut three more of this die in white cardstock, keeping only the lines & frame parts. I glued these three layers together, and then onto a  4 1/4" x 5 1/2" piece of white cardstock. Next, I glued all the inside pieces where they fit. Then to give it that Faux Stain Class look I filled in all the sections with Glossy Accents. It's amazing to see how it looks when dried.

In this next photo you can see the shine from the Glossy Accents and how it dried.


Here are the side views.


Now let's have a look at the second card made with this die cut.


So, for this coloured frame I had die cut three more layers of thick white cardstock. I like the look of the raised image, so I did not mind working on gluing the layers together. Here is a closser look at the layers.


I cut the backing a bit larger than the frame to give it a matted look, and added the second mat layer behind that.


So that is it for the two cards out of one die cut (sort of...).

Here is the Altenew Die for you to see.


Now you can go and see what you can come up with using the 'Faux Stained Glass' techniques.

Happy creating!


Spellbinders Geranium & Leaves Card Class


Hello Spellbinders enthusiasts!

Today I am showing you the cards we will be making in my 17th Spellbinders Educator class. I can't believe that we have had that many Spellbinder Educator classes already!  This is one of our September classes, using the Geranium & Leaves die set.


SPELLBINDERS EDUCATOR CLASS # 17

GERANIUM & LEAVES CLASS
WHEN: Monday, September 17th
TIME: 6:00 - 8:30 pm (may go a little longer)
COST: $42 + GST (includes $26.95 die)
Contact Stacey at sbebc2011@gmail.com  or  778-533-4290 to reserve your spot

Join us in this class to create not only these two cards, but learn other ways to use this die set. Geraniums come in different colours, which makes working with the die a lot of fun. The geranium leaves can be used in a crunch as lily pads and other types of broad round leaves. The additional long fern and other leaf helps in making floral or leaf arrangements on your projects.
PLEASE BRING TO CLASS: Your die cutting machine and plates, 3 in 1 tool or paper piercer, Stylus tool (like a paper piercer with a ball at the end) thick dense foam for flower shaping, 3 - 6 toothpicks, white gesso (if you have), dble sided adhesive tape, black foam tape or squares, ink blending tool, one of these ink pads - TH Distress in either Weathered Wood or Hickory Smoke, or Memento Gray Flannel, non-stick graft mat, & wipes. Bring a note book and pencil to write down ideas and tips for using this die. If you do not have some of these items, I will have mine there that can be borrowed.


Looking more closely at each of the cards you can see the details like the white centres of each blossom. I used NUVO Glossy White with a tiny drop in the centre and then took a toothpick to spread it out.


Here you can see the details a little closer. See the veining of the Geranium leaves?


In this side view you can see the white sentiment stamped piece is on the black card base with the circle die cut black piece popped up over it to also show an 1/8" border around it.


The next card did not quite turn out as I envisioned it, but is still a beautiful card with the leaves all being gray like the background, and the blossoms pop right out because of their coral colour against the gray.


I used a toothpick again as my brush, but used white thick gesso this time.


I love the "Happy Birthday" peeking out between the blossoms. Here is a closer look.


Did you notice the brushed on silver around the Geranium leaves? This was accomplished using NUVO Mousse and a brush. In real life you can see the metallic shimmer better.

Below is a side view and the only thing pooped up is the heat embossed sentiment strip.


I am looking forward to seeing everyone in class to make these cards.

Happy creating!


Spellbinders Educator Class - Layered Foliage Exclusive Die Set


I am excited to share with you today a class we are having at Scrapbook Essential BC using the exclusive die Layered Foliage!


WHEN: Saturday, July 14th
TIME: 10:00 - 2:00
COST: $38 + GST (includes the exclusive die only available through retailers valued at $20)


Contact Stacey at sbebc2011@gmail.com  or  778-533-4290 to reserve your spot

We are really doing something different for this Spellbinders Educator class. Not only will you be able to get an exclusive layering die set, but we are going to learn a little about working with the beautiful NUVO Mousse as well. You may have seen them in Stacey's store. Because of the details involved in this class we will only be making one larger card. We will be layering die cuts to create some beautiful die cut pieces. You are going to enjoy all the possibilities with both this beautiful layered die set and the versatile Mousse.

PLEASE BRING TO CLASS: die cutting machine and plates, tool-in-one, wax paper (in case you need it), scissors, non-stick craft mat, 1/2" or 3/8" washi tape that you are not crazy about (will be wasted), a NUVO Double Sided Brush (or a stencil brush will work if you have one), a 6" ruler (12" is fine if that is all you have), hand wipes, liquid glue (fine tip or a few tooth picks), mini-glue dots, double sided adhesive, & NUVO Crystals Drops-Periwinkle. If you have your own NUVO Mousse Powder Blue and a palette knife, please bring them to class (there will be some there if you do not wish to purchase your own)


Let's have a closer look at this card. First the side view to see the layers of the card.


These next two close ups focus on the NUVO Powder Blue Mousse applied to the card base edge, the frame of the sentiment, and the stripes on the background. Love that penalized or metallic look.


Here is a closer look at how I layered the die cuts. Some were used with out layering and others where only two layers where used rather than three.


I am so looking forward to teaching this class, because of the new product we will be playing with. Both the dies and Mousse.

Hope to see you there!