Showing posts with label theme - love. Show all posts

Home Decor Wall Haning in 45 Minutes!

Hope you are enjoying your weekend!

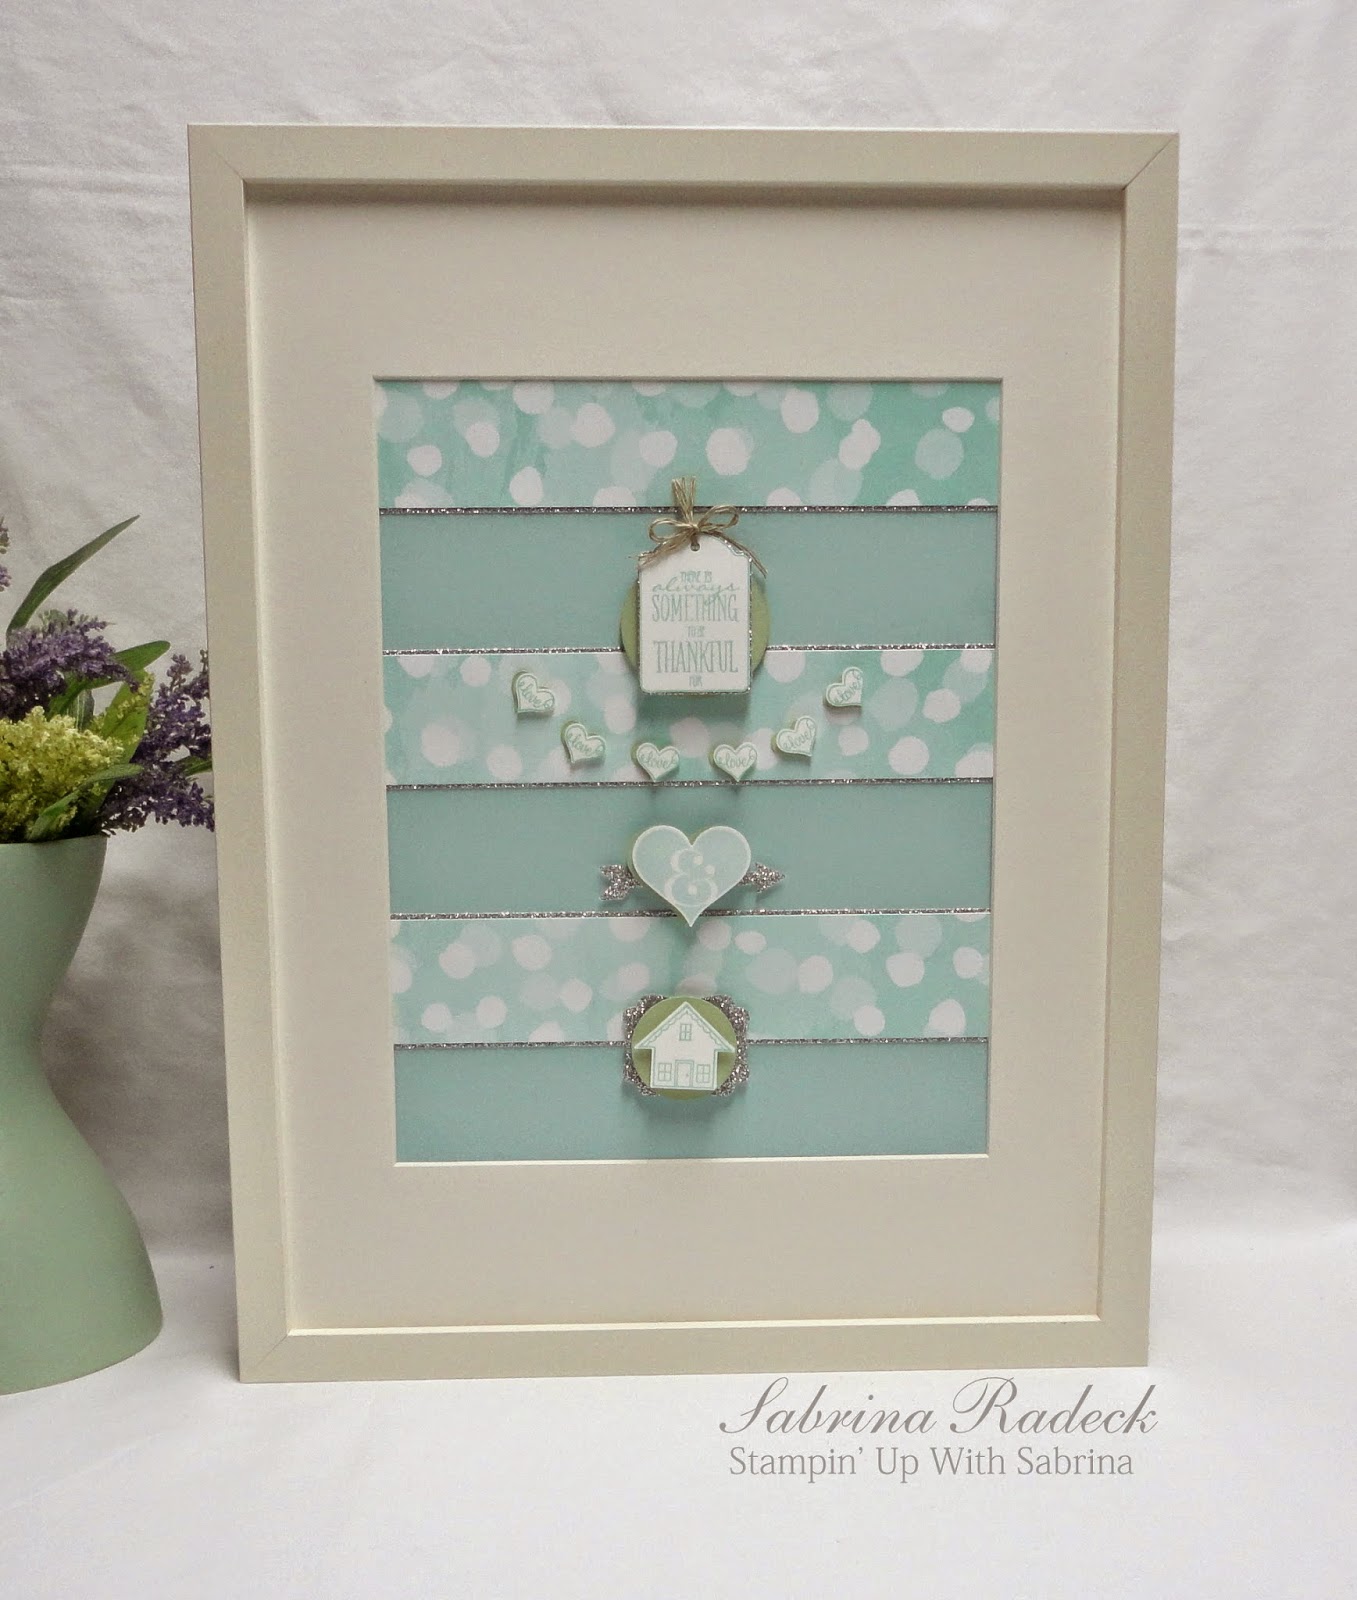
I've wanted to make a really nice wall hanging for my home for a while now, so when I finally got around to it, I thought I would share it with you from today's post at my Stampin' Up blog. I love the colours I chose, and even tried to see if glimmer paper would work for a home decor project.


I think with these colours, it worked well. Back at the end of Summer or beginning of Autumn, I had come across an image, that I wish I had pinned or saved, because it is the inspiration for this project. Do you think I could find it? Nope. So I'm not sure who to credit the inspiration to.

Here is a side view so that you can better see the layering.


I had so much fun making this and was surprised how quickly it came together. May have to use this idea for gifts in the future, and maybe make one or two more different ones for myself.

This frame is from IKEA and measures 12 3/4"w x 16 3/4"h. An 8 1/2"w x 11"h piece just barely fits in the mat area.

A couple of close ups...


What colours would you be using to make a home decor wall hanging?

Thank you for coming to have a peek.

Happy paper crafting!


My Graphic 45 Couture Came!

I was so excited when my Graphic 45 Couture paper came the other day. I've been waiting for what seemed like forever, and now it's finally here! It looks even more beautiful in real. I have several projects in mind for this line and immediately set out to prepare for one of the projects. I decided to tackle one of the larger projects for something that I can't tell you about just yet. But, I can tell you that it takes 34 sheets of the Couture paper as well as a whole pack of Bazzill Cardshoppe Licorice Twist, and 3 sheets of 12 x 12 black chipboard!

I cut up most of the paper in preparing to assemble it this big project. I decided however that I needed to get some different ribbon. So that means until I can get it, that project is on hold because I can't go any further. Rats! So, since I have all my Christmas cards completed, and more (made between teaching the Christmas Club classes all year long, as well as being on the DT for Christmas Card Challenges until last month), I was free to make a non-Christmas card for a change using the 8 x 8 version of Couture!

So without further ado, here it is.


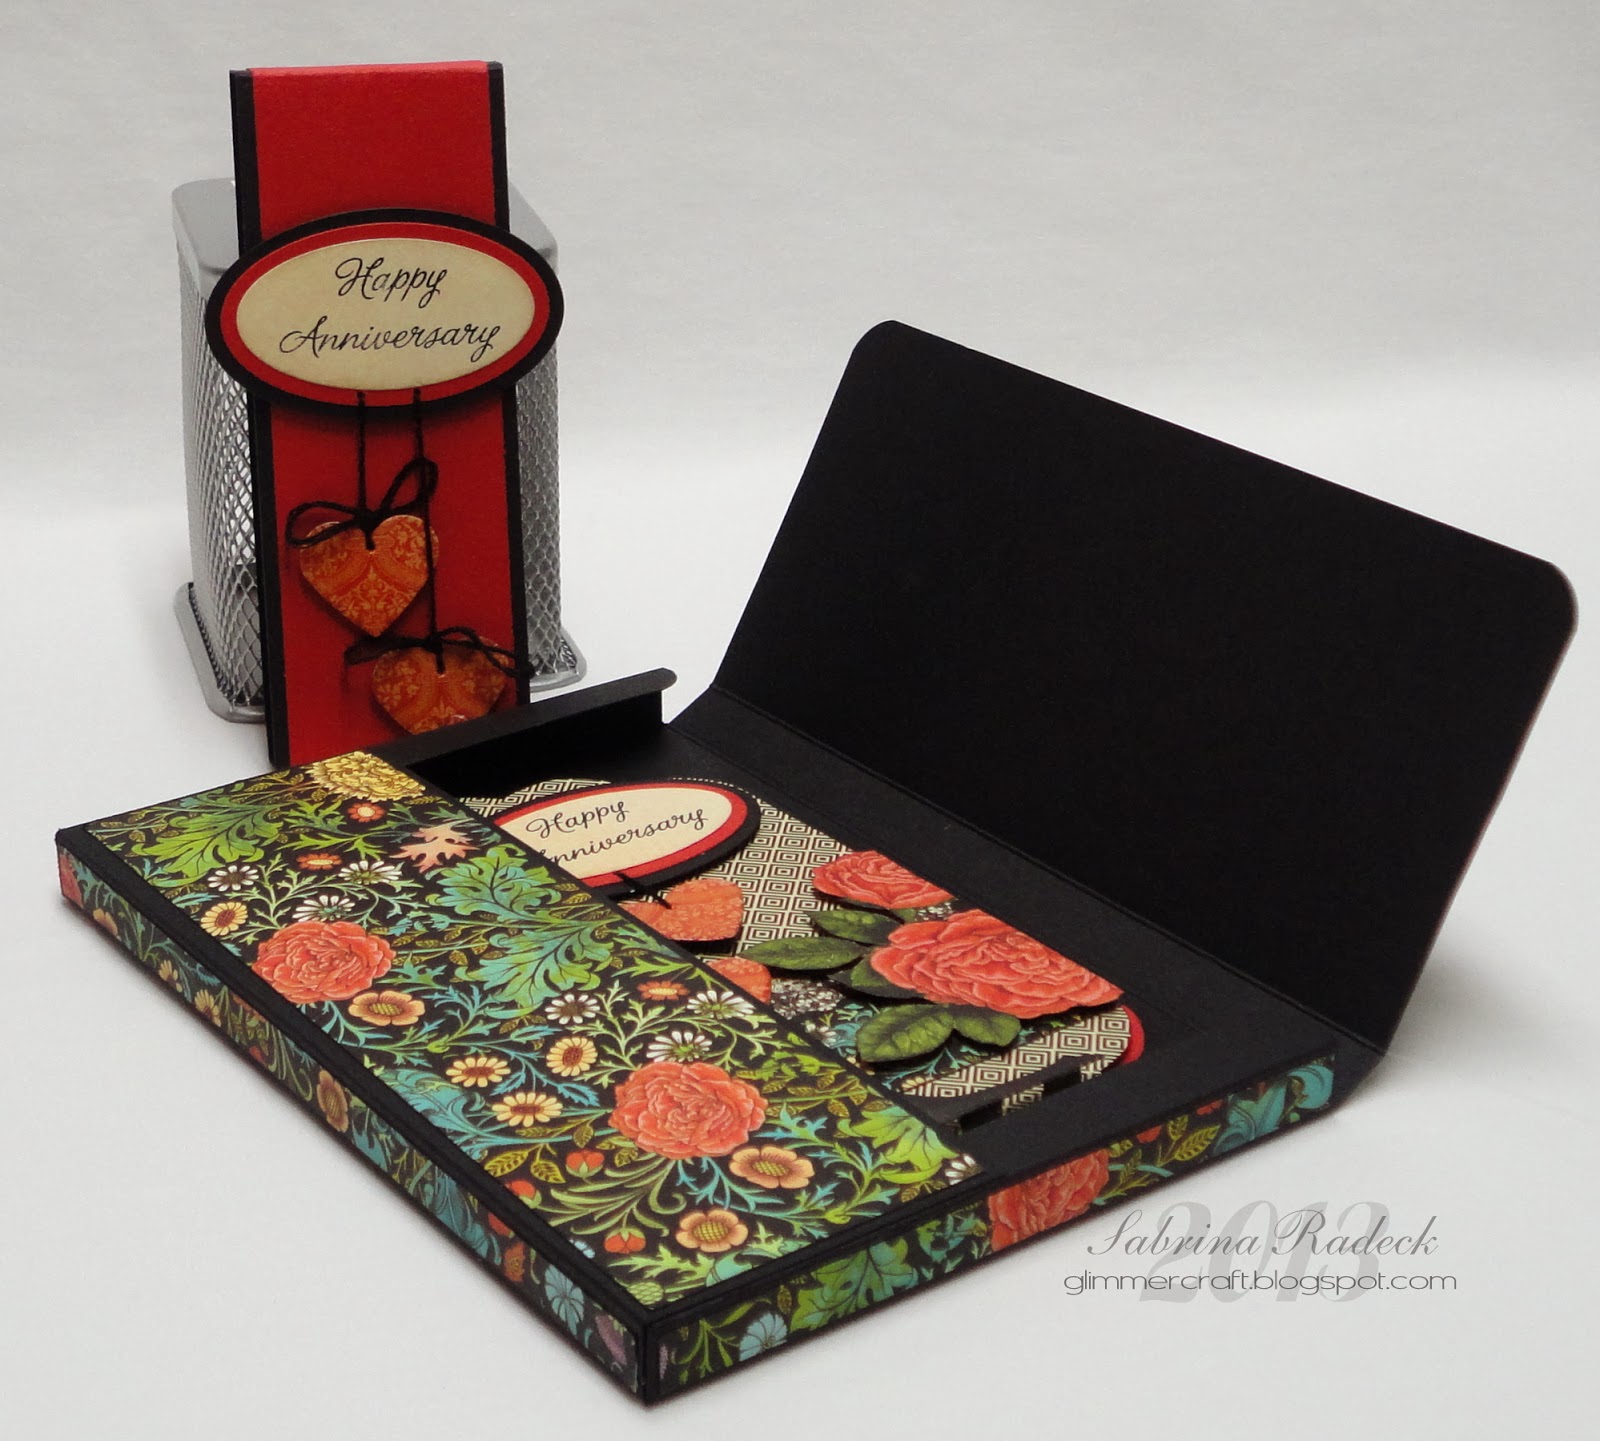
As you can see, since the 5 x 7 card is thick with popped up layers, I decided to make a card box to encase the card and protect it. This would make a beautiful Valentine card too.

So let's have a closer look, shall we.


The box is 1/2" thick and has a belly band to keep it closed. I used 1 1/2 sheets of the 8 x 8 "Gorgeous". The Anniversary oval and hearts are popped up with black foam dimensionals. The Cream oval is from the 6 x 6 pad, while the medium sized oval is die cut from Bazzill Red Rock.

To create the hearts, I took a scrap after cutting what I needed for the card and box, and glued it onto 100# black cardstock. Before the glue dried, which would make it harder, I punched four hearts out with a Martha Stewart Heart punch and used a black marker around the edge to hide the white paper core. Then came the Glossy Accents, and I set it side to dry.


Once they were dry, I used my paper piercer to punch a hole through. The oval sentiment also has two holes pierced in it. The black floss is fed through the holes of the oval as one piece. The hanging ends are then used to attach the hearts onto, and then popped up with black dimensionals.


You'll see that the edges of the Couture paper is all edged in black to cover the white paper core. I did the same on the card.


 You can see that the oval sentiment and hearts are repeated on the card. Again I did one of my favorite things; fussy cutting! The fashionable woman, the rose, the lace and floral strip, hearts (from the back) and the roses are from one 8 x 8 sheet (Couture). The Red Rock cardstock is used again, both on the outside and the inside which you'll see in the next photo. The background pattern paper is the back of the 8 x 8 "Style" and both the Red Rock and the pattern paper I traced one of the Grand Labels Eleven and trimmed slightly less with each layer since the black card base was die cut using the same die.

Maybe I should mention that the woman is popped up with two layers of dimensionals, while the oval, hearts, and roses only have one layer.


Here is the inside of the card. Sorry that it may be a little on the blurry side.


These stamps that you see here are cut from the same sheet as the woman was cut from. I added Glossy Accents to the red balls of the ear ring at the top stamps, and Star Dust Stickles to the diamond hearts entwined brooch at the bottom stamps.

So I hope that you enjoyed your little walk through on the making of this card. I just love the beautiful colours of this line and the wonderful fashions depicted that are from my grandmother's time.

Interactive Circular Chipboard Album

- a fun project, and something I've wanted to make for myself for quite a while!

Hello everyone! I'm here to show you a fun project for a class where we use Echo Park's Circular Chipboard Interactive Album. I used My Mind's Eye Collectable "Memorable" collection making this a 'girly' or spring/summer project.

 
This is what it looks like before I started. It has these fun pull outs for each of the three pages in the album and comes with the rings. I painted the edges white before covering it all with the beautiful papers.

I've always wanted to make a little album that didn't have many pages so that I could showcase a couple of more recent photos for each of my five children and their families. That way I would have something to go to that had them all in one album. I thought this project fit the bill for the Echo Park ablum.

I thought that I wanted to something a little different than a bunch of flowers on the the album as is tradtionally seen with this kind of a project, and since the focus was 'family', I thought"hearts"! Why not use the circle theme along with hearts? And this is what I now have.
Front Cover...
 Front cover pull out ... I used for an intro (journaling)


Opened to view double pages...


You can see that I used photos in a 4 x 6 size, which I usually don't like to do. But for  me, it worked very well in this project.

The first page is for my eldest, Dana, and her three children...


I continue with the circles and hearts throughout the album. Each little circle and heart has faux stitching around the edges, as well as the pages themselves.

I also used Library cards, which are archival and acid free, etc., matted to make my journaling tags tucked in behind all the photos on the pages.


The next page is for my oldest son and his family...First we see my lovely daughter-in-law with the girls.


The 4 x 6 photos fit perfectly in the pull outs of the album.

As we turn the page, we have the page for my daughter Eva and her family, and then my youngest son and his girlfriend. Unfortunately I couldn't find a photo of Eva and her husband with their two children, so I ended up using my grandchildren's latest photos until I can insert a better one.


That's my newest grandchild, Wyatt, in the cute bunny ears for Easter.... Let's see the pull out.


That's his big sister Claire, who will be turning 6 soon. The punched circles and hearts, and the library card tags continue throughout.

Here's the pull out of my younger son's page...with his beautiful girlfriend...


Sorry about the glare on the photograph.

The last page is for my youngest daughter. Just her in the photos, and wouldn't you know it that when I resign myself to using photos that are a couple years old, after the fact, there are suddenly new photos of her I could have used! Oh well, I can use them for another project.


Because I have a photo on the back I created another page by tracing the shape onto two pieces of cardstock and gluing them together. (The class will get a better matching cardstock. I didn't have any at the at the time I made this.)


Because both photos were landscape, I had to square this one off and tuck the journaling tag in differently than all the others.

...and this is what the back looks like...


Well that's it for this project. But, I do have a little run through video that you might like to watch.

Hmmm, having problems again...so here's the link - http://www.youtube.com/watch?v=jMtsTxTsoMs&feature=youtu.be

 Thank you for checking to have a peek. Happy papercrafting!
To You. From Me. With Love.

I'm loving me some crafty time! I pulled out some Limeade Ice cardstock to go with some teensy Kraft strips.


After white embossing the sentiment, I ran the Kraft strips through my 1" Xyron and then through my Fiskars crimper. A bit of spattering and done!


{Supplies--all Papertrey Ink unless noted}
  • Cardstock: Limeade Ice, Kraft
  • Stamps: Mini Blooms
  • Ink: Versamark (Tsukineko)
  • Other Tools: white embossing powder (Filigree), paper crimper (Fiskars), Winter Pine Glimmer Mist (Tattered Angels), Opaque White Mister Huey's mist (Studio Calico)

Fun Chalkboard Cards

For the past few months I've noticed what seems to be a comeback for the  Vintage Chalkboarding style and techniques for not only restaurants and the like, but in printing invitations, cards, brochures, and so much more. Of course the handmade card industry picked up on this and has come up with a few techniques to apply in cardmaking and scrapbooking.

This is mainly using stamping, inking, and colouring techniques and after Googling Chalkboard art, I was so very excited to experiment with some  techniques. I had so much fun with it, I just had to have a class at Scrapbook Parade to share this fun style and some of the techniques I discovered.


So hear are the 4 cards we'll be making in class in early February.


There is a large card on the left (5 1/2" x 8 1/2"). Often people like to give larger cards than usual for Valentines, so I thought it would be fun to make a larger card. Lets have a closer look at it.


I suppose it could even be used for a wedding or anniversary.

Next is a congratulatory card with stars.


I think this one is my favorite one of the four. Next is a Birthday card and my 2nd favorite.


And lastly, a chalkboard "Thank You" card.


I had such a blast with this style of card. I now want a bunch of stamps to take this style a step further. So, are you inspired to try out this technique/style? Have fun with it.

For those of you taking the class in February, at Scrapbook Parade, here in Victoria, the list of what you need to bring is at the very end of this post.

Thanks for stopping by everyone, and happy crafting!


Read the "what to bring to class list" carefully.

-paper trimmer
-scissors
-pencil
-ruler
-clear stamping blocks
-stamps that will work for this techniques based on these class samples and what you've researched online
-VersaMark ink pad
-ink/stamp cleaning stuff
-
stamping Anti-static pad
-ink blending tool
-coloured pencils & pencil sharpener (pencils must be sharp as we use them)
-dbl sided adhesive
-quick dry glue
-dimensionals (pop-dots) black & white
-white gel pen
-small black ink pad or a black marker
-small hole punch


You Color My World

There's so many things to do with a sentiment like You color my world.


I had to leave my craft room overnight to ponder how I would apply the sentiment. I'm glad I did because I've wanted to try this type of banner sentiment for some time but it took me awhile to remember that. ;)


I heat embossed the Paper Smooches sentiment in white on a long strip of vellum. I scored it here and there to get it to fit artistically. I adhere it using those little Kool Tak squares. They're expensive but awesome!

I'm entering this card into the WCMD Love card category over at Moxie Fab.

Thanks for peeking!


{Supplies}
  • Cardstock: Stamper's Select White and Vellum (both Papertrey Ink)
  • Patterned Paper: (Cosmo Cricket)
  • Stamps: Word Salad (Paper Smooches)
  • Ink: Versamark (Tsukineko)
  • Dies: Hexagon coverplate and Heart Prints (both Papertrey Ink)
  • Other Tools: Pure Poppy felt (Papertrey Ink), white embossing powder (Filigree)

October Colour Series - Purple Velvet - Scrapbook Parade Class

I've had a very busy day today!! I've been working since 10:00 am and it's now 2:30 am! I've made the six A2 cards for October's Colour Series Card Class, as well as three of four Christmas Crackers for a future class, and started on the Advent! No wonder it's the next morning! I'm not a bit tired though. Having so much fun with this all.

I'm not going to write a lot of details for these six cards, but I do have more than one photo for each card so that you can see a few of the details.

Here is a photo of all six cards together.


So these are they, and I have about another 15 photos. Hope you don't mind. But I like to post each card and a one or more detail shots for those who can't finish the class and need a reference from home, or for those who buy just the kit.

So, the first one I'm showing you is the one with ruffles made from paper. I've done that before, here, and there's a link there to Claire Buswell's blog who shared the idea with a tutorial.


I just have to brag a little here. Those pearls you see on this card, the rest of them too, are Liquid Pearls! I think I did a great job on this one.

And a detail photo showing the three popped up layer and the ruffles.


Next we have the purple and bright green card with some ink resist.


Made a mistake on this card that I didn't want to take the time to fix. Since the card is on a cream card base and the snetiment is stamped on like colour, I used the same for the ink resist and once the colours soaked in it doesn't look right. I should have done it on white. the class will get white.

In this following photo can you see the three layers and the bowed sentiment banner?


Now comes the purple and brown with the huge bow!


A couple of detail shots for this card. First from the right side...


...and now from the left side.


Here's a good card for a special anniversary. 50th would be good since there's gold with the purple.


And a side view...


Love the Labels 28 on this card. Next we have a "Wish" card that could be for a birthday, get well, wish you were here, miss you, etc...


And a side shot...


Again, love that Labels 28. And the last card is quite wild. Purple with turquoise and bright green. We'll be doing a little bit of water colouring on the flowers. As for the carnation, you've seen me do that a couple of times now. I got this idea from Claire's blog as well when I entered a challenge, here.


I tapped the Versa Magic Purple Hydrangea Dew Drop ink pad on the carnation ends. I like the look and will try it on others in the future. Here is a view from the bottom...


...a view from the right...


...and  view from the top.


I hope you had fun checking out these colour combinations and card designs. There are so many colours a person can use with purple. What colour would you like to try with purple?

Thank you for stopping by for a visit today, and I hope you've been inspired too. Happy crafting!