New Bullet Journal and June Set Up


May has flown by, and June is upon us. Time to show you my June bullet journal set up. I did not do any drawing this time, but ordered some beautiful watercolour stickers. I wanted to save time setting up my new month and getting the stickers did just that. I also punched out circles from a lovely sheet of 12 x 12 card stock with beautiful circles of watercolour painted birds and cherry blossoms. The interesting thing is that both of these came from Germany.

I made some changes in my layouts, and will explain them as we go through the photos.

To start out with, I completed my second bullet journal ending with May, so for June I had to set up a new journal. That is what I will begin with.

I decided to add a little something to the start of the journal with a circle punch watercolour painted bird. I used my gold metallic pen to trace around the circle which was a mistake because I had planned to use my newer silver metallic pen. I did remember to use the silver pen to write the index title with. It is a little hard to see in the photo, but looks real nice in real.


Next, I always need to have the year calendar in each journal as it is helpful with future planning. If you are wondering about the green washi tape, the page started to come out a little along the perforation and I had to tape a little part of it. But it did not look as good as taping the whole length of the page.


I like the silver metallic ink around the 2018.

The next spread is my four month future log. Each journal I have seems to hold three months, so four months is perfect.


Now comes my June set up, beginning with my 'Hello June' page. This is where I start to use the beautiful stickers that I ordered, and I added one of the bird circles that I punched out.


I love having my monthly calendar as my monthly over view. It has a little more detail than my four month future log, but not as much as my weekly spreads. Just enough info for planning. Don't the stickers look lovely? And so quick to add too. I also added some real narrow washi tape along the right side and bottom. I love the little date stickers that match the watercolour stickers.


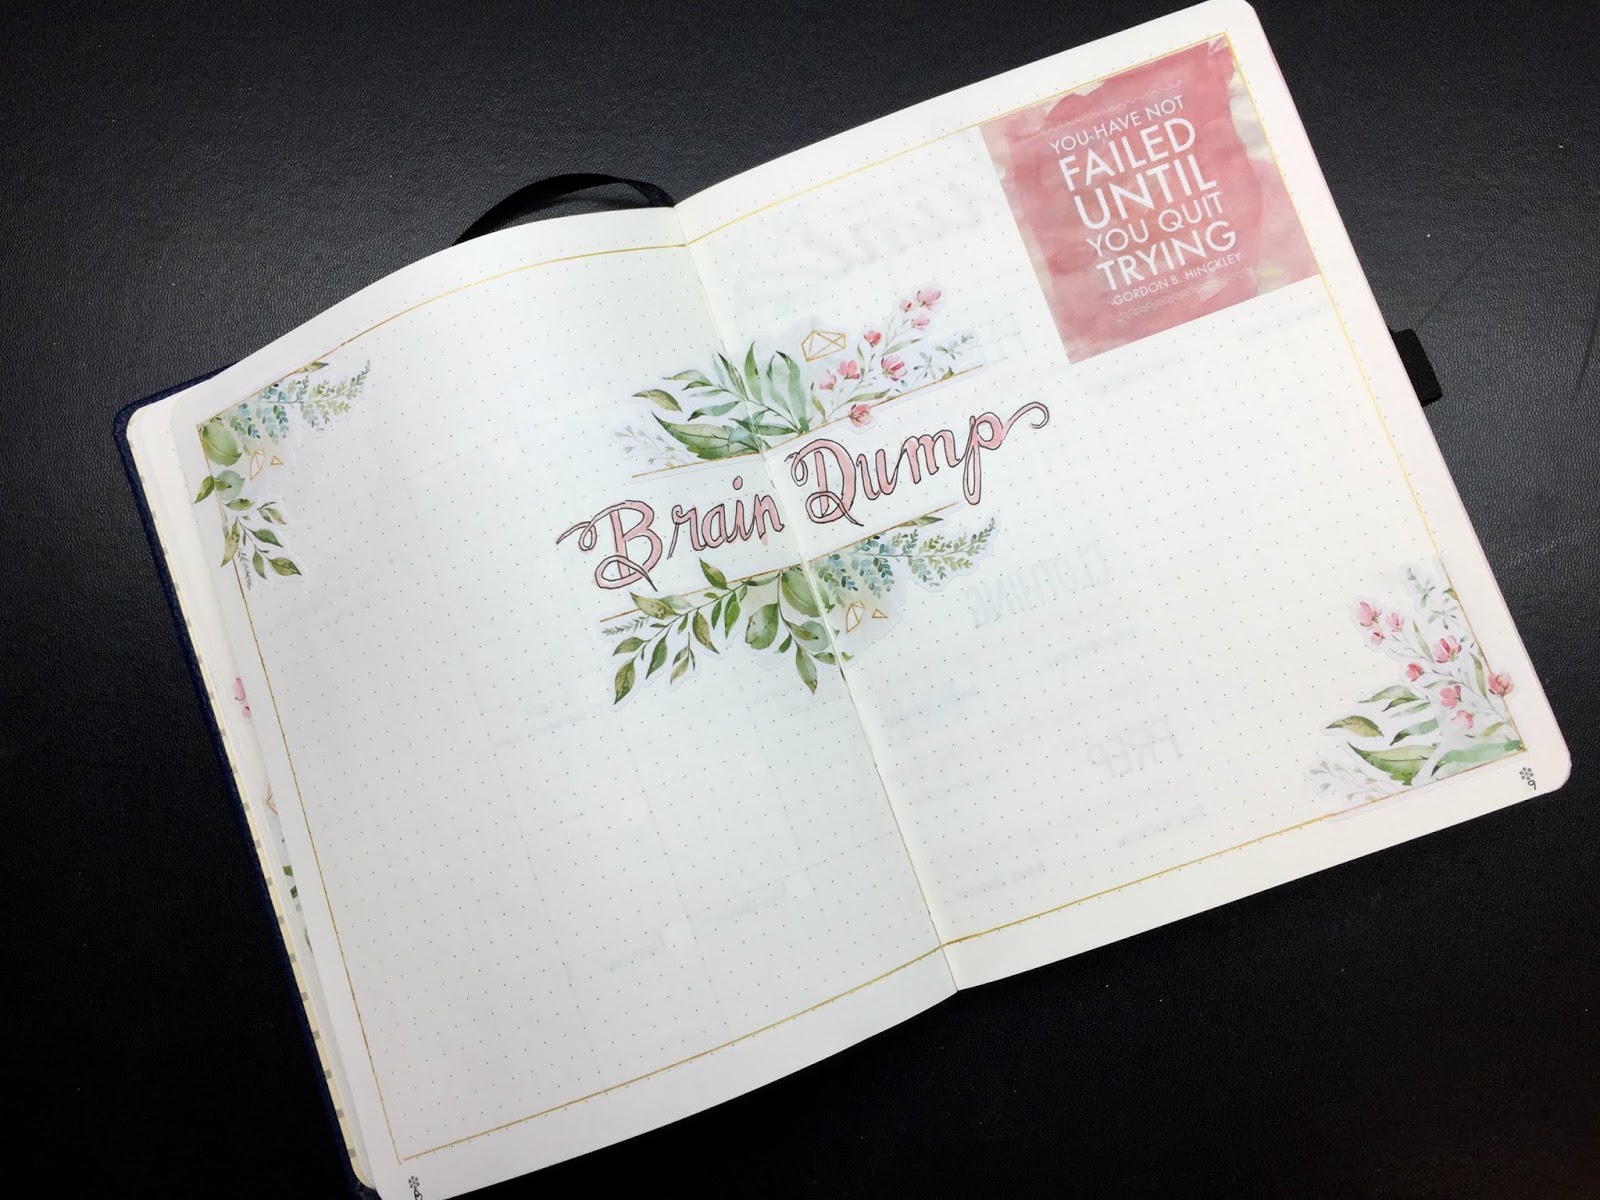
I love using my 'Brain Dump' page. I use a good portion of it, and refer to it when I set up the following month, because sometimes there are things in the dump that I can implement. I decided to add this quote in that space, as I usually have a little left over space. (I messed up here and used my gold metallic pen. Might change it to silver still.)


The next thing in my June set up is my financial spread.


Now comes the Habit tracker spread. This is where I made a big change. It was a lot of work to set up compared to my usual set up, but I think it will be helpful visually. I will see how it works out this month and decided if it is better and worth the extra work, or not.


The next spread is one that had wanted to put before my financial pages, but forgot. It is for my future card classes and any kits I might make. I always need to make samples for and prepare for classes a month or two in advance, so this is helpful in keeping things straight with a quick view. The larger space is for the photo of the projects and the right side is a check list to get it off and going.


My weekly spread is next. I kind of messed up the layout. I meant to have Sunday on the left side. That was one reason I decided to make the dates in large numbers, but light in colour, so that I could write over them. As you see the weekly layout is a different set up than the one I used last month or the previous months.

I added a quote sticker I had made, along with some of those circles I mentioned punching earlier.


I added my food tracker at the bottom of each day and drew a line through the six days to divide up into personal, work and church space. I used the silver metallic pen for those. It is visible enough to see the lines, but light enough to go over the line if I need more space.

The next spread I created my 'Gratitude Log' like I usually do, but realized it was the wrong thing to do since I did not have the food tracker to put next to it. I now had an empty space on the page. I am thinking that I might find something to fill in the space as I go through the week.


Do you like the pens and pencils washi tape, and the house sketches washi tape? Next time I use them, I might colour them in.

The last part of this weekly spread is my weekly journaling section. Because we are having a family reunion in July, I wanted to save space just in case I need more space for that, so I decided to continue with a 1/2 page per day for my daily journaling for June. It doesn't allow much space to include a photo is I would like to do on occasion, but I can go back to that in another month.


Well, that is it for my new journal, June, and first week set up. I did make some very minor changes in the next week's set up, but you can see that in the next bullet journal post.

Happy journaling, and creating!


A Simple Birthday Card For a Grandaughter - G45 'Fairie Dust'


My grandchildren are getting older, and for most of them I can not make those cute little fun kind of children's cards any longer. For a granddaughter turning 9, this pretty paper from Graphic 45 the  'Fairie Dust' collection, works just fine. I forgot to glimmer up the wings though!


As you can see this is a quick and easy, and a mailable card. Just fussy cut around the broader of this cut-a-part from the paper cutting away the framing but leaving what went over the edge of the inner frame.

You can see in the photo below, that the layering was simple too.


I always enjoy making cards for family members, but it is even more special when it is for a grandchild.

Happy creating everyone!


Another 'Not For Class' Post - Spellbinders & Graphic 45


As I said a couple of days ago, when I posted two other birthday cards, one of my favourite Graphic 45 collections is the 'Floral Shoppe' collection. Today I added a piece of light yellow card stock that matches the background yellow of the paper beneath.


I used the Spellbinders 'Botanical Heart Pair' to die cut from the dark purple blue script paper as well as the white botanical heart. The sentiment stamp is from Altenew's 'Build a Birthday' stamp set.

Here is a bit of a close up side view focusing on the heart.


In this next photo you can see the layering of the card.


Hope that you liked this card. I love seeing the rose peeking through the details of the die cut.

Happy creating!


Christmas in July Class with Bobunny Christmas Carousel


I can't believe it is that time of year where we pull out Christmas product to start preparing for Christmas! It is great to be prepared and not rushing around at the busiest time of the year trying to get your cards made.

These are the eight cards we will be making in class.


WHEN: Saturday, July 28th
TIME: 10:00 - 2:30 (1/2 hour lunch break)
COST: $48 + GST

Contact Stacey at sbebc2011@gmail.com  or  778-533-4290 to reserve your spot

Christmas in July is here! What a great way to start getting your Christmas cards ready to send off in November! We are going to use the beautifully coloured papers created by Bobunny - Christmas Carousel - to create eight 5 x 7 Christmas cards. There are three parts to this class - 1) HOMEWORK which will be ready for you on July 16th in the afternoon, 2) working with NUVO Mousse to set aside and dry, & 3) assemble our 8 cards. We will be doing three different things with the NUVO Mousses -rubbing, stencilling & brushing. You may want to wear clothes that can get messy, just in case.

PLEASE BRING TO CLASS: homework, lunch & leak proof drink, paper trimmer, scissors, double sided adhesive tape, NUVO Crystal Drops Glossy White, Glossy Accents, liquid glue, mini-glue dots, white 3D Foam tape and squares, non-stick craft mat, paper towel & wipes, palette knife, & Christmas stencils. OPTIONAL (available through Stacey's store or order) NUVO Mousse - Powder Blue, Indian Gold,& Mother of Pearl, NUVO double sided brushes, NUVO Crystal Drops - Gloss White, plastic palette knives, Tim Holtz Mini Stencils Set 19.

Let's have a look at each of the cards individually.


I must say that using the NUVO Mousse on these cards was a lot of fun and added some extra special touches to these Christmas cards. Hope you are inspired to get some to play with. You will love it! There are several YouTUbe videos out showing you what you can all do with the stuff. A very versatile product to have.

Se you in class, and happy creating everyone!


Spellbinders Educator Class - Layered Foliage Exclusive Die Set


I am excited to share with you today a class we are having at Scrapbook Essential BC using the exclusive die Layered Foliage!


WHEN: Saturday, July 14th
TIME: 10:00 - 2:00
COST: $38 + GST (includes the exclusive die only available through retailers valued at $20)


Contact Stacey at sbebc2011@gmail.com  or  778-533-4290 to reserve your spot

We are really doing something different for this Spellbinders Educator class. Not only will you be able to get an exclusive layering die set, but we are going to learn a little about working with the beautiful NUVO Mousse as well. You may have seen them in Stacey's store. Because of the details involved in this class we will only be making one larger card. We will be layering die cuts to create some beautiful die cut pieces. You are going to enjoy all the possibilities with both this beautiful layered die set and the versatile Mousse.

PLEASE BRING TO CLASS: die cutting machine and plates, tool-in-one, wax paper (in case you need it), scissors, non-stick craft mat, 1/2" or 3/8" washi tape that you are not crazy about (will be wasted), a NUVO Double Sided Brush (or a stencil brush will work if you have one), a 6" ruler (12" is fine if that is all you have), hand wipes, liquid glue (fine tip or a few tooth picks), mini-glue dots, double sided adhesive, & NUVO Crystals Drops-Periwinkle. If you have your own NUVO Mousse Powder Blue and a palette knife, please bring them to class (there will be some there if you do not wish to purchase your own)


Let's have a closer look at this card. First the side view to see the layers of the card.


These next two close ups focus on the NUVO Powder Blue Mousse applied to the card base edge, the frame of the sentiment, and the stripes on the background. Love that penalized or metallic look.


Here is a closer look at how I layered the die cuts. Some were used with out layering and others where only two layers where used rather than three.


I am so looking forward to teaching this class, because of the new product we will be playing with. Both the dies and Mousse.

Hope to see you there!


Not For A Class! Graphic 45 Floral Shoppe Birthday Cards


It's not often when I can post something that I have made, that is not for a class! Today I am posting two cards that I quickly threw together with leftover pieces I had fussy cut for a class and were waiting for me to use them. And it is from one of my favourite G45 collections! Floral Shoppe!

I made two cards as in mid June my two sisters will have their birthday. They are twins and have their birthday on my Dad's birthday! So three on one day! Let's have a look shall we.


As you can see, with the fussy cutting having already been done, these cards came together real quick. This first one has the exact same image popped up over the identical image on the paper under it.


Just love this purple blue floral.


Did you notice how the lines match on the popped up piece over the background base?

I know that my sisters will love these cards, and I am grateful that I had leftover fussy cutting that enabled me to put these together quickly so I can mail them off soon, as June is fast upon us.

Thank you so much for stopping by to have a peek. Hope you are inspired in some way.

Happy creating!