Stamping Vacation DT: Lots of Paper Challenge

This month's Lots of Paper challenge over at the Stamping Vacation blog asks us to use paper that looks like fabric, such as linen or gingham. I hunted through my collection and was ecstatic to find some denim-looking paper!  With it, I created these:


I think of them as my "Bald Dragonfly" cards... I hope Karen doesn't mind! ;)

I couldn't decide which one I liked better...


Anyone have an opinion?


Thanks for stopping by!


{Supplies--all Papertrey Ink unless noted}
  • Cardstock: Kraft
  • Patterned Paper: denim (unknown brand)
  • Stamps: Fillable Frames #1, Fillable Frames #2
  • Ink: Dark Chocoalte
  • Buttons: Terracotta Tile
  • Other Tools: jute twine

Valentine Series - Woven Ribbon


I always find black, white, and red a most striking color combination. This fourth card of the Valentines series is once again, one made from my scraps. The Spellbinders heart is popped up and with the Spellbinders Lotus Border Petites strip I wove the ribbon through it. This one is not quite as simple as the others, but it's close enough.

Today, I can rest up a bit and go to church here in Calgary for the last time before leaving. Still a few more in my Valentines series scheduled for you to see. So check in again.


Valentine Series - Heart Stamps & White Space Challenge


Of all the Valentines cards of this series, I believe this one is the simplest, or most CAS if you wish. Just three red hearts stamped at the bottom with a ribbon tied up in a bow over them, and a sentiment with a pearl. Very Easy to make, and so quick! I'm used to spending so much time with more details to work with. I must make more easy cards like this in the future.

Thanks again for stopping by and I hope you're having a good week. For me it's moving day tonight. Getting all my belongings stored in Dana's basement, cleaning the condo tomorrow, walk through and hand in the keys on the morning of the 31st, and then off to Victoria on Monday the 1st. I can't believe haw quickly this month has gone by. Happy creating to you!

ADDED LATER

Dana suggested that I enter this card on Stamping Vacation's White Space Challenge. So here I am all tired from moving things out, and entering this card. I love Dana's DT card. Thanks for encouraging me, Dana! ;) The funny thing is that we each made our cards around the same time without the other knowing! lol.

Stamping Vacation DT: White Space Challenge

This month's White Space challenge at the Stamping Vacation blog invites us to create a white card with 3 of anything. Easy-peasy! I chose hearts since Valentine's Day is coming up...


I scored lines across the top and bottom, added a strip of white that I impressed with Sheet Music and stamped the sentiment from this month's sponsor, The Stamps of Life. The hearts were die cut and stamped using Heart Prints from Papertrey Ink.


{Supplies--all Papertrey Ink unless noted}
  • Cardstock: Stamper's Select
  • Stamps: youare2kind (The Stamps of Life), Heart Prints
  • Ink: Pure Poppy, Hibiscus Burst, Berry Sorbet, Tuxedo Black (Memento)
  • Dies: Heart Prints
  • Impression Plate: Sheet Music
  • Other Tools: Scor-Pal

Cheerio Mon Amie!

I have a friend embarking on a trip to London soon and couldn't pass up giving her this book I found at Costco.

I made a quick tag to go with, of course!


This uses Small and Large Labels (Spellbinders) and Waltzingmouse Stamps.


{Supplies}
  • Cardstock: Ripe Avocado, Vintage Cream (both Papertrey Ink)
  • Stamps: Seasons of Love - Tags, Fancy Phrases (both Waltzingmouse Stamps)
  • Ink: Rusty Hinge, Forest Moss (both Tim Holtz Distress Inks), Dark Chocolate (PTI)
  • Other Tools: cream twine (PTI), ribbon (Michaels), clear embossing powder (Filigree), Big Bite (tag Hole)(We R Memory Keepers)

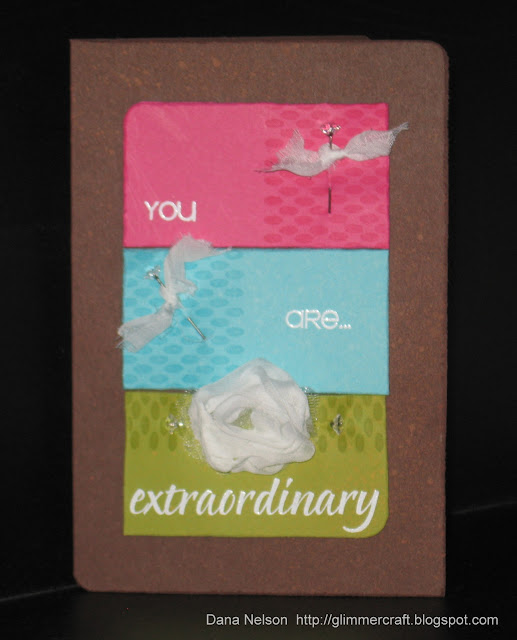
Paper Crafts Color Inspiration Challenge #1: Dana

I LOVE this color combo and had to participate in the Color Inspiration Challenge #1 put on by Paper Crafts.

I'm really not sure I'm pleased by the end result. I was going for unique and think I came out with weird... ;)


It's hard to tell from the picture but each of the colored cardstock pieces are distressed and the whole card has been misted with bleach.

I rounded alternating corners, stamped some background pattern and added some interesting flair. Kind of a marriage between vintage and contemporary...

This card was also made with Papertrey Playhouse's current challenge in mind. It asks us to create a Valentine's card with non-traditional colors...

Thanks for stopping by!


{Supplies--all Papertrey Ink unless noted}
  • Cardstock: Dark Chocolate, Raspberry Fizz, Hawaiian Shores, Simply Chartreuse
  • Stamps: youare2kind (The Stamps of Life), Background Basics: Geometrics
  • Ink: Versamark (Tsukineko)
  • Ribbon: American Crafts
  • Other Tools: white embossing powder, bleach, paper distresser (Tim Holtz), pins (Making Memories), Corner Chomper (We R Memory Keepers)

Valentine Series - Kraft


For the second card of the series, I decided to show you this scrap kraft card. The paper piecing around the edge of the card was done for another card and ended up not being used. The white scalloped Spellbinders circle was one left over from a previous class somewhere along the way, and the Spellbinders hearts are cut from scraps.

The bubble-like flourishes are white heat embossed and each layer of the circle and 2 hearts are all popped up.

Well that's it for this one. I think I kept my goal of keeping it simple. It's more mailable that way too. Check out the next one when it comes. Thanks for stopping by.


Papertrey Ink Blog Hop: A True Friend is You Friend

I am constantly reminded how grateful I am for my friends!


This is an unusual color combo for me but I would def use this card base idea in the future! This is my first time using my Garden of Life and Fillable Frame #11 stamp sets. I've also never used anything out of Beyond Basic Borders other then the main tree-like image.

First, I heat embossed the flower swirls (Garden of Life) with Kaleidoscope embossing powder, which gives them that glittery look. Then I stamped the solid flowers with Versamark Dazzle: Frost ink.

Considering that I distress inked (Peeled Paint) the Simply Chartreuse strip (stamped with Beyond Basic Borders), I should have distress inked the Plum Pudding card base as well. Oh well.

The Mat Stack 4 layer was die cut on Dark Chocolate cardstock and then "sugared" using a Xyron and glitter. The Fillable Frame #11 is Summer Sunrise cardstock stamped with Terracotta Tile ink. The sentiment is Dark Chocolate ink.


{Supplies--all Papertrey Ink unless noted}
  • Cardstock: Plum Pudding, Simply Chartreuse, Dark Chocolate, Summer Sunrise
  • Stamps: Fillable Frames #11, Beyond Basic Borders, Garden of Life
  • Ink: Versamark, Versamark Dazzle: Frost (both Tsukineko), Peeled Paint (Tim Holtz Distress Ink), Dark Chocolate, Terracotta Tile
  • Dies: Mat Stack 4, Fillable Frame #11
  • Other Tools: glitter (Prisma), Kaleidoscope embossing powder (Stampendous), Xyron

Stamping Vacation DT: Have You Tried Challenge

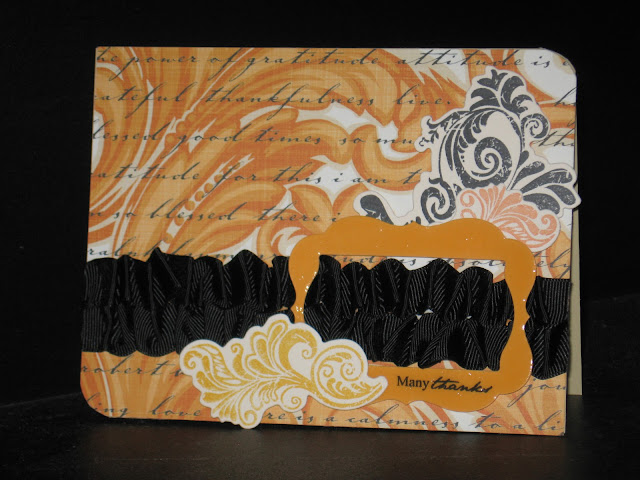
This month's Have You Tried challenge at the Stamping Vacation blog invites us to try using designer paper to cover our card base.


 After taking this picture, I added 3 black rhinestones to the top left corner.

After covering the Fine Linen card base with Teresa Collins paper, I ruffled some True Black grosgrain ribbon on two strips of Scor-tape.

I stamped the sentiment on a Summer Sunrise frame (made with Mat Stack 4 and Fillable Frame #11) and covered it with Glossy Accents.

I die cut and stamped flourishes using Embellishments, arranging them around the frame. Overkill??

I rounded 2 corners with my Corner Chomper and added the rhinestones (not pictured).

Thanks for visiting!


{Supplies--all Papertrey Ink unless noted}
  • Cardstock: Fine Linen, Vintage Cream, Summer Sunrise
  • Patterned Paper: Teresa Collins (can't recall the name...)
  • Stamps: Embellishments
  • Ink: Summer Sunrise, Orange Zest, Tuxedo Black (Memento)
  • Ribbon: True Black grosgrain
  • Dies: Fillable Frames #11, Mat Stack 4, Embellishments
  • Other Tools: Glossy Accents (Ranger), Corner Chomper (We R Memory Keepers), black rhinestones (dollar store)

Valentine Series - Polk-a-dots


It's that time of year again for hearts and love! And, I just love making Valentines cards! This year I challenged myself to try and keep them simple. Well, simple for me, anyway. There will be a series of them that I've scheduled for you to check out.

For this first one of the series, I used Hero Arts Cling Polk-a-dots stamp and combined it with the black with white polk-a-dotted ribbon. I attached 4 strips of ribbon sided by side to created a wider ribbon effect. Two red Spellbinders hearts are popped up, one over the other with the sentiment stamped on it from Flourishes Tag Lines.

The gray chipboard frame was from a tin of various such frames I purchased from a Dollar store, and I added the gunmetal brads.


SEI January Challenge Entry: Sabrina

I love the SEI page sketch along with the Designer's example by Julie Bonner, and was hoping I could participate. First, I had to check to see if I had any SEI products left. To my surprise I happened to have some more SEI paper from last year than I remembered having. I love so many of the SEI papers.

Due to less choice in tools these days, I had to adjust the sketch to fit what I now have available to me, but I think it is still close enough to the great sketch.

I have the title and description on one piece, and opted for no journaling as it would cover up the beautiful floral paper too much. So, here it is.


My two younger girls are having a blast being silly in these photos. A very good memory from about 9 or 10 years ago. They're all grown up now.

 The title was computer printed onto kraft cardstock and then die cut using the Spellbinders Lables 14.And I cut the shape after tracing the outer die edge onto the peachy pink mat. The brads were then added, and as you can see to the left, popped up.

I cut out the flowers from the paper and had to arrange them in a way that would not show that they were not whole flowers. I only had the one sheet of flower patterned paper so with the remains after cutting out the main circle there wasn't a whole lot of flowers to cut.

The one thing that I wish I had done was to put Liquid Pearls around the edge of the taupe and gold patterned paper. I might still do it, but won't be able to get a photo of it for this entry.


Well that's it. I just have to say again how much I love SEI paper.

Stamping Vacation DT: What a Guy Challenge

This month's What a Guy challenge over at the Stamping Vacation blog asks us to create a masculine Valentine's card. Groovy! I'm gonna need one!

This sentiment is courtesy of our sponsor this month, The Stamps of Life.


This passed the "husband test!" Simple is best, n'est-ce pas?


{Supplies--all Papertrey Ink unless noted}
  • Cardstock: Kraft
  • Stamps: youare2kind (The Stamps of Life), Round & About Sentiments
  • Ink: Versamark (Tsukineko), Pure Poppy, Tuxedo Black (Memento)
  • Other Tools: scoreboard (Martha Stewart), clear embossing powder (Filigree)

Coming Soon To Scrapbookers - That Special Gift Class

Well everyone, this will be my last class before moving to Victoria, BC.

A special gift box with a matching card, will be sure to let a special person know how much they mean to you when they receive this unique gift wrapped set. For my Calgary followers, this class will be held at South Scrapbookers Paradise store (403-253-4799), in Macleod Plazza, #20 - 9250 Macleod Trail South on Tuesday, January 25th from 5:50 pm to 8:10 pm.

 (The box and the card are supposed to be the same color, but the flash changed the look)

We'll cut and layer stamped flowers, Scor a mutli-lined border and ink distress it. The leaves too, will be inked around the edges and we'll use a beautiful Martha Stewart border punch. Be prepares for a lot of detail cutting with your detail scissors and using the Scor Pal to construct the beautiful box set.


Live Laugh Love

I'm using this one as a birthday card... Sort of nontraditional. I discovered belatedly that the ribbon was too wide to string across the front of the card as I did... Love the bow, though!


I did some distress inking around the card base (can't really tell) and then distressed it (frayed edges) using the Tim Holtz tool.


{Supplies--all Papertrey Ink unless noted}
  • Cardstock: Fine Linen, Vintage Cream, Vellum
  • Patterned Paper: Flocked Brocade (Making Memories)
  • Stamps: Fillable Frames #8, Very Vintage Labels #4 (Waltzingmouse Stamps)
  • Ink: Aspen Mist (Versamagic), Spring Rain, Antique Linen (Tim Holtz Distress Ink)
  • Ribbon: cream satin (Michael's)
  • Dies: Labels 4 (Spellbinders), Victorian Lace
  • Other Tools: pins (Making Memories), Bow Easy, paper distresser (Tim Holtz)

Googly Eyes: A Papercrafter's Duct Tape?

I was able to save Princess Freaky-Eyes!


Happy Birthday


{Supplies--all Papertrey Ink unless noted}

  • Cardstock:Sweet Blush
  • Stamps: Little Lady, and Birthday Basics
  • Ink:Memento Black, and
  • Other Tools: Martha Stewart's Zig Zag Boarder Punch Felt Ribbon

Taylor's 1st Birthday Party!

[Edited to add: You can find the fixed up version of this card here.]

My little guy is going to his 1st non-family birthday party tomorrow. The invitation was covered in Disney princesses so I thought I'd break out my Once Upon a Princess cartridge (for the Cricut) and my Gypsy to see what I could cook up.


The eyes are the freakiest! Not sure how to fix it. Not all white cardstocks are created equal and this was an unknown source that was more compatible with Cricut cutting than my usual Stamper's Select. The Copic coloring turned out horrible! I even used the airbrush system to try and blush the cheeks... can hardly tell with that awful skin!

I tried some two-tone hair... don't know if I like how it turned out.

The banner and font are from Lawn Fawn.


Smudged the sentiment but I had fun with the Make a Wish set from PTI. Love, love, love it!


{Supplies--all Papertrey Ink unless noted}
  • Cardstock: Stamper's Select (banner), Aqua Mist (card base), assorted Bazzill and unknown
  • Stamps: Bannerific and Jessie's ABCs (Lawn Fawn), Make a Wish
  • Ink: Tuxedo Black (Memento), Hibiscus Burst, Raspberry Fizz, Hawaiian Shores
  • Cricut Cartridge: Once Upon a Princess
  • Embossing Folder: Cupcakes from Once Upon a Princess Cuttlebug Companion folders
  • Copics: E0000, E000, E00, R20, 100
  • Other Tools: rhinestone (dollar store)

Birthday Wishes


Stefanie

{Supplies--all Papertrey Ink unless noted}

  • Cardstock:Sweet Blush
  • Stamps:In Bloom, Filllable Frames #8, Daily Design Sentiments
  • Ink:Memento Black, and
  • Other Tools:Spellbinders scalloped squares, and In Bloom Die, I colored the flowers using copics and added green tool behind the square

Lots of Layers

I had fun with layering on this card. I inked the edges of the white mat, and the scalloped circle with distress ink and embossed the red mat and the small white heart using Swiss Dots embossing folder, I embossed the black mat using the Heart Block folder. The white circle was cut using my Cricut from a previous project. (Love left over scraps) I think I should have left the ribbon off :(


Stefanie

{Supplies--all Papertrey Ink unless noted}
  • Cardstock: Pure Poppy, Black, Stampers Select White, Harvest Gold
  • Stamps:Daily Design Sentiments
  • Ink: Distress Ink Vintage photo, Memento Black
  • Other Tools:
  • Spellbinders Classic Hearts, Scalloped Circle's
  • EK Success corner rounder punch
  • Martha Stewart's loop boarder punch
  • Cricut - Accent Essentials Cartridge
  • Embossed using my Cuttlebug with Swiss Dots, and Heart Blocks

Sweet Lil' Princess


{Supplies--all Papertrey Ink unless noted}
  • Cardstock: Chocolate, Stampers Select (white)
  • Stamps:Baby button bits, and Daily Design Sentiments
  • Ink: Memento Brown, and Black
  • Other Tools: Martha Stewart's Eyelet border punch, and Spellbinders scalloped squares. Also cut out the tag using my Cricut, and I adhered the ribbon using two staples one on either side :)

Happy Valentine's

I

{Supplies--all Papertrey Ink unless noted}

  • Cardstock: Stampers Select, and Black
  • Stamps: Basic Grey Sweet Sentiments
  • Ink:Momento Black, Brilliance in Rocket Red
  • Other Tools: Spellbinders Beaded Circles, Classic Heart Spellbinders

Be My Valentine


I like overall how this card turned out but messed up on my placement of the ribbon :( oh well, as my fellow crafters would say "It's handmade" ;)

I had fun using my distress ink around the edges of the scalloped circle, I haven't used this technique in some time. I love these little birds and finally got to use them :)

Stefanie

{Supplies--all Papertrey Ink unless noted}

  • Cardstock: Dark Chocolate
  • Patterned Paper:Making Memories(bottom half) Basic Grey(top half)
  • Stamps:Tiny Treats Valentine, and Chatter Box Happy Day stamp Set
  • Ink:Tim Holtz Distress Ink in Vintage Photo, Versa Magic in Pink Petunia
  • Other Tools:Spellbinders Scalloped Circles

Welcome Little One


Stefanie

{Supplies--all Papertrey Ink unless noted}

  • Cardstock: Sweet Blush for the card base white for the mat
  • Stamps: Baby Button Bits
  • Ink: Memento Black
  • Other Tools: Fillable Frame die #5
  • I used Martha Stewart's Doily Lace boarder punch
  • added ribbon using two staples

Bulk Thank You's


With my move coming up soon, and all the people that are helping me get boxes, pack, move to storage, and ending with the cleaning, I knew I'd need a number of Thank You cards. I came across 9 pieces of green cardstock pieces that were all the same size left over from a class I taught a while back. They weren't sized to any predetermined card size, but were big enough to make cards with. I was also able to use up a little more of my scraps with these cards.

Now, many of you will know that I'm having difficulties with the new used camera I purchased. Once again the images are not clear. I debated whether or not I should post them. I hope you don't mind. This first one, I think, is my favorite of the 9.


I'm just going to post the rest of the pics without much commenting.


I kind of like this next one too.


And this one's not bad either.


And this next one as well as the one following..


These next two I'm not that crazy about.


Well that's it for the 9 cards. Hope that there might be some inspiration in here somewhere for you. Well I guess I had better get back to my job hunting for Victoria. But, please let me know which one is your favorite (that is if you can see it well enough). Thanks for checking in today and happy crafting!