Hope you are enjoying your weekend!
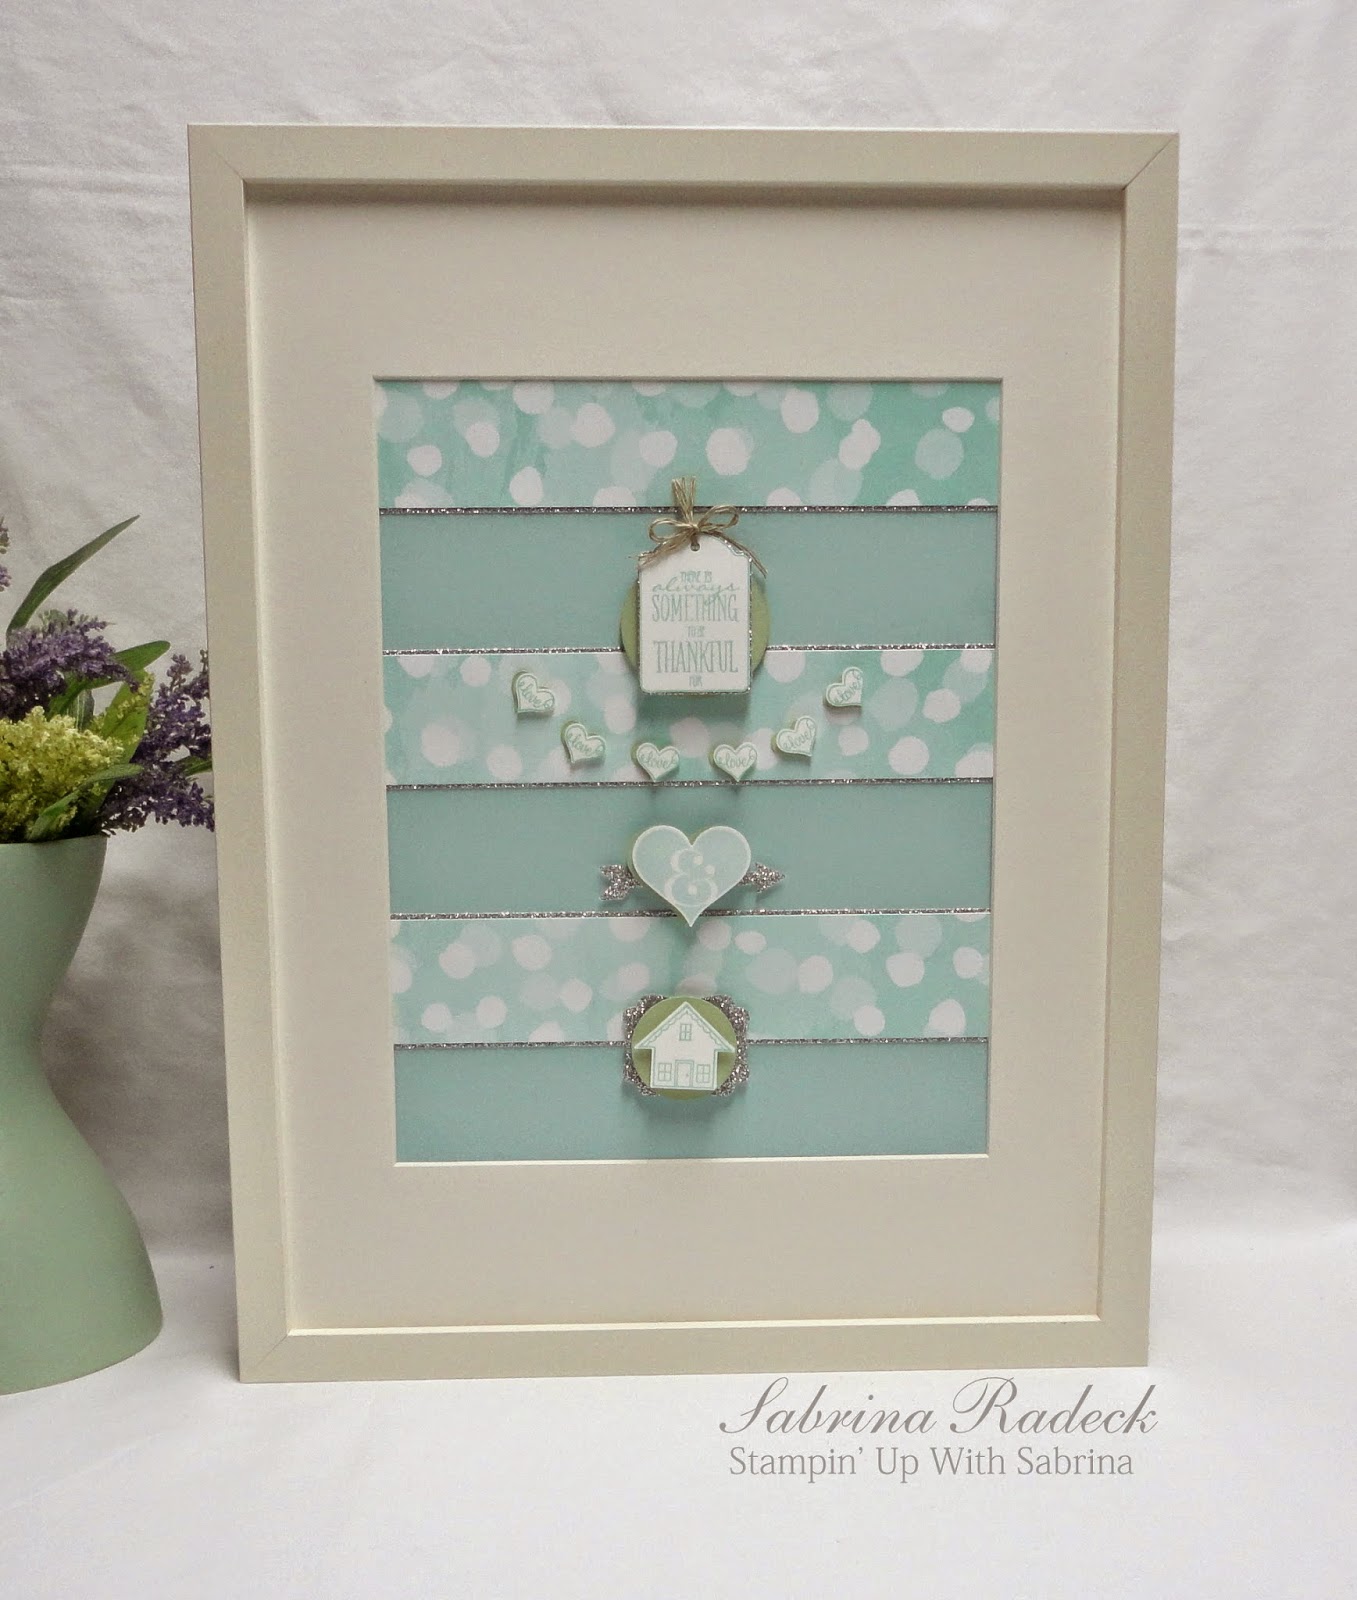
I've wanted to make a really nice wall hanging for my home for a while
now, so when I finally got around to it, I thought I would share it with you from today's post at my Stampin' Up blog. I love the colours I chose, and even tried to see if glimmer paper would work for a home decor project.
I think with these colours, it worked well. Back at the end of Summer or beginning of Autumn, I had come across an
image, that I wish I had pinned or saved, because it is the inspiration
for this project. Do you think I could find it? Nope. So I'm not sure
who to credit the inspiration to.
Here is a side view so that you can better see the layering.
I had so much fun making this and was surprised how quickly it came
together. May have to use this idea for gifts in the future, and maybe
make one or two more different ones for myself.
This frame is from IKEA and measures 12 3/4"w x 16 3/4"h. An 8 1/2"w x 11"h piece just barely fits in the mat area.
A couple of close ups...
What colours would you be using to make a home decor wall hanging?
Thank you for coming to have a peek.
Happy paper crafting!
Showing posts with label theme - family. Show all posts
Showing posts with label theme - family. Show all posts
My Christmas Gift to My Parents
I had so much fun looking at Dana's post yesterday. She doesn't get to craft often these days, so it's always nice to see her have time for a little fun and gives me the chance to be the proud Mom of her creative talents.
I'm sharing with you today, the Christmas gift that I made for my
parents. I would have posted this sooner, but because my charging cord
for my iPad Mini broke, I had to wait a while to get it out to you.
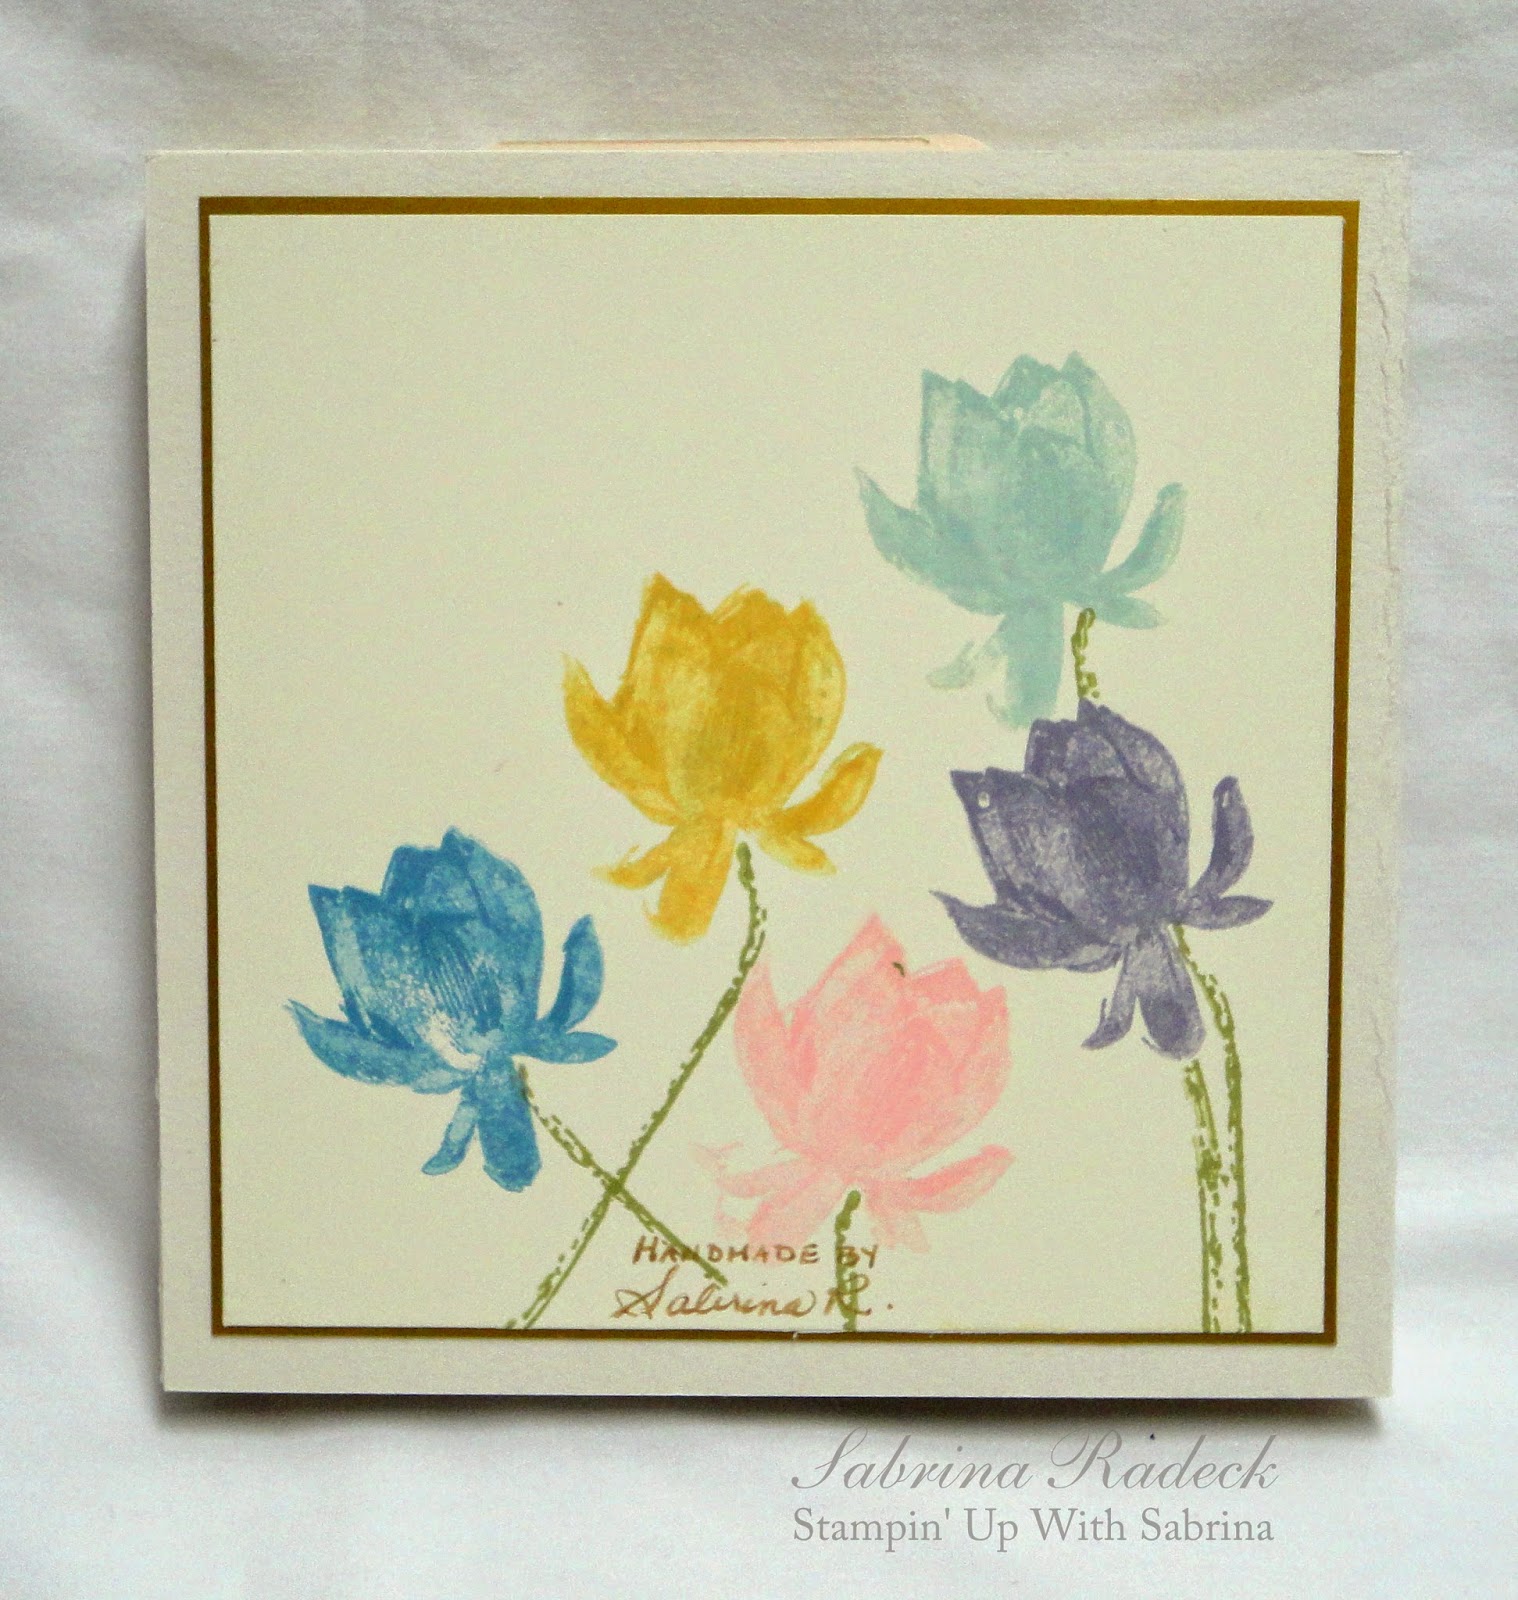
My Mom loves the colours of Ivory & Gold with just a touch of colour, so that is what I did with this mini folio. This first image is the front view.
And this next photo is the back of the folio.
Rather than show you a ton of photos of each page and section of the Mini Folio, I'm including a walk-through-tour of the project for my Stampin' Up blog.
Except for the Washi tape, everything is Stampin' Up products. This Mini
Folio measures 6 3/4"w x 6"h x 3/4" thick. I love this stamp set I used, and can
see it as a keeper long past it's retirement.
My Mom loves the colours of Ivory & Gold with just a touch of colour, so that is what I did with this mini folio. This first image is the front view.
And this next photo is the back of the folio.
Rather than show you a ton of photos of each page and section of the Mini Folio, I'm including a walk-through-tour of the project for my Stampin' Up blog.
I plan to make another one using Designer Series Paper (instead of the stamped flowers),
recording the construction of the project, typing up the instructions,
and have them ready for you to purchase at a small cost, so that you too
can make one! I will let you know when it will be available either on my Paper Architecture blog or my Stampin' Up blog.
Thank you for stopping by today! Happy papercrafting!
Blues & Browns Masculine Vintage Layout
- a little late getting out, but a class I'm looking forward to teaching.
It's time again for the Vintage Layout class at Scrapbook Parade. Since Father's Day is this month I thought it would be nice to create a masculine layout again. The papers used are from the retired Upsy Daisy company using the 'Man About Town' collection. I used the blues in the line along with some dark brown.
I was inspired to use my Cricut for this layout, using the Heritage cartridge. It will be a time saver in preparing the kits for this class.
All but the fussy cutting of the floral flourishes are ink distress with Tim Holt Vintage Photo. I even used it around the edges of the photos.
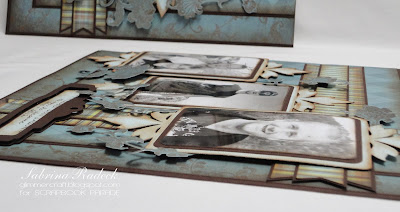
Here are some close ups to see all the parts that I popped up. Yep, I even use dimensionals on my layouts. Just can't help myself! I just like the look.
Hope you enjoyed this layout. Thank you for so patiently looking at all the photos. I have so many for those that can't take the class and have a kit. These detailed pics help them to put their project together.
Till next time, happy crafting!
It's time again for the Vintage Layout class at Scrapbook Parade. Since Father's Day is this month I thought it would be nice to create a masculine layout again. The papers used are from the retired Upsy Daisy company using the 'Man About Town' collection. I used the blues in the line along with some dark brown.
I was inspired to use my Cricut for this layout, using the Heritage cartridge. It will be a time saver in preparing the kits for this class.
All but the fussy cutting of the floral flourishes are ink distress with Tim Holt Vintage Photo. I even used it around the edges of the photos.
Normally I would have used a brown marker to edge the fussy cutting so
that the white paper core doesn't show, but I was in a time crunch here.
So if you do something like this, I recommend that you do it. It looks so
much better.
Here are some close ups to see all the parts that I popped up. Yep, I even use dimensionals on my layouts. Just can't help myself! I just like the look.
Hope you enjoyed this layout. Thank you for so patiently looking at all the photos. I have so many for those that can't take the class and have a kit. These detailed pics help them to put their project together.
Till next time, happy crafting!
Interactive Circular Chipboard Album
- a fun project, and something I've wanted to make for myself for quite a while!
Hello everyone! I'm here to show you a fun project for a class where we use Echo Park's Circular Chipboard Interactive Album. I used My Mind's Eye Collectable "Memorable" collection making this a 'girly' or spring/summer project.
This is what it looks like before I started. It has these fun pull outs for each of the three pages in the album and comes with the rings. I painted the edges white before covering it all with the beautiful papers.
I've always wanted to make a little album that didn't have many pages so that I could showcase a couple of more recent photos for each of my five children and their families. That way I would have something to go to that had them all in one album. I thought this project fit the bill for the Echo Park ablum.
I thought that I wanted to something a little different than a bunch of flowers on the the album as is tradtionally seen with this kind of a project, and since the focus was 'family', I thought"hearts"! Why not use the circle theme along with hearts? And this is what I now have.
Front Cover...
Front cover pull out ... I used for an intro (journaling)
Opened to view double pages...
You can see that I used photos in a 4 x 6 size, which I usually don't like to do. But for me, it worked very well in this project.
The first page is for my eldest, Dana, and her three children...
I continue with the circles and hearts throughout the album. Each little circle and heart has faux stitching around the edges, as well as the pages themselves.
I also used Library cards, which are archival and acid free, etc., matted to make my journaling tags tucked in behind all the photos on the pages.
The next page is for my oldest son and his family...First we see my lovely daughter-in-law with the girls.
The 4 x 6 photos fit perfectly in the pull outs of the album.
As we turn the page, we have the page for my daughter Eva and her family, and then my youngest son and his girlfriend. Unfortunately I couldn't find a photo of Eva and her husband with their two children, so I ended up using my grandchildren's latest photos until I can insert a better one.
That's my newest grandchild, Wyatt, in the cute bunny ears for Easter.... Let's see the pull out.
That's his big sister Claire, who will be turning 6 soon. The punched circles and hearts, and the library card tags continue throughout.
Here's the pull out of my younger son's page...with his beautiful girlfriend...
Sorry about the glare on the photograph.
The last page is for my youngest daughter. Just her in the photos, and wouldn't you know it that when I resign myself to using photos that are a couple years old, after the fact, there are suddenly new photos of her I could have used! Oh well, I can use them for another project.
Because I have a photo on the back I created another page by tracing the shape onto two pieces of cardstock and gluing them together. (The class will get a better matching cardstock. I didn't have any at the at the time I made this.)
Because both photos were landscape, I had to square this one off and tuck the journaling tag in differently than all the others.
...and this is what the back looks like...
Well that's it for this project. But, I do have a little run through video that you might like to watch.
Hmmm, having problems again...so here's the link - http://www.youtube.com/watch?v=jMtsTxTsoMs&feature=youtu.be
Thank you for checking to have a peek. Happy papercrafting!
Shadow Box - Authentique Remembrance
- unique colours and versatile collection make this line fun to work with
Hello blog friends! Today I'd like to share with you a future shadow box class. I love making shadow boxes, especially those that encase a precious photo. Here is what I came up with.
Oops, forgot to check my camera settings again. They look fine in Picasa though. Sorry for the blur...again!
Because this occasion was a western style wedding celebration, I thought adding the twine, lasso style, would be a nice touch. These are my children! The young man on the right, isn't really mine, but being the best friend of my oldest son on the left, he was over often and considered family. So after several years, it was nice to see them all together again.
There is one design in this collection that I simply had to fussy cut and roughly colour in just a bit of colour.
Beautiful paper, isn't it.
I used Fantastix and my ink pads to lightly add some colour. You can use the pen nibs I put in the photo, as well. Once I get all my Spectrum Noir, I'd use them.
So, let me show you some close ups. Hopefully they won't be too blurry.
The "My Favorite Memories" card, is a tag that can be pulled out and written on.
You can better see all the layers of these fussy cut pieces I used on the left side here.
Can you see that the purple pinstripe layer is popped up? Next is the photo with the twine lasso.
I put the year on the photo in Picasa. Love that program. Here is another view.
Well that's it for the detail shots. Now, which one do I give this to? The Groom? Or should I make one for all of my children do you think?
Thank you for stopping by to have a look. Have fun making your own shadow box!
Tools & Supplies:
PAPER: Authentique Remembrance, Bazzill - Dusk & (forgot the name of the green!)
INK: Tim Holt Distress Ink - Shabby Shutters & Dew Drop VersaMagic Eggplant
Tim Holtz paper distresser, Pop Dots, Hemp Twine, Fantastix
Frame Flip Album
-Another Stay-At-Home Retreat class for April
It's time for another mini-album. Well, not too mini as it measures 10"w x 7 1/2"H, but it's a fun and easy one to make. What I love about this one is that it stands on its own and with a flip of a tab stand you can display it closed or open ready to flip through. Plus, at any time you can add additional pages!
So above is what the end result is, and this is what we start with.
This was part of Kaisercraft's Beyond the Page collection, but is no longer available. I turned it horizontally to prop it up, took out the large panel in the center of the cover, and covered most of the slit in the back cover leaving about 1 1/8" in the center.
Lets have a look at a couple more photos.
In this next view, if you look closely you can see that there are some pages between the MDF front and back covers.
Maybe in this section of the photo you can see it better.
The flowers are punched from the small and medium Retro Flower punch from EK Success with the tiny butterflies punched from a tiny punch from the same company, and the larger ones with Martha Stewart's Butterfly punch. The leafy branches are punched using Martha Stewart's Branch 2 punch. And Avocado Liquid Pearls used in the flower centers.
I have made a very quick video for you see the details of the framed flip album. You'll have to excuse a few verbal mistakes. There was no time to remake the video so I had to leave it as it is.
This is going to be a fun class, and I look forward to it. Thank you for checking in today, and please feel free to ask any questions in your comment.
Happy crafting everyone!
Carta Bella WInter Fun II Layouts
I hope that everyone had a very Merry Christmas! I missed my children and grandchildren, but had a wonderful time with my parents. Now it's back to work and planning for the months ahead.
A while back I posted what Scrapbook Parade calls a "Double Double Layout Class" project using Carta Bella's Winter Fun paper collection. Here is the second Dbl Dbl LO posting for a class to be held at the end of January. I've had this in my drafts for a while and almost forgot to post it!
I love the corduroy covered brads from UpsyDaisy (no longer in business) whose colours just happen to match Winter Fun colours!
The center piece was punched using We R Memories Lucky 8 Punch and then ink distressed with Tim Holtz Pumice Stone ink. I drew the journaling lines on with a black journaling micro pen and a ruler. I love how the tied floss around the photos turned out.
I used some letter rub-ons (from UsyDaisy now retired) for the title of this LO.
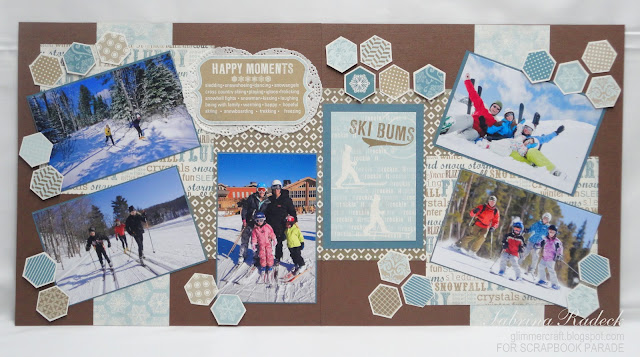
Here is the second LO.
I had a lot of fun working with all the hexagon pieces I cut out. I played with their arrangement on the LO for a bit. Some are popped up with dimensionals while others aren't. But, wherever there is a photo tucked in under, none are glued down there allowing enough space to tuck the photo in underneath the piece.
Well, thank you for stopping by to check out these Double Double layouts. Hope you are inspired to put together some of your winter fun photos from this year, or years past. I just have to say one more time that I just love the colours of this paper collection. Don't you?
For those of you taking the class at Scrapbook Parade here in Victoria, the things to bring to class list is at the very end of this post.

This is what you will need for class:
-Paper trimmer (make sure your blade is sharp)
-scissors
-a pair of old scissors to protect your good ones
-pencil & eraser
-ruler
-quick dry glue
-pop dots
-repositional tape/removable tape
-1/4″ double side tape and any other double side adhesive
-TH Pumice Stone ink
-ink blending tool
-a rub-on tool or popcicle stick
A while back I posted what Scrapbook Parade calls a "Double Double Layout Class" project using Carta Bella's Winter Fun paper collection. Here is the second Dbl Dbl LO posting for a class to be held at the end of January. I've had this in my drafts for a while and almost forgot to post it!
I love the corduroy covered brads from UpsyDaisy (no longer in business) whose colours just happen to match Winter Fun colours!
The center piece was punched using We R Memories Lucky 8 Punch and then ink distressed with Tim Holtz Pumice Stone ink. I drew the journaling lines on with a black journaling micro pen and a ruler. I love how the tied floss around the photos turned out.
I used some letter rub-ons (from UsyDaisy now retired) for the title of this LO.
Here is the second LO.
I had a lot of fun working with all the hexagon pieces I cut out. I played with their arrangement on the LO for a bit. Some are popped up with dimensionals while others aren't. But, wherever there is a photo tucked in under, none are glued down there allowing enough space to tuck the photo in underneath the piece.
Well, thank you for stopping by to check out these Double Double layouts. Hope you are inspired to put together some of your winter fun photos from this year, or years past. I just have to say one more time that I just love the colours of this paper collection. Don't you?
For those of you taking the class at Scrapbook Parade here in Victoria, the things to bring to class list is at the very end of this post.

This is what you will need for class:
-Paper trimmer (make sure your blade is sharp)
-scissors
-a pair of old scissors to protect your good ones
-pencil & eraser
-ruler
-quick dry glue
-pop dots
-repositional tape/removable tape
-1/4″ double side tape and any other double side adhesive
-TH Pumice Stone ink
-ink blending tool
-a rub-on tool or popcicle stick


