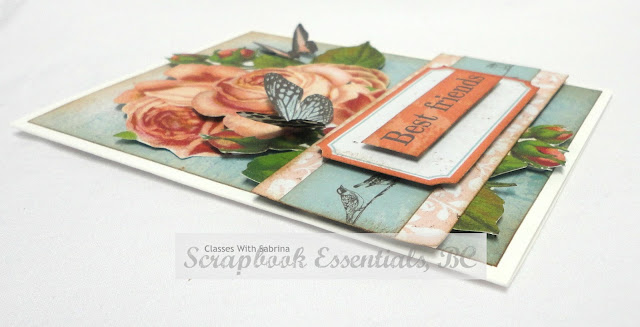
Shabby Chic Card Class! - Blue Fern Attic Charm - Card 3


This is the third and final card of the Shabby Chic card class.  This one has a little cross stitching on it, and a touch of Brussels lace! It's peeking out from behind a couple of paper tears, and tucked in under a couple of leaves.


A detail close-up...


The inside - Since the cardstock is so light in colour, I thought that a normal pen would be dark enough to write on it. If not, a slightly smaller piece of white could go over it leaving a lovely border around it.


So, will I see you in this class? Do you love Shabby Chic? Do you want to see more Shabby Chic? Have more Shabby Chic classes?

Till my next class posting, have a great day, and happy creating!


Shabby Chic Card Class! - Blue Fern Attic Charm - Card 2


This is the second card of the Shabby Chic class. Such lovely paper, isn't it. This a simpler one to make, and just as much fun.


I'm not going into too much detail right now, because I want to keep them for the class coming up. But here is a close up of the arrangement in the lower left corner.


Details of the side of the frame with some fussy cutting.


And the inside of the card. The designer paper, I thought, is light enough for a pen to write on. If you don't think so, then you can add a piece of white cardstock a little smaller over it to leave a bit of a frame around it.


So, tomorrow, there is one more card to show from this class. Hope that you are enjoying them and getting some inspiration for your own design!

See you in class, and happy creating!


Blue Fern "Attic Charm" Shabby Chic Cards

When: Saturday, March 4th

Time: 9:00 am - 11:30 am

At Scrapbook Essentials BC Studio - 3730 Grange Road

Cost: $30 plus GST

Contact: Stacey - sbebc2011@gmail.com


Shabby Chic Card Class! - Blue Fern Attic Charm - Card 1


This is the most detailed of the three Shabby Chic cards we will be making in class. You can see that we will be stitching around the edge of the background piece as well as the tag that we make.


You can see from the next two close ups that I had fun adding some sparkle to this card...


...and some gesso. Love the added die cut sentiment too. Don't you?


Lace and doilies, and cheese cloth all add to the look.

Hope the next two side views help you with the layering....


So to all you Shabby Chic lovers, or those that want to learn how to create Shabby Chic, I look forward to seeing you in class! Over the next two days, you will see the remaining cards to this class.

In the meantime, happy creating everyone!


Blue Fern "Attic Charm" Shabby Chic Cards

When: Saturday, March 4th

Time: 9:00 am - 11:30 am

At Scrapbook Essentials BC Studio - 3730 Grange Road

Cost: $30 plus GST

Contact: Stacey - sbebc2011@gmail.com


Shabby Chic Card Class! - Blue Fern Attic Charm


DO YOU LIKE SHABBY CHIC? It has been quite a while since I created 'Shabby Chic' cards! It was so fun to get back into it! I don't do them for myself, except maybe to hint at shabby chic here and there, But love the fun of creating a real Shabby Chic card. This class comes up at the beginning of March at Scrapbook Essentials, BC.


Blue Fern "Attic Charm" Shabby Chic Cards

When: Saturday, March 4th

Time: 9:00 am - 11:30 am

At Scrapbook Essentials BC Studio - 3730 Grange Road

Cost: $30 plus GST

Contact: Stacey - sbebc2011@gmail.com

Excited to once again dabble in some Shabby Chic cards with you. If you are new to this style, you are free to join us and learn some great techniques that will make any card a step up, or you might just fall in love with Shabby Chic. We will be paper piercing so that we can straight stitch (a backhand technique), and cross stitch. We get to pull apart some light and airy cheese cloth, rip and tear paper instead of using the paper trimmer on everything, use lots of layers, arrange doilies, flowers and leaves, paint with some gesso, and so much more. Creating Shabby Chic always means that your cards will not fit into a regular envelope, so be sure to sign up for the Envelope Punch Board Classes and learn how to make an envelope box for these kinds of cards on February 18th and March 4th.

Please bring to class the following: Paper trimmer, scissors, white 3D Foam Squares (pop dots), embroidery needle, paper piercer & piercing pad, paper distressing tool (not sand paper, takes too long to get the right result) 3/8" to 1/2" brush (for the gesso), adhesive tape (like Sookwang Score Tape), liquid glue (a quick drying glue), Star Dust Stickles (or something similar), silicone/nonstick craft mat, wipes (we will get a little messy, just like little girls...bring and apron if you wish)


I will be posting the cards individually at a later date so that you can see them a little closer.

See you in class!


SBEBC Envelope Punch Board Class 'B'


PUNCH BOARD classes will soon be starting! And 1st up is the ENVELOPE PUNCH BOARD!

This is class 'B' of the Envelope Punch Board


Envelope Punch Board Class B

When: Saturday, March 4th
Time: 2:00 - 4:30
Cost: $25 + GST
Where: 3730 Grange Road in the Studio

For the Envelope Punch Board Class 'B', we continue with learning the versatile things that can be created on this board. The focus will be mainly on boxes/containers and a little mini-album with envelope pages and tabbed tags. We will also learn how to make a variety of edges on the envelope punch board. These are great for both cardmaking and scrapbooking!

Not all of the projects are embellished to completion, and that is because the focus is on creating the item itself. Like this little box we are starting with. The lid, or top, is empty and waiting for your finishing touch.


Next, is a case from 'Pootles' online. She created this adorable flower box which we will be making in class.


This too, is a 'Pootles' creation, and a little more challenging of a box to create. For this one I will also create a larger version in your instructions, that I worked out for you to try at home.What I like about it is that when you have the two sizes, you can stack them, and it looks real cute!


Many of us have made Christmas crackers before, but many of the instructions out there are only for real small ones. This is a much larger, more traditional size, and can be not only for Christmas, but for Birthdays, and any party you can think of! This one has a secret on how it keeps it shape and the contents inside without falling out. Find out how in class.


For this fun project, you will not be getting the cellophane wrap or bow, we are just making the mug. (the doily is attached).


Everything inside this little min-album is made using the Envelope Punch Board! This is just a four page/pocket album, and I doubt it will be completed in class. But the step by step instructions you take home with you will help you complete it.


And lastly, we have several different look borders that can be created using the Envelope Punch Board.

Whoops, forgot to take these photos. Will post them soon, here.

Remember there will be projects to create in you instructions that we will not be making in class! An extra bonus!

The next Punch Board Class is the 'Gift Bag Punch Board'! You'll need to check in sometime in the next few weeks to see what we will be creating in those two classes!

In the meantime, happy creating!


SBEBC Envelope Punch Board Class 'A'


PUNCH BOARD classes will soon be starting! And 1st up is the ENVELOPE PUNCH BOARD!


Do you have an Envelope Punch Board, but never get around to using it much? Or wonder how all those different projects can made using the Envelope Punch Board? Maybe you don't have an Envelope Punch Board, but always wanted to get one. Now is the chance to learn how to use it for basic envelope making, and a whole lot of other creative uses! This two part class (A & B) will get you comfortable using the Envelope Punch Board, and teach you just a few of the incredibly creative things that you can make using it. 

Class A will be more simple projects, keeping it to envelopes, envelope card boxes, cards, and bows! Wait till you see what we will be making in Class B!

$32.95 + tax per punch board (10% off all the punch boards when you commit to all 6 classes)

Envelope punch board class DATES:
A Class - Saturday, February 18th (class projects pictured)
B Class - Saturday, March 4th
Time: 2:00 - 4:30
Cost: $25 + GST for each class (6 total)
Where: 3730 Grange Road in the Studio
RSVP: sbebc2011@gmail.com or 778-533-4290

This is what you will need to bring to class with you: Paper trimmer, 12 x 12 score board (there will be one that someone can borrow if need be), scissors, 1/4" Sookwang/Scor tape, mini-glue dots, liquid glue, ruler & pencil, paper piercer & mat, a non-stick craft mat and your printed class instructions that will be emailed to you just before class. If you are purchasing your Envelope Punch Board, you will receive it at class. If you have your own, please be sure to bring it with you.

Future class dates are:

Gift Bag punch board:
A Class - Saturday, April 22nd
B Class - Saturday, May 27th

Gift Box punch board:
A Class - Saturday, June 10th
B Class - Saturday, June 17th

So let's have a closer look at what we will be making. It may look square in the photo due to the angle, but this is a standard A2 size envelope. How pretty envelopes can be when you make them from design paper collections!


This is the tiniest envelope that a person can make on the envelope punch board. But, the measurements to make it are not on the board!


This envelope is sized just right for a gift card!


...and is not sealed like a standard envelope.


This is a box envelope! For those cards that have a lot of layers or flowers on them.


There many options for this box envelope closure. You can use velcro, magnets, ribbon, or a belly band as we are here.


Now this box envelope is much thicker so it can hold a set of cards to give away, or for an even fuller, thicker card!


This box envelope had a tuck-in closure.

This next project may not look like much, but it is a combo card/envelope for a special purpose.

It holds cash! Just add white or cream cardstock on the upper flap to stamp a sentiment and write a little note.


Next we have something that looks like a mini-file. no, wait! It is it a card? Yes, it is a tabbed card. You cam write or stamp things onto the tabs and add other things, like a sentiment on the front. Great card for someone at the office...


Next you see...what exactly? Well I ran out of designer paper to attach to this project, but you can see what it would look like.

When you open it up, a gift card pops up! All that needs to be done is cut up and add the designer paper, embellish it a bit, and you have a fun kind of card to give that holds a surprise for the receiver.


I don't quite know why, but policy or coin envelopes have always been a favorite of mine. Perhaps it is the interactive part of winding that string around? I will show you how to construct one.


And lastly, we have some bows that we will be making in the envelope punch board. You can make a variety of sizes, and do different things to them to create for your projects.


So that kind of wraps it up as to what we will be learning in this class, but there's more in the part 'B' Class! Yup, there's more. In each class you will be getting step by step instructions for other Envelope Punch Board projects that we will not have time to create in class. But you can take it home and try them out there!

Hope to see you in class!


Kaisercraft "Ooh La La" Vintage Card 4


Today's project is the last card of four, for my Kaisercraft "Ooh La La" Vintage Card class. It has a simpler look to it, but fussy cutting is still very much a big part of this card. This one I find calming with the blue background, and anything from nature seems to have a calming effect, too.


This card also has a lot of popped up layers, as you can see in the photo below.


In this next image, I am trying to get the Clear Wink of Stella to glimmer in the photo. All of the butterflies in these four cards have been covered with it.


While making these cards, all with a 'Friend' theme, made me realize I need to send cards to my friends for other than birthdays and Christmas. Friends are always there with encouragement, an ear to listen to your complaints and sorrows, and any help you need. So, I really should be giving them way more cards! How about you and your friends?

I'm looking forward to teaching this class as it has been a while since I have taught a Vintage card class.

Happy creating everyone!