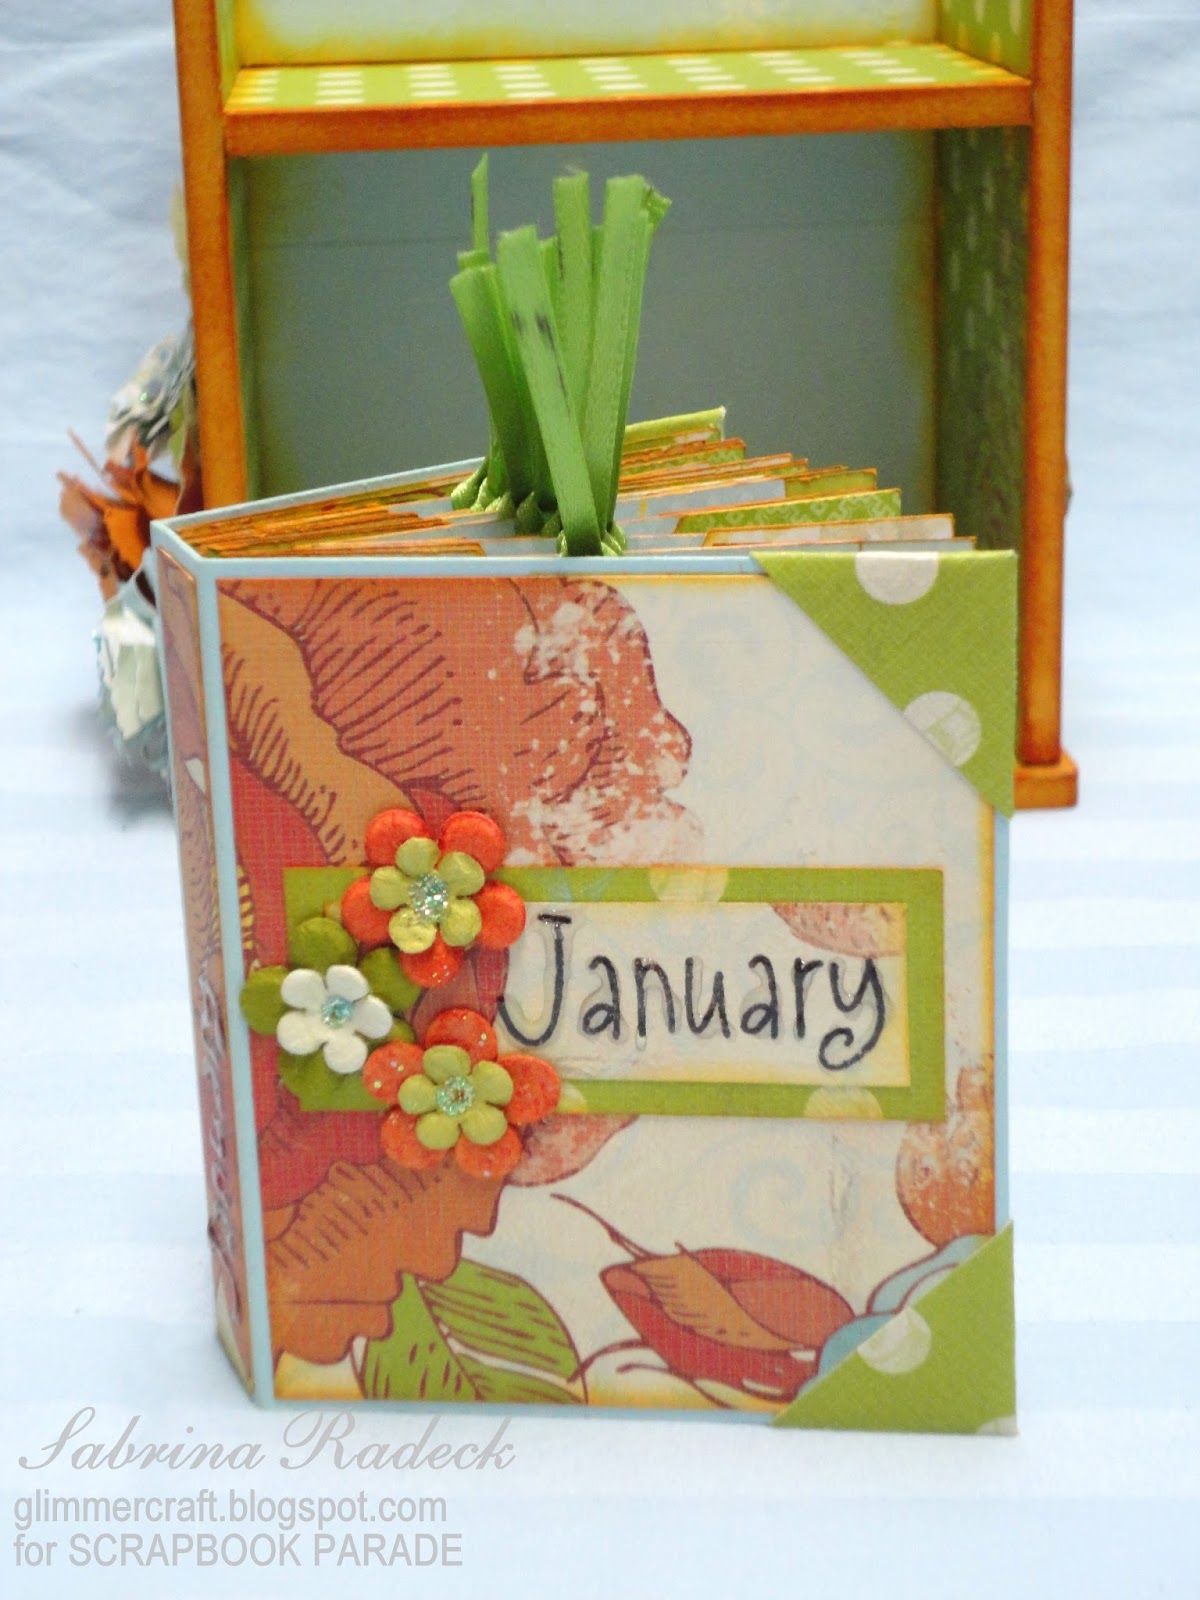
A Year in Minis! - Janaury Mini

Hope you are having a good day!

I'm here to share with you the promised posting for the January mini of the new "A Year in Minis" class series at Scrapbook Parade. I had so much fun making this little 3" w x 3 1/2" h x 3/4" thick mini. Can you believe this little mini holds up to 22 photos and has up to 12 journaling tags!

It is a basic and simple little mini made from scratch, with not a lot of room for thick embellishments, because we need to keep in mind that there must be six minis for each of the two shelves. Some of the later ones we will design with fewer pages so that we can have a few with thicker embellishment.

Let's get on to the photos, shall we.


This, of course, is the front of the mini. I stamped "January" and then added Glossy accents on the text to make it stand out a bit more. The little blossoms I layered from two different colour packages, and added a little Waterfall Stickles in their centers.

The papers all throughout are edged with Tim Holtz's Wild Honey Distress ink. You will be able to see that better when we open the little mini in a later photo.


This is the spine...


...and this is the back of the mini. Don't all the green ribbons standing up look like tufts of grass?


Here is where you can see the edges all inked with Wild Honey.

The next few shots are of some of the papers inside the mini.


And, this last shot shows some of the tags pulled up. Great for journaling!


So what do you think of this cute little 3"w x 3 1/2"h x 3/4" thick mini? I should have taken a photo with my hand in it so that ou could better see the size. Maybe for the February mini.

What colours would you like to see in the February mini?

Well, thank you so much for taking the time from your busy schedule to stop by and have a peek. For those of you in Victoria taking the class there is a list of things to bring at the very end of this post.

Happy crafting everyone!



MATERIALS & SUPPLIES:
PAPER: Kaisercraft Devonshire (discontinued and hard to find)
INK: Memento Tuxedo Black, Tim Holtz Wild Honey
Ranger ink blending tool and foam
Scotch Quick Dry Glue
Scor tape - 1/4"
Glossy Accents
Recollections mini blossoms - Tangerine & Avacado
Waterfall Stickles
1/8" Green satain ribbon 
1" circle punch
3/16" hole punch


Scrapbook Parade Class

Please bring to class:
-Paper trimmer
-scissors
-pencil & eraser
-ruler
-score pad (ScorPad or Martha Stewart)
-quick dry glue
-Glossy Accents OR Matt Accents
-splat mat (non-stick mat)
-damp cloth (not wipes)
-Scor Tape (1/4”)
black journaling OR black or white gel pen
-a choice of the following inks depending on the colour you wish to accent from the paper - Wild Honey (what I used) & Shabby Shutter, OR Tea Dye & Shabby Sutter, OR Pumice Stone & Shabby Sutter OR Weathered Wood & Shabby Shutter (remember the inks you used in the previous class  because you will need the same ones for this January mini class)
-ink blending tool & sponge

A Year In Minis!


Hello everyone! Thank you for stopping by. Today I would like to show you something exciting that we have come up with at Scrapbook Parade for the new year. We'll start in January by making a small MDF shelf unit made by Kaisercraft. It is such a small unit that it makes you wonder how one could possibly get 12 little mini albums in it. You can also get little  MDF minis that are made for the shelf unit, but I opted to create our own minis. Then later in January we'll make the January mini to go in it! Isn't that a fun idea?

In this post I will show you the details of the shelf as that will be our first class. In another post I'll show you the January mini. So here is the shelf unit.


In this first photo you see the unit from the front. The papers used for this shelf are also from Kaisercraft - Devonshire. We didn't use the entire collection, just two of the double sided sheets. I used Tim Holtz Wild Honey ink to stain the edges of the unit as well as the edges of the paper. I used a Fantastix to get into the corners and grooves where the ink blending tool couldn't reach.

Now I'll show you photos of the unit as I rotate it counter-clockwise.


Made the paper flowers the old fashioned way by drawing a spiral on the back, and cutting it along the lines with the old fancy scrapbooking scissors and rolling it to the center.


For the leaves, I free cut the shapes and lightly folded down the center, then using my tweezers to pinch the vein lines on either side of the center. I added just a touch of Waterfall Stickles to the flowers with my finger.


I love the line on the paper here. It makes so that you can write a little something on the back if you wish. Or, you could just put a nice family portrait on the back, too.


On this side, coming from the back, I used the Tim Holtz die Hardware Findings to cut both the chipboard and the blue paper that is glued on top, and then bent around the corner to the side. Before attaching the paper to the chipboard I inked the edges of the paper with an ink blending tool and Tim Holtz Shabby Shutters ink. To bend the paper covered chipboard, you do it slowly while the glue is still wet and the moisture of the glue in the chipboard and paper helps it to bend without cracking. Oh, I almost forgot...I used the screw head brads in the holes of the die cut.


 So that's all the sides. One more photo to show the upper front details.


The chipboard florals I cut using the AccuCut at the store. Covered them with Lettuce and Lemonade Adirondack Acrylic Paint Dabbers. On the yellow I edged it using an ink blending tool with Wild Honey ink to make it look a little more like a flower. Then I stamped it and used a white gel pen to create a faux stitching line. With the larger green one, I cut a backing out of Bazzill Marigold, stamped it and attached it from behind and added the same faux stitching with a white gel pen. Then I attached the last of the flowers and leaf I had made with scraps.

There will a posting very soon showing a few of the detail of the tiny little January mini. Surprisingly it can hold up to 22 photos and 12 journaling tags! That's amazing! So look for the posting coming soon.

Thank you so much for dropping by to have a look, and for those of you here in Victoria that plan to take the class, at the very end of this post is a list of things that you will need to bring to class. I really look forward to teaching this class and all the 12 little minis, one per month, that will go into this little shelf unit!

Thank you for leaving your comments, questions, and request. I always love to read them.


MATERIALS & SUPPLIES:
PAPER: Kaisercraft Devonshire (discontinued and hard to find)
INK: Memento Tuxedo Black, Tim Holtz Wild Honey & Shabby Shutters
Ranger ink blending tool and foam 
Adironack Acrylic Paint Dabber: Lettuce & Lemonade
Scotch Quick Dry Glue
Chipboard (medium weight)
Tim Holtz Alterations Die - Hardware Findings
screw head brads 
Glossy Accents
Waterfall Stickles
White Gel Pen
Laser Cut Chipboard - Lamp Post
AccuCut & Layered Blossom & Blossom die

Scrapbook Parade Class

Please bring to class:
-Paper trimmer
-scissors
-pencil & eraser
-ruler
-quick dry glue
-emery board (the soft ones/foam core)
-Glossy Accents OR Matt Accents
-splat mat (non-stick mat)
-damp cloth (not wipes)
-Scor Tape (1/4” & 1/2”)
black journaling OR black or white gel pen
-a choice of the following inks depending on the colour you wish to accent from the paper - Wild Honey (what I used) & Shabby Shutter, OR Tea Dye & Shabby Sutter, OR Pumice Stone & Shabby Sutter OR Weathered Wood & Shabby Shutter (remember the inks you use in this class because you will need the same ones for the January mini class)
-ink blending tool (may need 2 or 3 sponges) 
-FantaStix if you have one


Bird Song Policy Envelope Organzier


Well, for those of you that have been waiting for the 3rd project of the Bird Song Series, here it is! This is a very photo heavy posting, and I will get a video out as soon as I can. So I'll keep the text down to a minimum so that you can go through it more quickly.
To the right you see what I used to create the organizer with - Graphic45's polic envelope album. Love the heavy paper of the envelopes and it is great to work with.


The above is the front cover.
A couple of front cover close-up details.

Now for the back cover...


And a whole bunch of inside photos.


Each pocket has a set of these double folders I made with two months labled on them.


Well, I hope you enjoyed the Bird Song organizer. This class is scheduled for January 5th, and I'll add a few more written details at a later date as I haven't gone to bed yet and it is 5:22 am!!. I'm so excited about the project that I had to take all the photos, fix them up in Picasa, send in a blurb and photos to Scrapbook Parade. I just had to get the photos out for interested parties here in Victoria.

Thank you for checking in to have a peek. Check back in a few days to get some of the details I'll enter.


This is what you need to bring to class:

 -Paper trimmer
-scissors
-fussy cutting scissors (if you have)
-pencil, ruler (longer than 6″)
-gold gel pen
-Glossy Accents
-Black Enamel Accents
-Tea Dye & Black Soot ink pad (or other black ink pad)
-ink blending tool
-black marker (not the journaling pen)
-quick dry glue (& a long stick pin in case you need it)
-double sided adhesive from 1/2" to 1/8" widths
-black pop-dots
-Splat mat
-hand wipes or damp cloth for hands
-Scor Pal (or Martha Stewart Scor Pad),
bone folder,
Optional - gold acrylic paint and dry brush, or gold Acrylic Dabber

Bird Song Fan Mini Album


I have something special for you today. Not long ago I posted a project for a class where we would make a card box out of a cigar box and make our envelopes to go with the custom sized cards for that box using Graphic 45's Bird Song paper collection. (to review posting, click here.) Well, today I'm sharing with you the 2nd project of the 5 in Bird Song series.

Today's reveal is a fan mini album! And I loved every minute it took to make it! So let's get on with the photos, shall we.

Front of Mini
I love the little tiny butterflies I fussy cut and glued two back to back around the gold cord. When you fan out the pages it looks like this...


...and when you fan it open to see each page simultaneous it looks like this...


But, that is just from one side. If we flip it over to view from the back, closed, it looks like this...


Then fanning it open...


...and all the way...


So that's the fan in photos. I do have a short video presentation next, but please forgive all the "and...ummm"s. It was late and I didn't plan ahead what I was going to say, but at least you can get a few more details in the video.


So thank you for stopping by, and ask any questions you want in your comments. happy crafting everyone!

For those taking the class there is a list of things to bring to class at the very end of this post.


This is what you will need for class:
-paper trimmer (be sure your trimmer blade is sharp for this class)
-scissors
-fussy cutting scissors (if you have-not required)
-pencil
-ruler (longer than 6″)
-gold gel pen
-Glossy Accents
-Black Soot ink pad
-black marker (not the journaling pen)
-quick dry glue (& a long stick pin in case you need it)
-double sided adhesive
-black pop-dots
-Splat mat
-hand wipes or damp cloth for hands
-Scor Pal (or Martha Stewart Scor Pad- the
small one will work)
-bone folder
-clothes pins as grips might be helpful