My Christmas Gift to Mom - Multi-Purpose Tray Organizer

Merry Christmas, Mom!

As I mentioned in yesterday's post, I grew up having our Christmas on Christmas Eve, so that means my Mom now has her gift, and I can post it...actually I scheduled it.

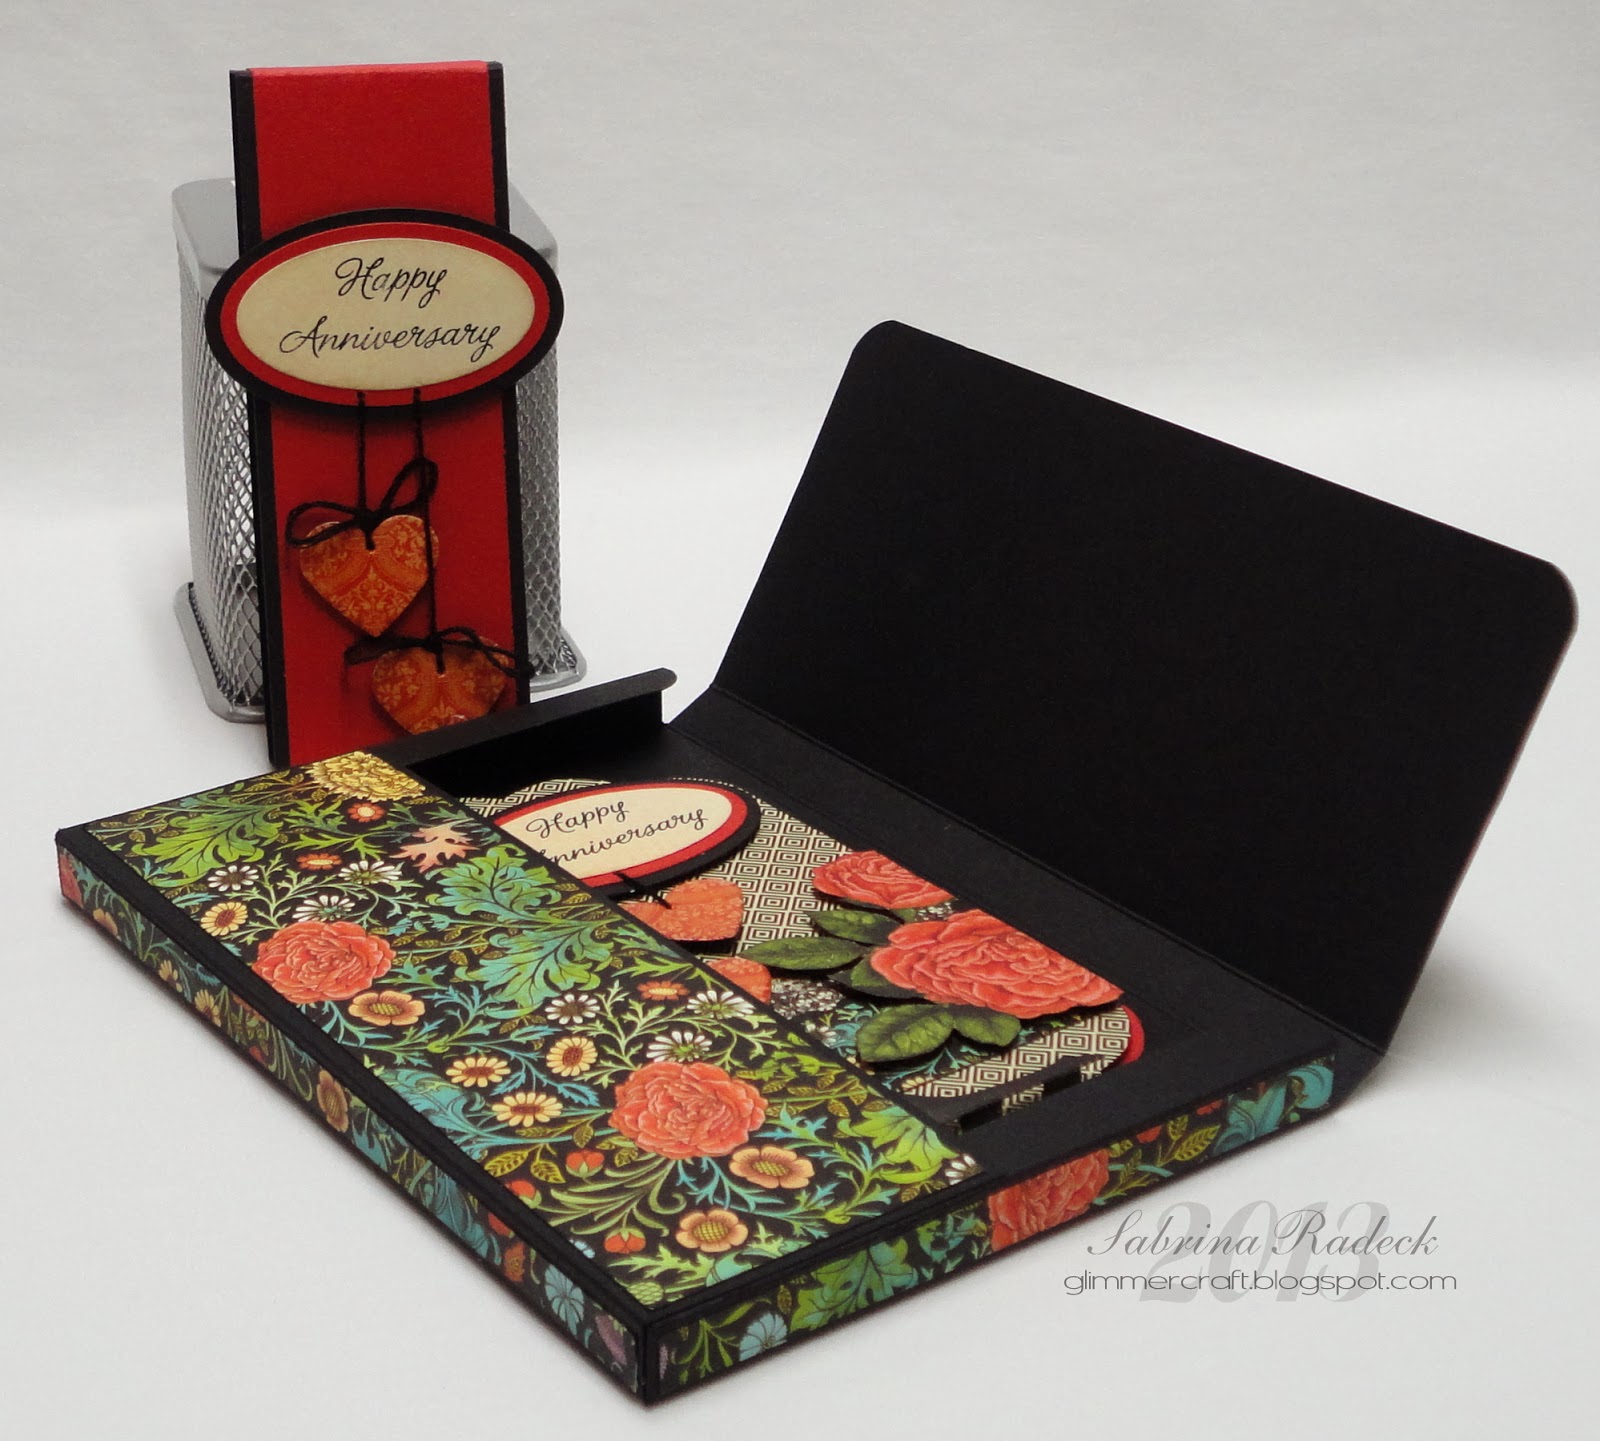
My Mom is writing her life story along with a little family history. I look forward to reading it even though I have heard some of these stories throughout my life. I wanted to make her something for Christmas that might help her with this project. I don't know how many chapters she will end up with, but this would be a start. I came up with a tray-organizer, and using the beautiful spring papers of Graphic 45's Sweet Sentiments, this is the result.


I used all but five sheets from the 12 x 12 paper pad, with some scraps enough to make a few cards as well. The project measures 12 3/8" w x 5 3/4" d x 9 1/4" h.

It starts with a chipboard base tray, and all of the parts that go into it are individual pieces that you can configure it in different ways. Here is the tray alone.


Here are all the parts!


You see 15 mini-magazine-like holders, a pen & pencil holder, and a compartment to hold notebooks and more. Here's a shot with the notebook.


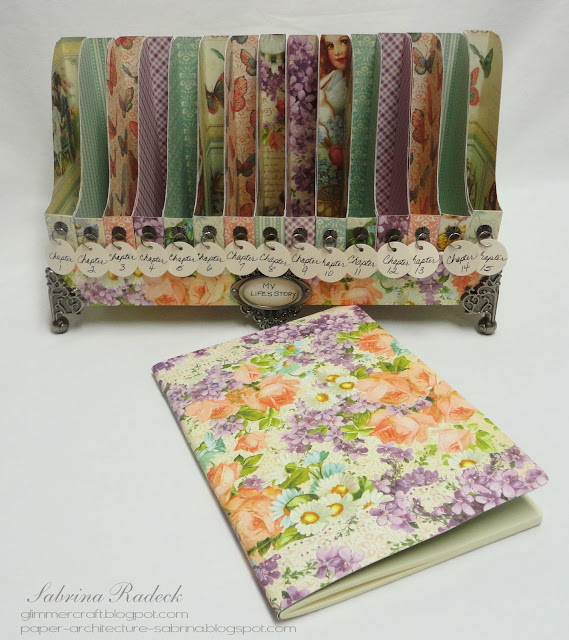
Here is an individual little mini-magazine-like holder.


So when all the parts are assembled in the tray in the configuration you like, you have a useful organizational tool. In the YouTube video, I demonstrate some different uses for this project. But, first let's look at the loaded tray from all angles.


So that's it for the photos, but you can view a walk through video where I also share a few multi-purpose uses for this project.


What other functions for this project can you come up with?

Thank you for stopping by to share in my gift to my Mom. (Added late Christmas Eve: My Mom loved it!)


My Christmas Gift to Dad - Desk Set

Merry Christmas Dad!

I grew up having Christmas on Christmas Eve, and since we will be busy on the 24th, I'm scheduling this for that day... my Dad won't see it before Christmas Eve.

A person always wants to make something as a gift for a loved one that will be something they will like and use. My Dad likes to read and make notes using a lot of stickies or post-it notes. I came up with something I could make him and went through my stash of dollar store repurposing/project stuff. I found a frame, and a box that would work beautifully for what I had in mind. But, what paper could I use? What paper could I use for a man? I decided to check out the many scraps I have from all those classes I've taught. Guess what I found? A bin full of Graphic 45's Bird Song scraps! I love those papers.

So here is the end result.


I've included a frame so that my Dad (& Mom) can place in it a more current photo of me. I' happy that I had all these strips to work with! Let's look at the frame first, shall we.

You can see that I added some red on the side edges of the frame.


In this photo you can see the little knob that I added to the top of the frame, hanging a tassel I made with a wooden bead. I also created a charm using black chipboard and a couple of the stamps I had left from an 8 x 8 pad.


Looking at the box you can see a Kaisercraft Metal Label Pull for a place to hold and open the box with.


Here is the box open.


On the lid you can see that I repeated the image inside using the smaller version from the 8 x 8 pad, while the outside has the same image from the 12 x 12 cropped   bit at the top and bottom. this way I was able to hide the adhesive for both image panels while creating red side borders for the one on the inside!


You will also note that I line the box bottom with cork! I created divers with black chipboard and glued them into the box. I added an entire package of mechanical pencils from the dollar store, for my Dad. He's always needing a pencil sharpener, so I hope this helps him. Then I have, also from the dollar store, a variety of post-it note sizes and colours for his reading notes, and more. I created a little section to act as a mini bulletin board where he can post notes to himself or reminders, and the note can be seen even when the box is closed. With that little mini-bulletin section I then had include some tacks too.

I hope that my Dad will like this set. So back to both the frame and box together again.


So that's it for my Dad's Christmas gift. I found that I have enough Bird Song scraps to make a few more things. I wonder when I can get to that?

Hope you all have a Merry Christmas! A wonderful time of the year!


Gift Card Holders You Can Hang in Your Tree!

I had a few packages of Graphic 45 cardstock banners, pockets & tags, and chipboard die cuts left from Graphic 45's 12 Days of Christmas collection and wanted to use them up. Plus, I wanted to avoid any fussy cutting what so ever on this project not only so I could use up all this stuff, but I wanted to keep it simple and fairly quick. And then, I came across the talented Arlene Cuevas beautiful gift card project posted both on the Graphic 45 blog and Arlene's blog, and I knew that I could use up all these pieces using Arlene's idea. Thank you Arlene! I also happened to have a package of Large Tag Album tags to use on this project!

So here they are!

Some of the things that I did differently from Arlene are, 1) no fussy cutting as I mentioned earlier, 2) I used as many of the embellishments from the banners, chipboard, and pocket & tags as I could, 3) I didn't keep to one theme for each holder - I mixed them all up, and 4) I also added a ribbon that would make it possible to hang the gift cards in their little packages on the tree as part of the tree decorations.

Even though the colors of these little holders are not the colors I have for my tree, I wanted to show you what they look like on the tree. The flash refused to go off when taking these photos so they aren't the best.


Now, I'll show you each gift card holder and what it looks like inside.


Well, I certainly will have fun making others like these for other occasions throught the year!

Thank you for checking in today to have a look. If you're wondering about that big project I mentioned a few posts ago, I'm still working on it. I just had to quickly get the last three projects & posts done before I could continue on with it. I'm looking forward to showing it to you. hee hee...

Happy papercrafting!


Couture Birthday! - Tri-Fold Card in a Box

It even has a Gift Card pocket!

Wanting to go a little out of the box (pun intended) with this card, I decided to create a Tri-Fold Accordion Card and include a hidden Gift Card pocket. I wanted it all packaged up in a pretty card box since it's too thick to go into an envelope. And, of course, I just had to use more of the Graphic 45 Couture collection. So here you see the card and it's companion box.


Now let's have a look at just the box.


...taking the lid off of the box...


...were you can see the card. When you take the card out of the box...


...every page of the card has a birthday greeting so that it can be seen from several angles (or could be for a set of triplets, hee - hee).


So, let's have a closer look at each panel...


Now we'll look at the back two panels, one of which has the pocket for a nice gift card.


So that's it for this set. Thank you for stopping by to have a peek and leaving your comment.

And, of course, Happy Papercrafting!

Added Dec 17, 2013: This card was featured this morning on the Graphic 45 Ning Feature page!  http://graphic45.ning.com/photo/photo/listFeatured?xg_source=msg_feat_photo  This will be my 5th feature over the last two years! Make my days, lol.

Added Dec 27, 2013: Can't believe it! Graphic 45 feature this card again on their blog today!  http://g45papers.typepad.com/graphic45/2013/12/graphic-45-ning-gallery-highlights-.html
 Talk about excitment! TY Graphic 45!


  • Cardstock:  Bazzill Cardshoppe Licorice Twist 12 x 12
  • Patterned Paper: Graphic 45 Couture 8 x 8 & 6 x 6
  • Accessories: Graphic 45 Cardstock Flowers, Graphic 45 Cardstock Banners, Bisque Liquid Pearls, Creative Charms Vintage Brads - Blue
  • Other Tools: Scissors, Bone folder, Scotch Quick Dry glue, ScorTape, Martha Stewart Butterfly Punches, Martha Stewart Score Board, Fiskars SureCut Deluxe Paper Trimmer, Memento Black Tuxedo ink pad, black marker, Tim Holtz Pumice Stone Ink pad & Rangers Ink Blending tool

A Brief Appearance!

I don't usually have time during the semester to play in the craft room but the semester has wound down and Christmas is looming!

Here is my first card in several months!!


I finally used my sequins!!

I am submitting this into the Paper Smooches Anything Goes challenge. :)


{Supplies--all Papertrey Ink unless noted}
  • Cardstock: Stamper's Select White
  • Patterned Paper: Christmas Prints
  • Stamps: Joyful Greetings (Paper Smooches)
  • Ink: Pinefeather, Pure Poppy
  • Dies: Love Word (Paper Smooches)
  • Accessories: sequins (Simon Says Stamp)
  • Other Tools: Goosebumps Shimmer spray (Tsukineko)

My Graphic 45 Couture Came!

I was so excited when my Graphic 45 Couture paper came the other day. I've been waiting for what seemed like forever, and now it's finally here! It looks even more beautiful in real. I have several projects in mind for this line and immediately set out to prepare for one of the projects. I decided to tackle one of the larger projects for something that I can't tell you about just yet. But, I can tell you that it takes 34 sheets of the Couture paper as well as a whole pack of Bazzill Cardshoppe Licorice Twist, and 3 sheets of 12 x 12 black chipboard!

I cut up most of the paper in preparing to assemble it this big project. I decided however that I needed to get some different ribbon. So that means until I can get it, that project is on hold because I can't go any further. Rats! So, since I have all my Christmas cards completed, and more (made between teaching the Christmas Club classes all year long, as well as being on the DT for Christmas Card Challenges until last month), I was free to make a non-Christmas card for a change using the 8 x 8 version of Couture!

So without further ado, here it is.


As you can see, since the 5 x 7 card is thick with popped up layers, I decided to make a card box to encase the card and protect it. This would make a beautiful Valentine card too.

So let's have a closer look, shall we.


The box is 1/2" thick and has a belly band to keep it closed. I used 1 1/2 sheets of the 8 x 8 "Gorgeous". The Anniversary oval and hearts are popped up with black foam dimensionals. The Cream oval is from the 6 x 6 pad, while the medium sized oval is die cut from Bazzill Red Rock.

To create the hearts, I took a scrap after cutting what I needed for the card and box, and glued it onto 100# black cardstock. Before the glue dried, which would make it harder, I punched four hearts out with a Martha Stewart Heart punch and used a black marker around the edge to hide the white paper core. Then came the Glossy Accents, and I set it side to dry.


Once they were dry, I used my paper piercer to punch a hole through. The oval sentiment also has two holes pierced in it. The black floss is fed through the holes of the oval as one piece. The hanging ends are then used to attach the hearts onto, and then popped up with black dimensionals.


You'll see that the edges of the Couture paper is all edged in black to cover the white paper core. I did the same on the card.


 You can see that the oval sentiment and hearts are repeated on the card. Again I did one of my favorite things; fussy cutting! The fashionable woman, the rose, the lace and floral strip, hearts (from the back) and the roses are from one 8 x 8 sheet (Couture). The Red Rock cardstock is used again, both on the outside and the inside which you'll see in the next photo. The background pattern paper is the back of the 8 x 8 "Style" and both the Red Rock and the pattern paper I traced one of the Grand Labels Eleven and trimmed slightly less with each layer since the black card base was die cut using the same die.

Maybe I should mention that the woman is popped up with two layers of dimensionals, while the oval, hearts, and roses only have one layer.


Here is the inside of the card. Sorry that it may be a little on the blurry side.


These stamps that you see here are cut from the same sheet as the woman was cut from. I added Glossy Accents to the red balls of the ear ring at the top stamps, and Star Dust Stickles to the diamond hearts entwined brooch at the bottom stamps.

So I hope that you enjoyed your little walk through on the making of this card. I just love the beautiful colours of this line and the wonderful fashions depicted that are from my grandmother's time.

A Tip For You

Have you on occasion ripped a piece of paper as you tried to rip it out of a 12 x 12 or 8 x 8 pad? Even when you were very careful?

I have a tip for you that helps to keep that from happening, even if you want to rip out a page from the middle of the pad! It only takes about five minutes before you open the pad to view all the lovely paper inside.


Hope this helps from future papers ripping as you take them out of your paper pads.

Thank you for stopping by today.

Happy papercrafting!

Busy, Busy, Busy - Another set of instructions available


Great start to a new week! Everyone is busy getting ready for Christmas, and I have something for you, that you might be able to squeeze in, because it makes a great gift.

Remember this?

It's now available at Paper Architecture with Sabrina! And here is the link to view all the photos posted for that class project. You can use any paper you like, and you don't have to do all the fancy embellishing either. Up to you!

I have new ideas flowing into my head while preparing instructions for these older projects people wanted to know how to put together. So soon you will be seeing new things!

Thank you for checking in. Maybe I can participate in a challenge or two as well. See you soon!

Happy papercrafting!


12 Days of Christmas Explosion Box Instructions Available


Hi blog friends! Wondering where I've been?

Well there have been some changes in my life, and I will no longer be teaching so many classes for Scrapbook Parade, and there will be fewer posts from now on, and concentrating more on my "Paper Architecture with Sabrina" blog. And that brings me to today's post.

Remember the 12 Days of Christmas Explosion Box I posted a while back? Well, I've been working for days now to get it all typed out and created 7 video tutorials to accompany them. It is now available for your purchase if you would like to know how to create this explosion box.

Paper Architecture with Sabrina now has it all there for you to create your own.

If you haven't already checked out some of my other projects there, just look to the upper right of this blog and you'll see a link to Paper Architecture with Sabrina.

Thank you for stopping by today, and hope your Christmas preparations are going well!

Happy Papercrafting!