Blog Pimpin': Jinny Newlin's Soaring

You may recall that we had a blog candy giveaway recently for our 1st Blogoversary... The winner of the stash, Jinny Newlin of Soaring, sent us the beautiful thank you card pictured below!


As I commented on Jinny's blog, cards are so much more wonderful in person than in (blog) pictures!! I keep meaning to make those crumply flowers out of phone book pages, that ruffly ribbon is to die for and that homemade brad is amazing! Those borders of perfectly even stitching are a testament to your skill!! Thank you so much, Jinny! (Here is the link to her original post with the above card... it won Top 5 at the CAS-tastic Wednesday Challenge!)

In searching Jinny's blog for a post on which to comment about the marvelous treat she sent us, I found so many amazing little goodies that I wanted to share! (Click on the picture to view her posts...)


Wouldn't you fall all over yourself to receive a package like this? Just beautiful!

 I'm almost embarrassed about what I commented on this card:
Wow!! I love, love, LOVE this card! I want to marry it and have its babies!! ;) Just gorgeous!
  lol!

This next card is completely amazing!


She tells you how to create those fun little "squares" on the post (click the pic)! Try not to drool over the fresh baked bread in the same entry... Oh, who am I kidding! I can't stop thinking about that bread!

This next card was the one she entered into our ATC Glimmer Challenge 2:


Isn't that black ruffly ribbon and sugary butterfly to die for?!

Jinny also has some amazing scrapbook pages you should check out on her blog!

Well, I hope you're feeling as inspired as I am from Jinny's work! Obviously Dawn of WPlus9 Design Studio was since she snatched Jinny up on her design team! ;)

Thanks again, Jinny!
ATC Team

Mariana's Latest

These cards were too gorgeous to not feature on the blog! If that makes sense...

You can find them on Mariana Grigsby's post here!


I'm inspired to try this background technique!!

Thinking of You, Denise!


The Stamping Vacation DT got together to create "hugs and loves" cards for our dear Denise at this difficult time of year. Her amazing son, Bryan, died in September 2009 and we all wanted to let her know that we are thinking of her and him...

You'll be getting all these cards in the mail soon, Denise!

[Edited to add: Denise posted about our little conspiracy here!] 

Don't forget to join Stamping Vacation on its blog hop this weekend! There'll be over $300 in prizes to be won!! More info here.

Also, join in our own challenge here on Aspiring to Creativity! There's a $25 Oh My Crafts gift certificate to be had and it's impossible to come out of that online store without something! Spellbinders, Cuttlebug folders, Cricut cartridges, adhesives, paper, embellies, inks... Whatever you need!

Card details:

I die cut some Rustic Cream cardstock with Mat Stack 4, mounted it on Enchanted Evening and then cut out around the shape to get a mat. I stamped the lovely floral bouquet using Rich Cocoa ink and proceeded to color it in with my Copics. In retrospect, perhaps I could've added a little sparkle with my Sakura Stardust gel pen.

I embossed the Scarlet Jewel layer with the Polka Dots Cuttlebug folder, matted it with the rustic cream and then adhered it to a Ripe Avocado card base. I was using up my scraps from this project so they might look a little familiar... I popped up the mat stack over the Scarlet Jewel.

As a final touch, I stamped a banner from Bannerific (Lawn Fawn) using Rich Cocoa ink and then stamped the sentiment (Autumn Abundance) using Pearlescent Chocolate and then heat embossing it with clear powder. (I find the Brilliance inks hold on to the embossing powder better than the Memento inks...) I cut out the whole thing and adhered it to the mat stack.

{Supplies--all PTI unless noted}
  • Cardstock: Ripe Avocado, Rustic Cream, Scarlet Jewel, Harvest Gold, Enchanted Evening
  • Stamps: Autumn Abundance, Bannerific (Lawn Fawn)
  • Ink: Rich Cocoa (Memento), Pearlescent Chocolate (Brilliance)
  • Copics: B95, B97, B99, R83, R85, R89, Y21, YR23, YR24, YG93, YG95, YG97, 0, T1
  • Other tools: Polka Dots embossing folder (Cuttlebug), Mat Stack 3

Stamping Vacation DT: What a Guy Challenge

Sorry this is being posted so late! It's been up on the Stamping Vacation blog for some time it seems!


This month's What a Guy Challenge asks us to make a masculine card with a deer, elk or moose on it. Since I don't collect those types of stamps, I broke out my Cricut. It's been too long! This adorable image is from the Christmas Cheer cartridge.

After cutting the image out of some brown cardstock, I cut a tag out on kraft. Before popping up the deer on it, I inked it with some Tim Holtz Walnut Stain Distress Ink. The mat layer (Ripe Avocado) was impressed with PTI's Woodgrain impression plate and the wooden brads on either side of the reindeer were attached through this. The whole front was adhered to a Scarlet Jewel card base.

As a final touch, some Xmas Red Stickles were applied for the little nose!

{Supplies--all PTI unless noted}
  • Cardstock: Scarlet Jewel, Ripe Avocado, kraft (unknown brand), stripe-textured brown (unknown brand)
  • Ink: Walnut Stain (Tim Holtz Distress Ink)
  • Other tools: Woodgrain impression plate, Christmas Cheer Cricut cartridge (Provo Craft), Xmas Red Stickles (Ranger, wooden brads (unknown)

Finally Able to Make a Scrapbook Page! - Halloweens Past

After making sooooo many cards, I finally said, "That's it! I'm stopping everything to make a scrapbbok page." Now, while I was excited to do this, in the end I was not happy with the result. Normally, I like to make sketches of layouts for my pages before actually working on them and compiling them. But, because at the back of my mind I felt rushed, thinking that  I should get back to the card making as soon as I could, I didn't do it and regret. But, it's done now, and still the memories remain the same when I look at the photos.

I did have more Halloween photos not long ago. However, I went through all my pictures last year to divide between my five children and their Dad, and these three are all that I have left. Just enough to remember by. In each photo, all the costumes were made by me. At least from what I can remember, I don't think I ever purchased any Halloween costume. I made them all! Wow! I never really thought about that before. That's a lot of Halloween costumes!

The only tools I used for this page were Martha Stewart Spiderweb Border Punch and Corner Punch, and a round corner punch - Oh, and a 5/8" circle punch.

My Three Year Old Granddaughter's Help

I just wanted to share with you a little something that is a recent development, and something that I'm enjoying.

Because Dana's children are still young, they haven't quite lost their curiosity enough to not touch and play with things that are not toys. Dana had to move her craft room to my condo almost a year ago. When we saw that we needed more room, I moved out of the master bedroom into the spare one, which surprisingly is quite large enough, and moved the joint craft room into the master bedroom. lol!

Needless to say, Dana is over here whenever she can find the time to craft. At times she has to bring the children with her, and I will spend time with the grandchildren to keep them out of trouble and give Dana some uninterrupted time in the craft room. This isn't always the case, she still gets interrupted at times. But here comes the recent development.

Averi, who just turned three, at times would wander into the craft room showing curiosity, and interest in what we were doing. I used to just leave what I was doing and go out with her to spend time with her and her siblings, leaving Dana in the craft room. But one day I thought, "I wonder if Averi would like to be creative?" So I decided that the next time this happened I would pull her up into my lap, with the direction not to touch, and that she could help me.

She was thrilled the next time I was able to follow up on this opportunity. It turned out that she loves sitting on my lap watching. I gave her scrap pieces of paper or ribbon to play with as she sat in my lap. Eventually, she would make a comment about what I was doing, and we'd talk about it. So the next step was to ask her where she thought I should place something. Half the time she had some good ideas. Finally, I asked if she wanted to help me make an entire card. I wish you could have seen her glowing face and smile.

Here is the first card that we worked on together in it's entirety. She, of course, wanted to work with the color pink.
It was her idea on where we placed the ribbon, and her idea to place the little 'friends' sticker in the center button. She loved to peel off the double sided adhesive backing for me before I attached the layers. I gave her options to choose a stamp from, and she chose the one used here. I even let her ink the stamp with instructions on how to do it without getting messy. It took twice as long to make this simple card with her help, but I would never give up those precious moments just to accomplish the creation of this card faster.

We've done this a couple more times now, and she she really seems to enjoy it. So When her third birthday arrived in August, I put together for her a card making kit with scraps of cutouts I had left over from teaching classes, some stickers that I had around for a while and hadn't used, a few A2 cards with envelopes, some ribbon pieces, and even stamped a few Thank Yous and Happy Birthdays on some Spellbinders die cuts I had collecting in my scraps. I even laced double side tape on some pieces and some ribbons since I know that she knew how to do that.

It was a very simple gift, but she really liked it. A few days later Dana and her sat down, and using up everything I gave her she made up all the cards I'd given her. I now have, sitting proudly in my living room, a Thank You card that she made for me. And, here is the card that my cute little 3 year old granddaughter, Averi, made for me.


Here is a picture of my sweet 3 year old granddaughter. (If you're wondering about her eyes, she just had eye surgery two weeks ago.)


I can hardly wait for the next time we can work together on another creation!

[Edited by Dana to add: The card Avi made for her Omi started out a little simpler than this but since it took awhile to deliver the card to its recipient, she continued to add stickers to it from other cards! A Thank You card created for a different recipient ended up entirely naked except for the sentiment! ;) ]

New PTI Group Blog: Papertrey Playground

Papertrey Ink has a huge fan base. The forum boasts 12840 members at the time of this post and counting! I happened upon the opportunity, recently, to join up with the Papertrey Playhouse blog. What an exciting proposition for me!

Photobucket

I'm still visiting all my team members blogs and whatnot but wanted to let all know about a fun new PTI blog!

Remaining Christmas "Card Frenzy" Cards

Hope that you all are having a fabulous weekend. Here, in Calgary, it has been raining so much that it reminds me of the Falls growing up in Victoria BC. On my homepage, I have the weather report for all the cities in which my four out of Calgary children live, where my parents live (still in Victoria), where my 2 sisters live, and 2 areas in Germany where my parents are from and never before met family members live (just out of curiosity and for comparison). I have children living in Idaho and Arizona, and they still have quite warm weather. Oh well, I love being close to my my daughter, Dana, here in Calgary, and her 3 children. I have 2 granddaughters in Arizona, and 1 granddaughter in Idaho.
On with the purpose of this post. I think I will just post the remaining photos and make remarks only on certain cards. Remember, if you need to see more detail just click on the image to enlarge it.

I don't know why I put the silver ribbon ties on either side of the snowman oval, but they are there. I used my clearstar pen on many of the circles surrounding the snowman and certain parts of his hat.I made eight of these.

Notice the Versa Mark snowflake I stamped onto the envelopes. I made two of each of these cards.

Now this one is a little outside of my usual style and Christmas color combo, but I have been intrigued, interested in, and inspired by the works of Sankari Wagman. Click on her name and check out her blog. She designs for many companies, and her work is colorful, bright, gorgeous, and unique. She uses Liquid Pearls almost  on every project. On this card I was so proud of myself for drawing the gold border, freehand, with my Gel Pen around the curved part of the card edge. I made six of these cards.

Well, I do have other Christmas cards that I made in the August Card Frenzy, but I think this will be the last posting of those Christmas cards. Wishing you a very good and creative week.

Sharing Even More Christmas From My Card Frenzy

I hope that you aren't getting tired of my August 'Card Frenzy' postings, but I still have more to share with you. However, before I begin, I want to take the time to mention that our Glimmer Challenge 3 is still open for your entries. We'd love to see your interpretive creations of the photo collage in a shaped card that you have never made before. And, the winner get's to shop online at Oh My Crafts!


Now back to my post.
This card has a wreath made using several pieces cut with Martha Stewart's Cedar Branch punch adorned with a pop-dotted Spellbinders Poinsettia and mounted on a Cuttlebug embossed circle and Spellbinders inverted scalloped circle with gold Liquid Pearls in each point. Then this wreath medallion is pop-dotted over the ribbon.

Next I wish to show you a favorite of Dana, We both like the color combination of red, browns, and cream as a Christmas color combo. Even though the three I'm posting are similar, I want you to see how I used the text on the Christmas paper for each card.


The Christmas text paper is placed behind the Spellbinders cut out oval on the stamped brown cardstock. I chose a word on the text and went over it with my Gelly Roll Clearstar pen to add sparkle to the word and make it stand out more. If you click on each of the three images posted you will better see the word chosen. Because I did this, the positioning of the oval is different on each card, even though some position changes are slight.

The trees stamped and the red jewels, the red bow, cedar branches, and snowflake are also positioned to fit wherever the oval is cut out. Tracing around the embossed part of the oval cut out I used my white gel pen to draw attention to the oval window. 
Only a slight difference with this one.
Now lets have a look at the Three Wisemen Card. I made 6 of these usinf Tim Holtz's Broken Glass and Weathered Wood Distress ink pads for the streaked background and Versa Magic Night Sky on the Cornish Heritage Farms "We Three Kings" stamp. I drew attention to the crowns and gifts with my Clearstar Gelly Roll pen. I used my dark blue Gel pen to draw lines on either side of the "Peace" sentiment. I really like this effect. It's easy, quick and effective as a background, and I plan on using this technique again with different colors.

Here is another card using the same stamp with gold gel pen highlights on the crowns and gifts. On this card I used the Cuttlebug Double Embossing technique. I love this technique! Another new technique for me to try again. Click to enlarge photo for a better view of the double embossing technique.
 This card was a fun one to make. The background is Cuttlebug embossed using the "Holly Ribbons" folder only part way down to allow a flat surface for the silver embossed sentiment stamp.It was an experiment for me to heat emboss on the silver foil cardstock, and I was happy that it worked. I just need to work on getting a sharper image. It's also popped up. Now, in the photo the silver looks black, but I sure wish that you could see the silver. There is silver foil framed around the background and text stamped squares behind the snowflake.
All the previous cards were A-7's, but this next one is an A-2.Tools used were Cuttlebug's Ornament die, Textile embossing folder, and Martha Stewart's cedar branch punch. On the ornament I used Kaisercraft's Gypsy Sisters Collection stamp and heat embossed with gold adding red Liquid Pearls. I also used Frosted Lace Stickles on the green cedar branches. 

I think that I'll stop here. Yes, there are still more cards to post, but I'll save them for another time. I love  reading your comments.


PTI Moment: Niki Estes

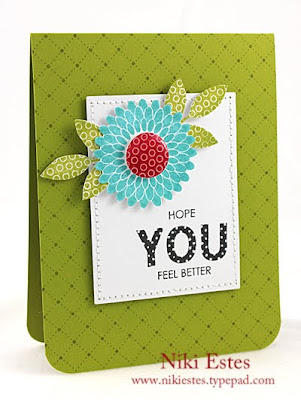
Being a huge Papertrey Ink fan, I'm familiar with the majority of the designers. The blog of Niki Estes, My Paper Creations, has really caught my attention recently... She's a fabulous crafter! The majority of her cards have the most amazing stitching on them! I was rummaging through her PTI posts looking for a specific project that she had done (will prob put that in a different post) and thought I would share some of her pieces that really inspire me... (She has other wonderful non-PTI cards, but I chose to focus on PTI for this post.)

Clicking on these photos will take you to their coordinating posts on Niki's blog:


Thanks for sharing, Niki!