Red, white, black, pink & gray...The colours most often used in making Valentine cards. So what will we be making with these colours? Check it out.
Which one of these is your favorite? Lets have a closer look at each of them, shall we.
Every paper piece is edged in black ink on this card, with the exeption of the labels fourteen piece. That way we don't see the white core of the paper on the black. It really makes the paper pop more, too.
Which one of these is your favorite? Lets have a closer look at each of them, shall we.
Every paper piece is edged in black ink on this card, with the exeption of the labels fourteen piece. That way we don't see the white core of the paper on the black. It really makes the paper pop more, too.
On this card I took a laser cut chipboard key and heat embossed it with silver on both sides. I also made a velum cardstock tag heat embossing the tag stamp in white. Oh, and guess what? You see that bow on the card? It reaaly isn't a bow! I came up with a way to make what looks like a bow without any tying and twisting! All the cards in this class use this methood if it has what looks like a bow on it.
This is a close up of the velum tag.
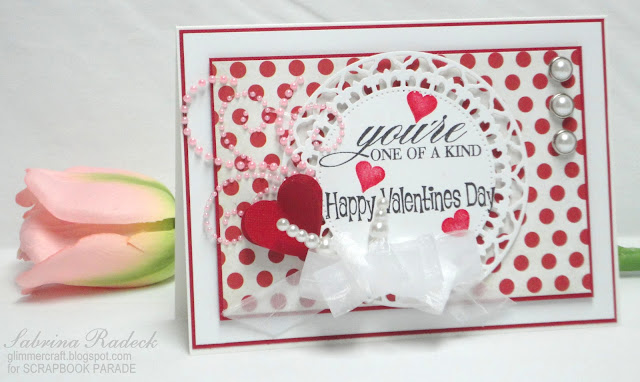
Red Polk-a-dots! I have a fondness for polk-a-dots even though I don't use them often. This card is loaded with pearls! Let's have a closer look, shall we.
I don't know if you can see it very well, but the heart is actually three hearts folded and glued together.
This is my favorite of these cards. It's so bold, don't you think? A couple of close ups for this card. The first shows the Labels six frame.
The next one shows more of the rosettes, stamped hearts, and my no tie bow!
So there you have it! I look forward to seeing all of your Valentine cards, too.
For those of you here in Victoria that are taking this class, the list of what to bring is at the very end of this post.
Thank you for stopping by, and have a great day!
This what you will need to bring to this class:
-paper trimmer
-scissors
-ruler& pencil
-dbl sided adhesive
-1/8" & 1/2" Scor tape
-quick dry glue
-dimensionals (pop-dots)
-black marker &/or small black ink pad like a dew drop
-a bright deep red ink pad with ink blending tool-hole punch
-white Opal Liquid Pearl (Platinum will work too)
-Tiny Heart Stamp - if you have Valentine stamps the chances are you will have one tiny little heart stamp in there somewhere. Please bring that to class along with a clear acrylic block and a bright deep red ink pad. You are welcome to bring any of your Valentine stamps that might want to use.


1 comment:
These are all beautiful. I think my favorite is the "You hold the key to my heart".
Post a Comment