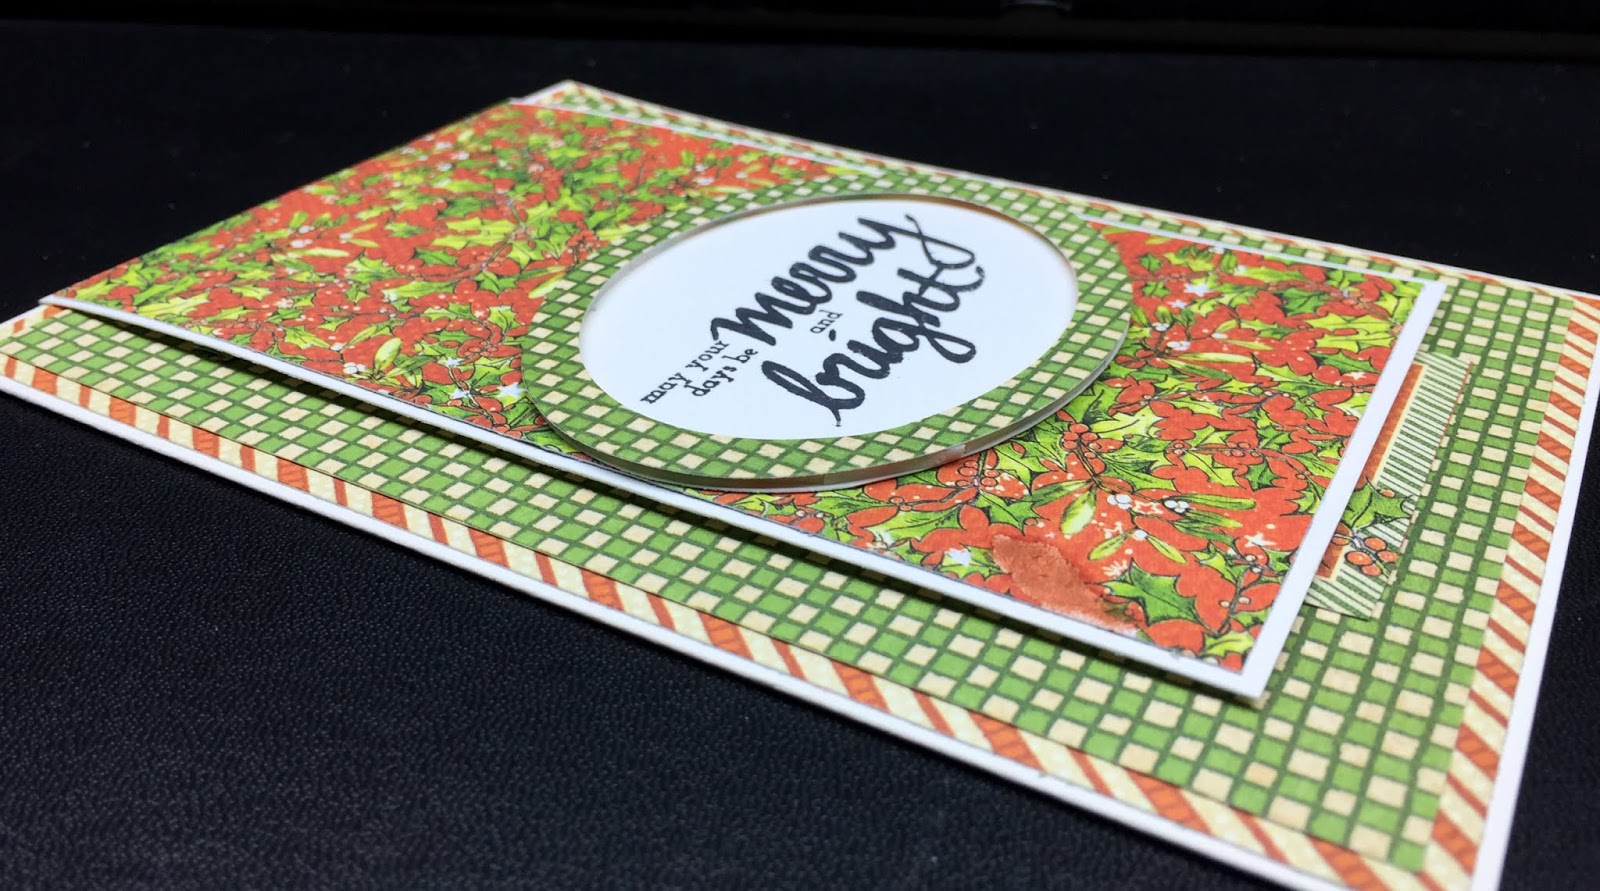
Colouring Christmas Cards Using Kaisercraft's Poinsettia Stamp & Die Set


Hello everyone!

Another Christmas card class to share with you. This one is a little different in the fact that all the images will be stamped and die cut ready to colour in class. Everyone can bring their favourite colour medium! Pencil crayons, watercolour pencils, alcohol markers, and even watercolour paints! I look forward to seeing them all when they are done.


Christmas Stamp Colouring Cards

WHEN: Wednesday, October 10th
TIME: 6:00 - 8:30pm
COST: $32 + GST

Contact Stacey at sbebc2011@gmail.com  or  778-533-4290 to reserve your spot

Christmas cards for those that love to colour! Any form of colouring you wish - alcohol markers, pencil crayons, watercolour pencils, or watercolouring paints! You choose, and let Stacey know when you sign up so that we can have the appropriate paper ready for you in class.
All the cutting, stamping, & die cutting will be done for you, except for the sentiments. You can choose from the stamp set available, or bring your own Christmas sentiments to stamp. (Will need to bring stamping blocks and ink pad if you choose to bring your own sentiment stamps).

PLEASE BRING TO CLASS: Choice of colouring tools in like colours (alcohol markers, pencil crayons, watercolour pencils, or watercolouring paints and everything to go with this medium), scissors, doubles sided adhesive tape, liquid glue, mini-glue dots, craft mat, ruler.

Optional: NUVO Crystal Drops in Simply White & Autumn Red (or like drops in white & red). I will have sentiment stamps and a black ink pad, as well as Nuvo drops there if needed.


This is the Kaisercraft "Poinsettia" stamp & die set that we are using for these cards.


First of all, I mentioned that if you take the class you can use any colouring media you like, but I decided to use pencil crayons, since I sold my alcohol markers a few years ago and never had the chance to replace them yet.

Let's have a closer look at each card. To start off with, I took an 8 1/2 x 11 shhet of cardstock and stamped it full. I coloured and die cut, and then designed the layouts for the crds by playing around with the pieces.

Card #1

I created a wreath over the top of an oval frame, and you will see a blank sentiment strip. The stamp set I need to use here, I have loaned out. What I have available does not fit in the banner. SO I will wait until I get the stamp set back.


You can see here that I also added NUVO Crystal Drops in 'Simply White' & 'Autumn Red'. It adds a lovely Christmasy look to the wreath/card.


From the side, you see the layering on this card.


Card #2

The background on this card is debossed using Spellbinders 'Circle & Diamonds' folder. NUVO 'Simply White' Crystal Drops are used and an oval double layered frame over a stamped oval is on the card.


You can see that better, close up, here.


The side view shows the layering of the car a bit better.


Card #3

For this card, I used the same embossing folder as in the previous card, but used the embossed side, also adding the NUVO 'Simply White' Crystal Drops. Spellbinders Square dies to create the square frames, are doubled for thickness and strength.


You can see the drops a little closer here in the next photo. Also the arrangement of the die cut coloured pieces.


In this side view below, you can see how everything is layered.


Card #4

For this card I decided to use as a landscape so I could create a long border with my die cut pieces.


A slightly closer look at the colouring and white drops. Love the look of the white drops. Don't you?


Hopefully you can see the layering in the next side view photo.


Card #5

The last card, has a long border-like look too. It runs the height this time. The red strip is popped up and the die cut holly is attached to it.


Again, the white drops add a snow-like drop texture along the narrow side section of the card.


...And, the side view shows the layering.


I loved creating these cards, and hope everyone in class will enjoy making these cars as well.

For those that do not live here, I hope you are inspired for the Christmas cards you will be making yourself. I love this Kaisercraft set, and encourage you to add this to your Christmas collection. Stamp & die sets, I think, give many more options to your creativity.

Happy colouring!


Graphic 45 Christmas Magic Flap Card


Hello Everyone!

We are having a Christmas card class using this years Graphic 45 Christmas Magic Paper. And guess what? NO FUSSY CUTTING! We will be making 5 A7 flap cards.


G45 CHRISTMAS MAGIC FLAP CARDS

WHEN: Wednesday, October 3rd
TIME: 6:00 - 8:30pm
COST: $38 + GST

Contact Stacey at sbebc2011@gmail.com  or  778-533-4290 to reserve your spot

Using Graphic 45's Christmas Magic Collection we will be creating a variety of flap cards that reveal something hidden. All the die cutting will be done for you, and basic paper cutting so that you will have time in class to make 5 cards and do a little fussy cutting.
You will also be shown in class an idea of what you can do with the left over scraps at home to create 2 or 3 more cards. So if you are looking to get some Christmas cards going, this will be a great opportunity.


PLEASE BRING TO CLASS: Paper trimmer, scissors, double sided adhesive tape, white foam squares or tape, & liquid glue.


On each flap I have included a magnetic closure. This is not a must for flap cards, but I though it would be fun to include. Let's have a look at each card and it's flap.


Each flap opened reveals a little something. In the first card it reveals some stamp cut outs among other little cut outs from this collection.


This second card had a wide narrow flap with an oval.


A little closer look...


...and when the flap is opened it reveals a cut out sentiment on the flap with more cut out stamps.


You can see the layering in this next photo.


This third card, has a top flap that lifts ups.


You can see the layering from the side,...


...and when you lift the flap you get to see some cut out images.


For the fourth card, the wide narrow flap covers part of the main image with an image of it's own on the flap.


When you open the flap you reveal the entire image and a stamped sentiment on the inside of the flap.


Because, there was another image that went with this card, I decided to make a pop up on the inside.


The fifth, and last card, the flap comes from the bottom. Using the text on the paper and a cut out image for the bottom flap.


When opened, it turns out to be an easel card. again the text of the paper serves a purpose, as does the popped up coordinating image.


Lastly, I am showing you what can be done with all the leftover pieces. I had many and did not want to throw them away. So I made a few card bases like this one. I can use it horizontally like here,...


...or vertically like here.


When you have card bases like this one ready to go, you can add cut out images or larger Christmas sentiment stamped pieces.

Hope you have some fun creating some of your own flap cards.

Happy creating!


You Are In My Thoughts #3 - Altenew Wildflower Garden


OK, today I share with you the third and final of the cards I made the other day using Altenew's 'Wildflower Garden'. I went with blues and browns for this card, and again make it a card I can send in the mail.

First I ink blended the edges of the cardstock piece, and then stamped.


Here you can see close up the NUVO Crystal Drops (Antique Rose) and how it adds to the effect of the stamped grasses and flowers.


The only thing popped up on this card is the sentiment strip.


Well, that is it for the three cards that I recently made. I am hoping to post some class or kit samples soon. Just waiting for the order to come in. I might make a few more cards for myself till then.

Happy stamping and creating!


You Are In My Thoughts #2 - Altenew Wildflower Garden


Welcome back for a look at the second card I recently created with Altenew's 'Wildflower Garden' stamp set.

I stamped unusual colours for the leaves - a light purple and bright lime green. I also wanted to use two colours of ink pads on the blooms. I did that by using my Memento Drops ink pads to use the point of the drop at the center of the flowers after inking the stamp with the lighter colour first.


You can see the effect of that way of stamping better in the next photo. You can also see that I popped up the the stamped piece and not the piece I die cut out with the sentiment on it. Usually people do it the other way around, but I wanted to do it this way again since I had not done it for a while.

Also, what you see is the splattering of inker refill mixed with water and splattered around. Note that I stamped the sentiment twice, off setting it as you can see.


Also note the NUVO Jewel Drops in Periwinkle. I was hoping the pink/purple hue would show a bit more on the card, but I guess rather than jewels it looks a little more like rain drops.


Here in the side view you can see that I popped up the main piece rather than the sentiment piece.


Yesterday I posted the stamp set, but thought in case someone did not check in yesterday, I would show it again. It's a real nice set to have.


Hope there was something new for you today to try, or at least something you haven't done in a while and are inspired to try again.

Happy stamping!


You Are In My Thoughts #1 - Altenew Wildflower Garden


I have had the Altenew Wildflower Garden stamp set for a while now, but have only used it on two past cards. I thought it was time to pull it out and have a little fun with it. (I even used it on my 'Hello September page in yesterday's bullet journal post.) I ended up making three cards stamping with the set.

It has been a while since I stamped a small tag to use on a card, and that is what I did for this card. Make a little tag.


Here is a closer look at the tag.


As you can see I did not do any masking, but just let everything overlap when I stamped.


The stamped tag is the only thing that I popped up on this card. All the cards I made using with this stamp set I made as cards that I could mail, so there are not a lot of popped up layers.


This is the stamp set I used. A lot can be done with this set, and I looked forward to using it again some time in the future.


Have fun using your similar stamp sets. Happy stamping!